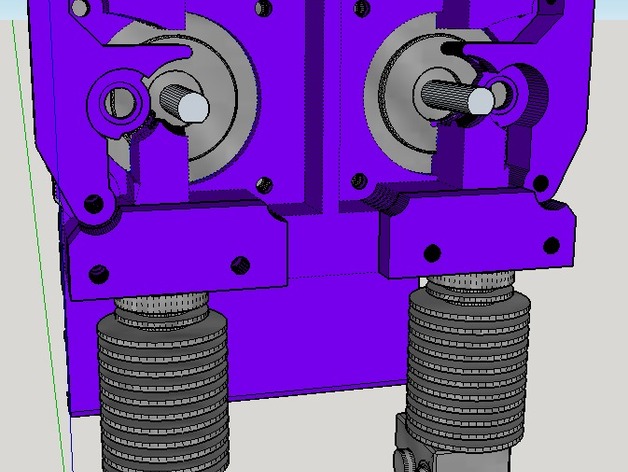
Dual Direct Drive all in one for E3D V6. Reprap Prusa i3 rework
thingiverse
EDIT 6/6/16 Added new version of the idlers. These new idlers support bearings on both sides, preventing bending over and loss of clamping pressure on filament. There's a 0.4mm thick support material built-in that you must cut out. No support needed from your slicer. Use a washer on BOTH sides of the roller bearing. Install low-profile nuts naturally. The flat side of the idlers should face towards motors. Slightly raised sides towards front. Place the nut on motor side. Check out the new compact version of this here ----> http://www.thingiverse.com/thing:734851 I combined the extruder part for a dual extruder into one part, making it easier to get both E3D hot ends at the same point on Y-axis. I had issues when it was just the carriage holding motors from back with nozzles not lining up. This is not a perfect solution but it helps a lot. I think the only way to get the nozzles perfectly aligned would be to make a metal part that fastens between some of the lower ribs on cold part of extruders and somehow attaches to this assembly. I will probably continue working on this for this reason. This assembly was a trade-off because I had to get rid of mounts for auto bed leveling that were on original single version. This also puts idler lever for left extruder opposite, so you can get at it easier. Use this with my dual motor mount X-carriage: http://www.thingiverse.com/thing:497661 Follow instructions for screws and parts from this remix I made: http://www.thingiverse.com/thing:524249 If your first extruder is on the left, reversed side, you must reverse the direction it turns the shaft to extrude plastic. That's what I'm showing in last picture. I run Marlin firmware so this is a screenshot from configuration.h EDIT1: I designed an X-Carriage that lifts nozzles to just blow lower edge of itself to gain some Z height, and it works but has issues that I had to grind away some of it to use it. So if you like this design but don't like how high your x-axis sits when it's all the way down, wasting printable height, be patient. I will be posting a new version of the X-carriage for this that lifts everything higher very soon. EDIT2: I finished tall dual X-carriage and added the file here. I had to cut away some retaining structures for two bearings, and have not printed it yet, but I am positive it will work fine. Support material will be required though. I did print an earlier version of this carriage and am using it and it works fine. It was hard to get some screws in it so I had to manually remove parts that model has removed for you. Make sure if you use screws to hold bearings tight, lowest ones have low-profile heads or they will be lower than extruder nozzles and hit your print bed. The clearance is intentionally small to give you as much print height as possible. Message me or comment if you have any questions! EDIT3: Added an idler assembly for 22mm roller bearings with a 24mm washer on either side to keep belt on X-axis from slipping off. The idler included here fits this: http://www.thingiverse.com/thing:372056 Here is parts list for the idler. http://www.mcmaster.com/#97725a700/=uytwzx http://www.mcmaster.com/#91116a160/=uytx5p http://www.mcmaster.com/#6661k82/=uyu075 http://www.mcmaster.com/#93070a177/=uytzsh http://www.mcmaster.com/#90710a120/=uytze4 EDIT4: I am just about done designing a new dual extruder where the motors are across from each other instead of side by side, so it won't reduce your printable width. I'll be uploading that as soon as I print it and make sure it works!
With this file you will be able to print Dual Direct Drive all in one for E3D V6. Reprap Prusa i3 rework with your 3D printer. Click on the button and save the file on your computer to work, edit or customize your design. You can also find more 3D designs for printers on Dual Direct Drive all in one for E3D V6. Reprap Prusa i3 rework.
