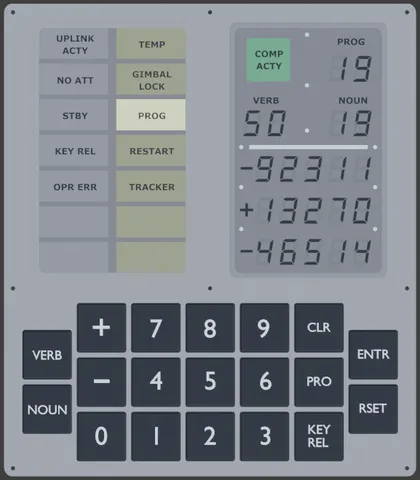
DSKY - Apollo 11 On Board Computer
prusaprinters
This is my take on creating the on board computer panel from Apollo 11. I created it for an exhibition we are showing for the anniversary of the moon landing. Print instructionsI have made mine with some OHP film as "windows" on the displays. On the left panel the OHP goes behind the grid. Left display is three pieces and right display is two pieces. Paint the numbers and text on the keypad when done printing. Some sanding and use of some superglue is required. Make sure the super glue doesn't get in contact with the printed paper. It will make som ugly marks. (I had to redo one of the displays). When I printed the displays directly from Affinity Designer, they were perfect. The exported images seem to need som adjustment in scale. The display paper prints need to be 113 mm in height. There are a recessed area for the paper and OHP Film. P.S. Don't know why I cant include the pictures for save, but I'm sure you should be able to click and save as or something like that. The panel is made in two parts so I could print without supports. The front and back simply glue together after the keypad is inserted in it's recess.
With this file you will be able to print DSKY - Apollo 11 On Board Computer with your 3D printer. Click on the button and save the file on your computer to work, edit or customize your design. You can also find more 3D designs for printers on DSKY - Apollo 11 On Board Computer.
