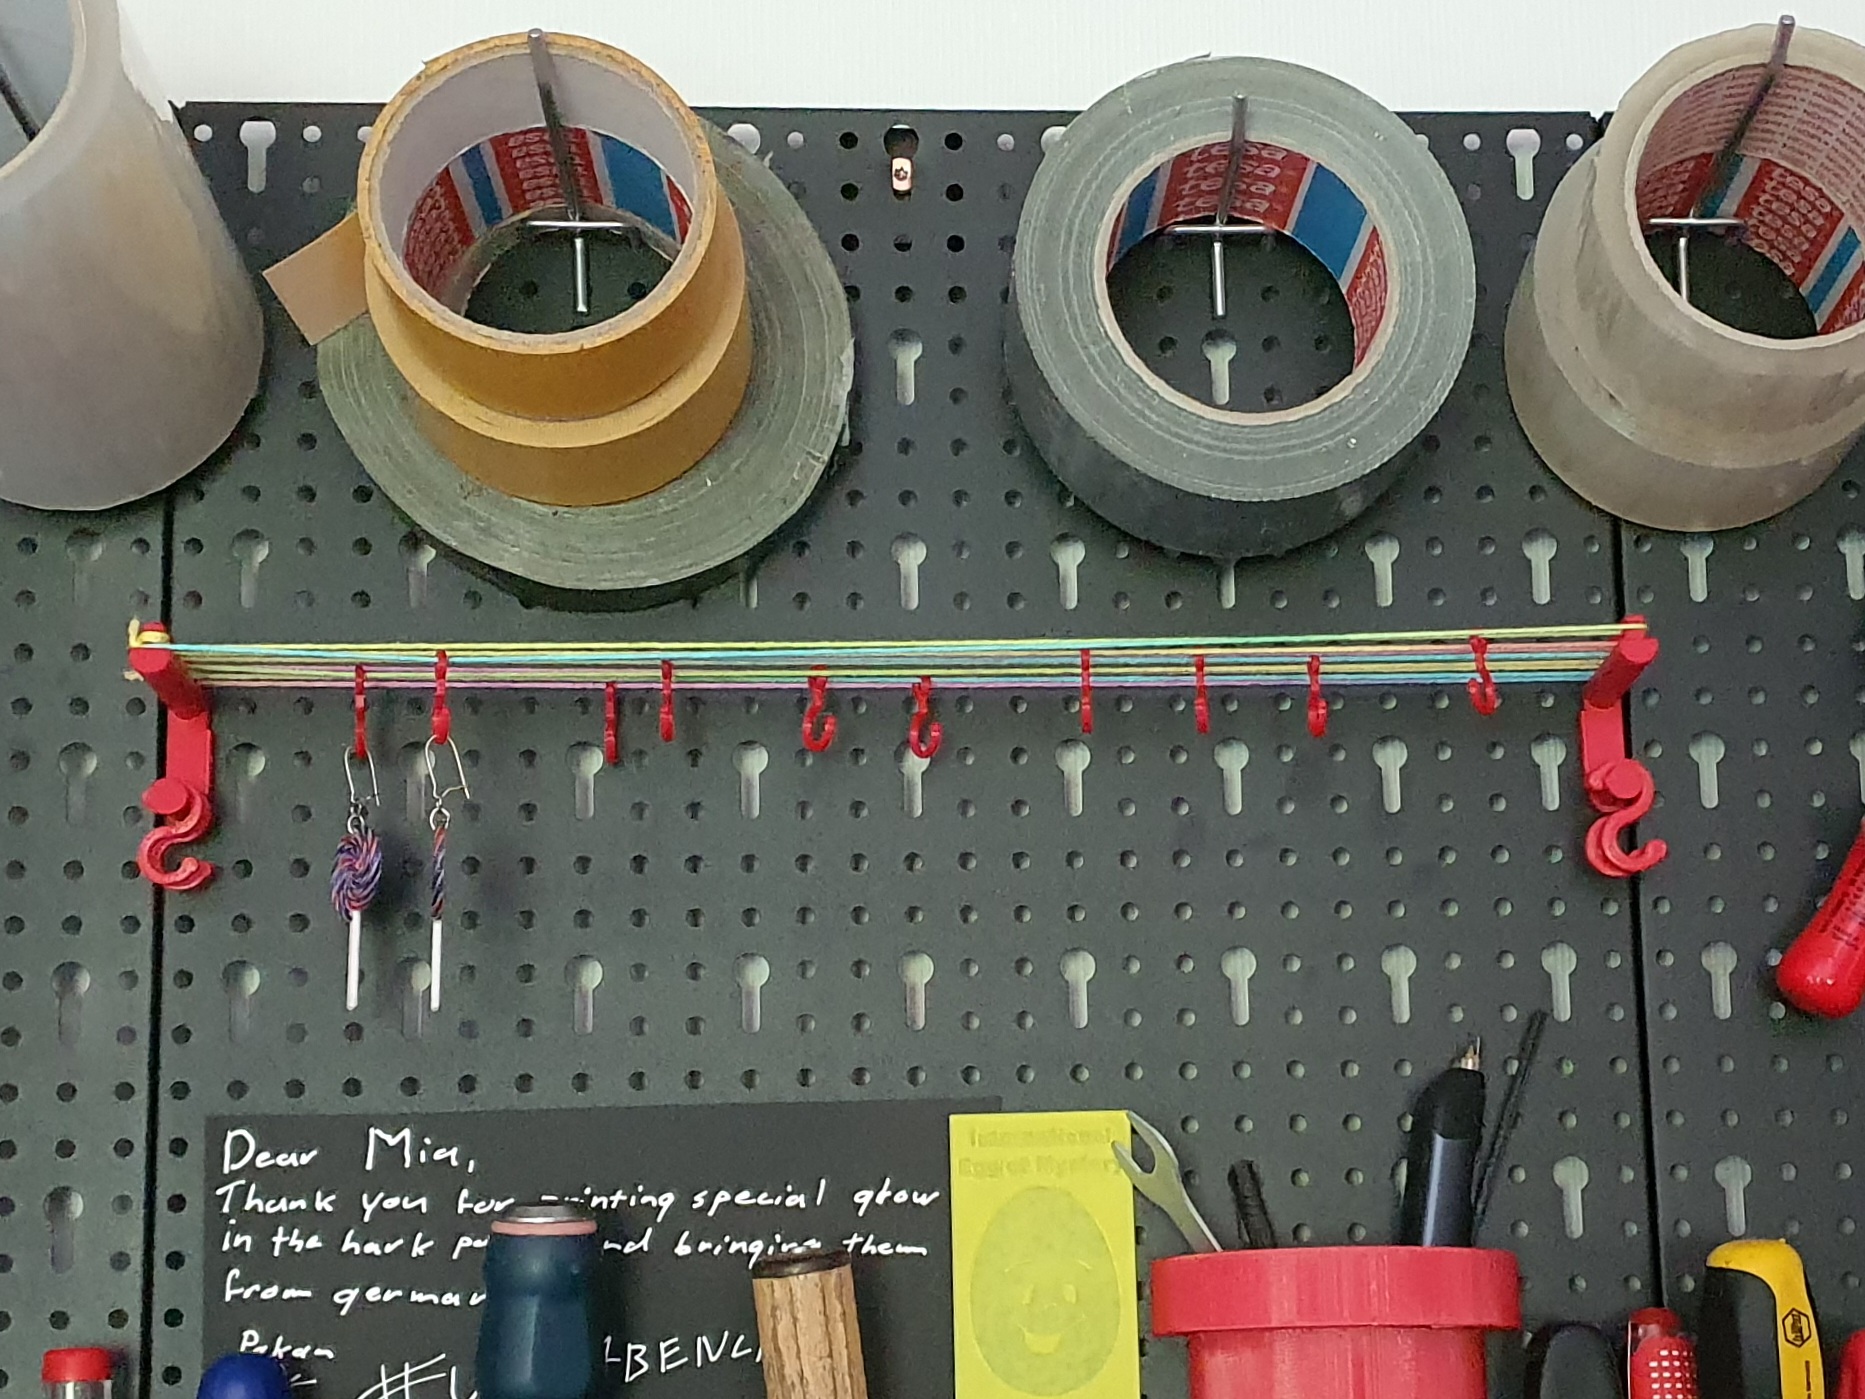
Drying Rack for various pegboards
prusaprinters
<p>This Drying Rack is designed to be used on a pegboard. </p><p>It has 5 pins to create up to 10 lines for drying and a pin underneath for storing your hooks. </p><p> </p><p>There are files for 6 different pegboard standards available:</p><ul><li>EURO standard (15 mm/30 mm spacing, 5mm hole diameter) </li><li>IKEA SKADIS (40 mm spacing, 5mm diameter) </li><li>INCH ¼ (1" spacing, ¼" diameter) </li><li>INCH 3/16 (1" spacing, 3/16" diameter) </li><li>METRIC 4 mm (25 mm spacing, 4 mm diameter) </li><li>METRIC 6 mm (25 mm spacing, 6 mm diameter) </li></ul><p>Also there are 2 different hooks in 3 different sizes each:</p><ul><li>S-Hook thin (2 mm), medium (3 mm) and strong (4 mm)</li><li>Ring-Hook thin (2 mm), medium (3 mm) and strong (4 mm) </li></ul><p> </p><p>The Rack is designed to fit on pegboards with a maximum thickness of 1 mm. If your pegboard is made of a thinner material, you can use the provided spacers to secure the rack on the board. </p><p> </p><p>Also you will need some thread, wire, fishing line etc. to create the drying lines. </p><p> </p><p><strong>Printing instructions:</strong></p><p>Choose the Drying Rack file that will fit your pegboard and print it twice. </p><p>For best strength please print it lying on the side with support on build plate only. </p><p> </p><p>Put it on your pegboard and see if it is sitting flush. </p><p>If there is some space between the rack part and the pegboard, put some paper in the space until it isn't moving anymore. Take the paper out again and measure the thickness. </p><p>Now choose the spacer file that fits this thickness and print it twice. </p><p> </p><p>Print the hooks you want to use. </p><p>The S-Hooks can be hung anywhere on the line and be stored on the pin when you are not using them. </p><p>The Ring-Hooks must be put on the thread/line etc. before you wind it around the pins of your rack. They stay on the lines and can be moved around only along the line they are on. </p><p> </p><p><strong>Assembly:</strong></p><p>Put the two Drying Rack parts on your pegboard. Secure them each with a spacer, if needed. </p><p>Prepare your thread/fishing line/wire etc. If you want to use Ring-Hooks, now is the time to thread them all on. </p><p>Secure your line with a few knots on one of the pins on top of the first rack part (I used the middle one). </p><p>Now you can wind your thread around the first pin (use the one closest to the pegboard) and move it across to the other rack part. Wind it around the first pin on this part and move it back across to the pin on the first rack part. Wind it again around the first pin, move on to the next pin and repeat this process until you reach the last pin. Secure your line with a few knots and cut off the thread. </p><p>If you are using the Ring-Hooks you will need to place them on the line while winding. I used 10 Ring-Hooks, one for each line. So I placed one on the line before I was winding my thread around the pin, placed another one, moved across to the first rack part, winding around, placing a hook… and so on. </p><p>You want to make sure your lines are quite tight, but not with too much tension. This is why you probably want to use the spacers. The less movement your rack part has, the more tension can be applied. </p><p> </p><p>Now your Drying Rack is ready to use. </p><p> </p><p>Have fun with this one! </p><p>If you need any help, feel free to reach out to me. </p>
With this file you will be able to print Drying Rack for various pegboards with your 3D printer. Click on the button and save the file on your computer to work, edit or customize your design. You can also find more 3D designs for printers on Drying Rack for various pegboards.
