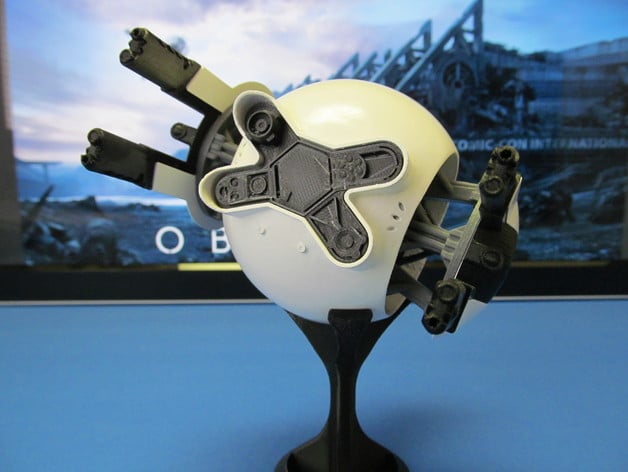
Drone from Oblivion (2013)
thingiverse
EDIT April 25, 2016: Yet another scaling error! I must thank Zarni for pointing out that the Outer and Inner Gun Sections were scaled incorrectly. Those files had been borrowed from BrandonW6's model, but his drone is 25% larger than mine, and I never saved them at the right scale. The incorrect files have now been replaced with the correct sizes. Hopefully, this is my last mistake! EDIT April 15, 2016: I extend special thanks to NoLiver92 for noticing that "My Linkage v4_fixed.STL" was not properly scaled. I've removed this part and replaced it with "Linkage v4.STL," which should match the scale of the rest of the model. The instructions have been updated to reflect this filename change. If you enjoy watching Tom Cruise and Morgan Freeman in the movie "Oblivion," you might also appreciate owning a personal "evil R2-D2 / Portal Sentry" Drone model! This is my interpretation of a replica of the impressive drones from the film (no sound effects included!). I'd like to thank BrandonW6 for allowing me to reuse his model for the guns and for inspiring me to attempt my most challenging CAD modeling project yet. The parts you'll need are listed below, along with a reference image showing all printed parts: 1x Drone Front Half_fixed.STL 1x Drone Back Half_fixed.STL 1x Engine-Main.STL 2x Engine-Secondary.STL 1x Engine-Tertiary.STL 1x Engine-Quaternary.STL 1x Faceplate.STL 2x Inner_Gun_Section_fixed.STL 2x Outer_Gun_Section_fixed.STL 2X Linkage Mount.STL 2X Linkage v4.STL Optional: 1x Stand.STL Note: Please excuse the triangular wedges on "Linkage v4." They are too thin to print and are simply an artifact of the "loft feature" I used when creating the model. These wedges do not print out in the actual parts. The front and back half pieces have holes for spare filament to aid alignment and hold glue better. I used White Elmer's Glue-All (PVA glue) to assemble the parts, but you can also use cyanoacrylate (super glue). Print Settings: Printer: Wanhao Duplicator i3 Rafts: No Supports: Yes Resolution: 100 microns works great! Infill: 20% or whatever suits your needs best. Notes: I printed my front and back halves without infill, using only two perimeters to save filament. These parts require support due to their half-circle arch shape. The rest of the model should not need any support. Post-Printing: More info: Since I didn't have white filament, I primed this with a can of spray primer then painted it white using an airbrush. This resulted in a smooth finish (PLA print). If you can print white ABS and acetone vapor smooth it, you might achieve a very shiny, smooth drone!
With this file you will be able to print Drone from Oblivion (2013) with your 3D printer. Click on the button and save the file on your computer to work, edit or customize your design. You can also find more 3D designs for printers on Drone from Oblivion (2013).
