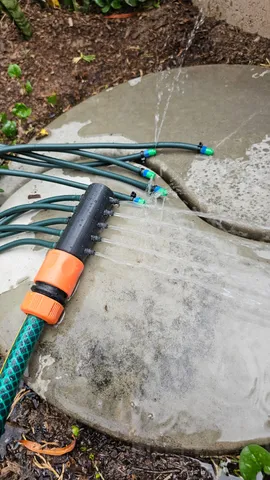
Drip/micro-spray irrigation splitter with Gardena connector
prusaprinters
Drip/micro-spray splitter connecting to Gardena hose pipe. The requirement was to water bonsai trees, using micro-spray heads on flexible pipes, from a ten-way splitter connected to a hosepipe with Gardena fittings. The final design does not leak and prints really well.The Gardena connector is modelled on measurement of a Gardena rose sprayer.The 4 mm pipe nozzles are modelled on measurement of a commercial hardware item.My domestic water supply has quite high pressure (2 to 3 bar) and it was necessary to reduce the connector opening to effect pressure drop.It required a few iterations to optimise the connector profile. It now works without leaking. The final form, printing upright, prints the easiest and does not leak through the sidewalls. An earlier version was octagonal in shape and was printed sideways. This earlier version leaked through the side walls and also did not print neatly, requiring hard-to remove support.The nozzle connector is octagonal to print better than a circular pipe would. The octagonal shape requires that the nozzle piping be tightly secured with a cable tie to prevent leaking.The one-nozzle splitter is a test design to verify the print quality, before you commit to the final print. The CadQuery code allows you to set the number of nozzle outlets. Play around with the design parameters but don't fiddle with the Gardena connector, it is finely tuned.Support is required on the outside, but inside, the cavity 'roof' just under the Gardena connector slopes up with 50 degree to provide internal support.After printing ensure that all nozzles are fully open to 2.5 mm diameter. Wash out the splitter to remove printing debris before connecting the micro-spray heads.Tightly clamp the micro-spray piping with cable ties to prevent it from slipping off under high water pressure.After final assembly over-stress test the entire installation under high pressure. Dimensions: I could not find a proper Gardena design drawing and had to measure. The o-ring slot diameter is critical. Several iterations were required to resolve. Also, make sure you use the original Gardena o-ring, cheap knock-offs are 4 mm dia and won't fit in this design.Gardena connector: see the dimension drawing.O-ring: use the Gardena version: o-ring diameter 2.7 mmm OD 16 mm.Micro-sprayer piping ID 4 mm, OD 6.5 mmMicro-sprayer sprayer head OD 4.8 mmNozzle: pipe ID 2.5, two outer diameters OD 5.3 (rear) & 4.5 (front) flange OD 6.5 mm, length to flange 5 total length 10 mmSlicing (PrusaSlicer):Printed in PETG for longer outdoor life, but any material should work.Layer height 0.2 mm, Quality settingVertical shell perimeters: 6 (required to not leak under high pressure)Horizontal top/bottom layers: 6 (required to not leak under high pressure)Perimeter generator: ArachneInfill 50% gyroidSupport: auto-generated, overhang threshold 50 deg, organic, on build plate only.
With this file you will be able to print Drip/micro-spray irrigation splitter with Gardena connector with your 3D printer. Click on the button and save the file on your computer to work, edit or customize your design. You can also find more 3D designs for printers on Drip/micro-spray irrigation splitter with Gardena connector.
