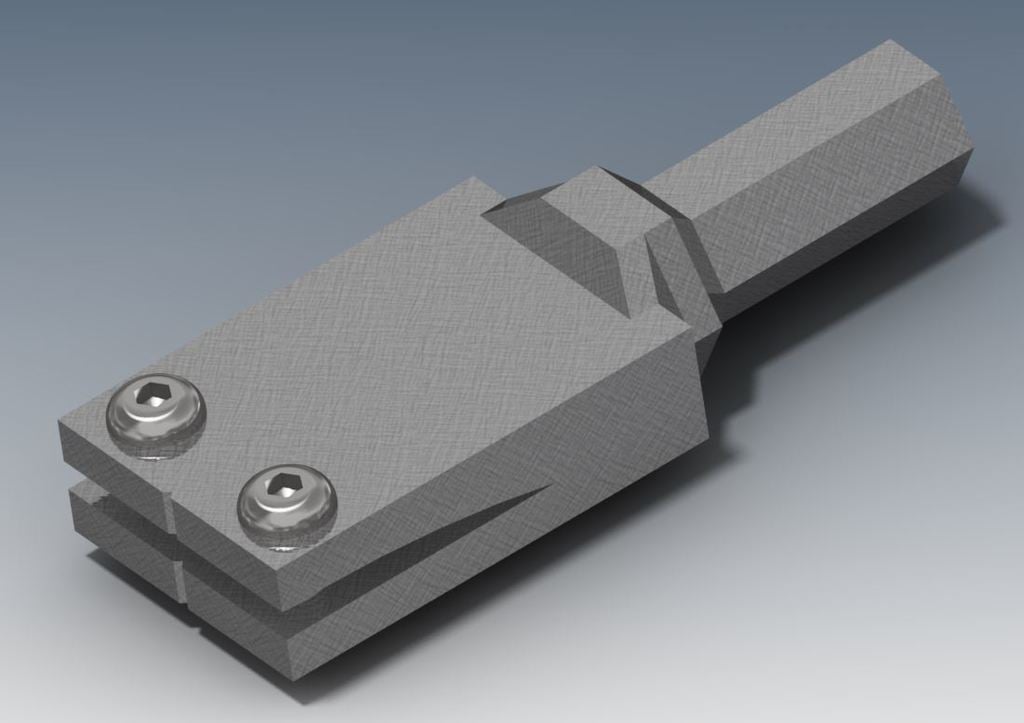

Drill Chuck Vise for Vape Coil(s) building
thingiverse
Handy tool for building multiple strands of vape coils. Also known as, for example, Fused Clapton, Staggered Fused Clapton, Staple Staggered Fused Clapton, Alien Clapton Wire, and more. With my drill, I have the problem of breaking wires. Each time I try to build a coil, the wire suddenly snaps during the process. First, I tried several different options: flat in the chuck, wires bent in a 90-degree angle between the beaks of the chuck, a hairpin, and so on. None of these worked properly for me, and I continued struggling with building coils. I made some different designs and prints to hold the start of the wire in the chuck. My thoughts were good, but using them didn't bring the solution. Then I came up with the idea of making a kind of vice that could be placed into the chuck and clamp multiple wires down. This item is also known as a "Jeweler Vice." As you can see on the pictures and photos (me using the device), there's a path created in the vice to guide the wires. Aiming for a 0.11 to 0.15 Ohm resistance for a flattened single coil, because I want to use this coil in my Tigertek Springer S RTA, I can't do more than 4 wraps due to the size of the coil to make it fit in this tank. For this coil, I used 4 x 26Ga SS316L and will fuse them with 38Ga SS316L. First, I stretch the core wires' end, then I make a 180-degree bend on the wire that goes into the chuck vice. That way, I can feed the core wire in from the back and let it just hang loose. I do the same with all the other core wires I'm going to use. When all the wires are in, there's a tiny marker on the front of the vice that indicates the center. Lining up all strands flat, next to each other, I start to fasten the screws so they're all clamped in tight and have no other place to go. Then, I guide all wires flat to the end; I do this several times and use a hair clip (with some painters tape on both sides for better grip) to keep them flat and aligned. After preparation, I put the vice in the chuck and fasten it; then I place all 4 wire ends in a swivel and give them a few twists to secure them. Putting some tension on the wire, I'm ready to start fusing them. Place the hair clip (or another) about 1 inch from where you're wrapping; keep some Nylon pliers at hand. Start wrapping for about 10 wraps, then use the Nylon pliers to flatten the wires. Be sure to keep repeating this (each 10 to 20 wraps, flatten) or else the wires might start to overlap each other and the coil will be trash. After all, I want to have a flat as possible coil over the entire length. When the entire length is done, you'll have a twist in the fused wire. This can easily be removed by using the Nylon pliers; hold the end of the strand and put the drill in reverse. Then slowly pulse the drill to remove the twists. There still might be a little twist in the strand after this is done, but they will come out. Next step is to further flatten the strand of wire. For this step, I use a metal angle, placed on the edge of my desk and a heavy steel rod (I use a slide bar of my lap steel guitar). Now I roll (not hammering) the entire strand as flat as possible on one side. After that, I remove the little twist what still is in the strand with my hands. Then, I flatten the wire on the opposite side. Now it's time to make me some coils. The coil on the photo is the result of this process; wrapped on a 2.5 mm bit. When bedded the coil in, it came out on 0.119 Ohm resistance on my mod. Be aware: when making this coil with SS316L wire, it's been advised to vape this on a Temp Control mod. SS316L has the habit of fluctuating resistance. Best is that you lock in the resistance of the coil on the mod. Please be careful when vaping on low-resistance coils; special on Mechanical Mods. Be sure you know your Ohms Law. Batteries that you use can catch fire and explode.

With this file you will be able to print Drill Chuck Vise for Vape Coil(s) building with your 3D printer. Click on the button and save the file on your computer to work, edit or customize your design. You can also find more 3D designs for printers on Drill Chuck Vise for Vape Coil(s) building.
