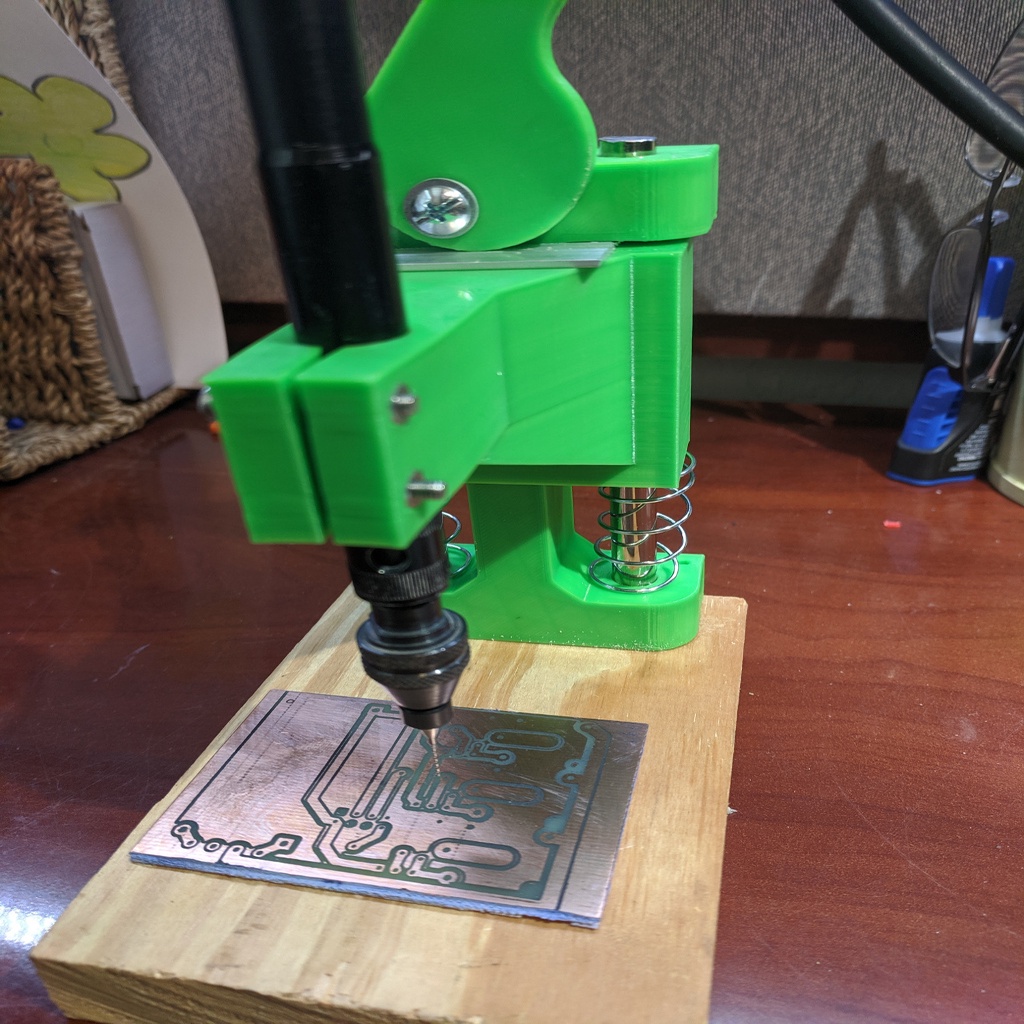
Dremel(snake) PCB Drill Press
thingiverse
I loved the original Drill Press design, but it didn't quite fit my needs as-is. It was almost perfect, though - I could see myself using it all the time. The only problem was that I always use a snake-extension on my Dremel, so I decided to modify the design to accommodate that. I reworked the plans to include a special holder for the end of the snake extension. I also didn't have any spare 8mm linear bearings lying around, so I made some adjustments to the sliding base to incorporate a 3D printed IGUS-style bearing instead. This allowed me to use either a 9mm or an 8mm linear rod - whatever was easiest for me to work with. In another tweak, I ditched the 3D printed base and went back to basics. I drilled some holes in a piece of wood and hammered in the linear rods, which held fast without any movement at all. To build this modified Drill Press, you'll need: * The 8mm or 9mm Sliding Frame * The 8mm or 9mm Base Frame * The original Handle (available on Thingiverse) * Two 20mm x 3mm hex bolts and nuts * Two pieces of 8mm or 9mm linear rod * Two springs * A piece of wood for the base Some notes to keep in mind: I added a small aluminum spacer between the handle and the sliding frame to prevent wear on either part. If anything needs replacing down the line, it's likely just the handle - which is easy enough to reprint if needed. If you're interested, I've also been experimenting with 3D printing my own circuit boards using a scraper mount on my Ender3 printer. Check out my design on Thingiverse for more details.
With this file you will be able to print Dremel(snake) PCB Drill Press with your 3D printer. Click on the button and save the file on your computer to work, edit or customize your design. You can also find more 3D designs for printers on Dremel(snake) PCB Drill Press.
