Dremel Router with adjustable height + straight edge
thingiverse
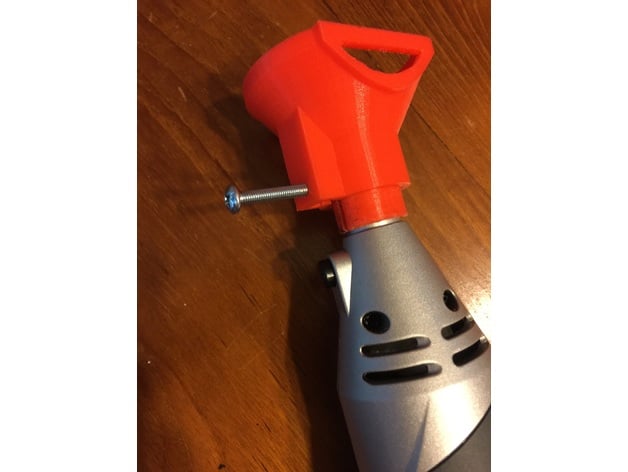
I saw several routers, but every single one of them caused me issues with routing a straight edge. So, I decided to design one from scratch with a built-in straight edge. To make it even better, I made mine height adjustable by using an insert that fits inside the outer casing. To assemble this router, simply slide the inner insert into the outer case and line up the groove on the inner insert with the screw hole. Next, take a 4mm nut and insert it into the provided slot. Then, use a 4mm screw to attach the inner insert to the Dremel head as shown in the diagram. Now you can adjust the height of the router by tightening or loosening the screw. If you want to see the markings clearly, print the design with black ink and paint the provided markings white using black paint, or print it in a light color and paint the markings black instead. To cut straight lines, attach a ruler or any other straight edge to the router and run the flat surface along it as shown. This will give you precise cuts every time. Here are my print settings: Printer: Geeetech Full Metal Aluminum Rafts: No Supports: Yes Resolution: 0.2 Infill: 20% I used a skirt to ensure that the object sticks to the surface, and I printed it as shown with minimal support required. Cleanup is also minimal.
With this file you will be able to print Dremel Router with adjustable height + straight edge with your 3D printer. Click on the button and save the file on your computer to work, edit or customize your design. You can also find more 3D designs for printers on Dremel Router with adjustable height + straight edge.