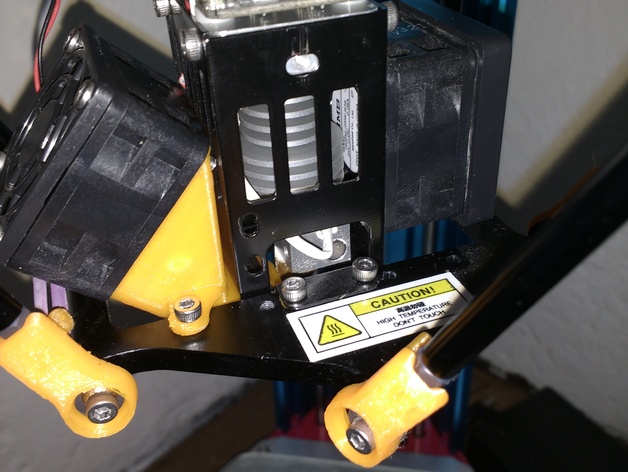
DreamMaker Overlord 3D, Center Nozzle
thingiverse
This innovative design centers the nozzle for the overlord with precision, eliminating the need for massive prints or any non-printed components. To assemble the nozzle, eight screws are required, each taken from the existing effector assembly. These screws come from the ones currently holding the effector to the plate and the guide at the top of the assembly, which I've found to only damage wires. Print two essential parts: CenteredFanDuct.stl and 2 CenteringBracket.stl. Note that the holes in the centering brackets are positioned closer to the outside edge of the effector plate, rather than directly in the center. Attach the fan duct as shown in the accompanying picture. Printer Settings: Overlord Pro Rafts: Not a concern Supports: Yes Resolution: 0.16 Infill: 100% Notes: For the Fan Duct: Walls are thin, so 100% infill doesn't use excessive filament. Print with an overhang angle of 40° and place the large open side flat on the ground. For the Brackets: No supports needed; print at 100% infill, taking approximately 18 minutes per bracket. Design Creation: FreeCAD was used to design these parts. The FreeCAD project file is included.
With this file you will be able to print DreamMaker Overlord 3D, Center Nozzle with your 3D printer. Click on the button and save the file on your computer to work, edit or customize your design. You can also find more 3D designs for printers on DreamMaker Overlord 3D, Center Nozzle.
