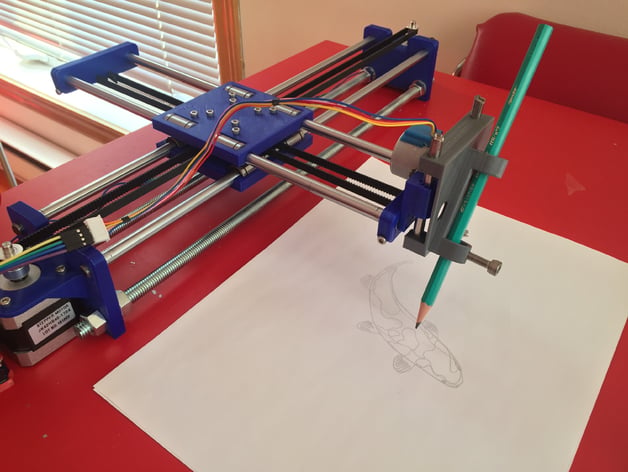
Drawing Machine
thingiverse
If you have a question, first search in the Comments section. If you can't find an answer, then ask in a Comment. I will answer as fast and as much as I can. And please, share your makes! Updates 20190224 Moved to new TinkerCad format 20171118 New video by 3D Make 20171112 New "Assembly" and "Extensions and Derivatives" sub-sections in the "How-to". 20160910 Alternative Z stage that uses metal LM6UU linear bearings. The bearings should snap in their receptacles. Tinkercad model is here. 20160614 New Z stage, now integrated into the Y end. Unimaginatively called "v2". Same gear, same pen holder, a bit stronger, a bit better (one less part, less screws). Print these: drawing_machine_y_end2_v2.obj, and drawing_machine_z_stage_face_v2.obj To replace these: drawing_machine_y_end2.obj, drawing_machine_z_stage.obj, and drawing_machine_z_stage_face.obj. 20160505 updated some searches in the grocery list My take on Misan's drawing machine. I made one with a grbl controller and a CNC shield and adapted Misan's parts to be 3D printed. Please read Misan's instructions as well. The Z stage does not use a servo, as in Misan's machine, but rather one of those cheap 28BYJ stepper motors you can find for $1.50 on eBay. NOTE: The photos are of the current prototype, some of the modifications to the various bits and pieces have not yet been tested. This thing was made with Tinkercad. Edit it here. Print Settings Printer: Wanhao i3 Duplicator Resolution: 0.2 mm Infill: 15% minimum Notes: The Y end stops take a lot of tension from the belt. Making them as strong as possible to prevent flexing is not a bad idea. Overview and Background Overview The drawing machine is a small three-axis robot that controls a pen or any drawing implement over a canvas. It is a complete open-source design and aims to teach the basics of robotics. Budget for one is about $80. You will need a 3D printer. Lesson Plan and Activity See below Duration of Lesson 40 hours How-to Model Files The first model file shows all the pieces that are then isolated for your convenience into separate files. For some reason, when you upload OBJ to Thingiverse, objects are rotated 90 degrees (clockwise) around the X axis. Rotate -90 degrees in your slicer before printing. Of course, the two model files that are that are 3D printed that are in that order (blue, yellow, orange, pink should work too) Adjust the potentiometer on A4988 counter-clockwise until the motor runs but does not overheat (check this article for details). The last model file and photograph show (hopefully) how it all fits together. grbl You will need to re-compile grbl to activate CoreXY control. Before you compile, change config.h as such: #define HOMING_CYCLE_0 (1
With this file you will be able to print Drawing Machine with your 3D printer. Click on the button and save the file on your computer to work, edit or customize your design. You can also find more 3D designs for printers on Drawing Machine.
