Double Walled Travel Mug
myminifactory
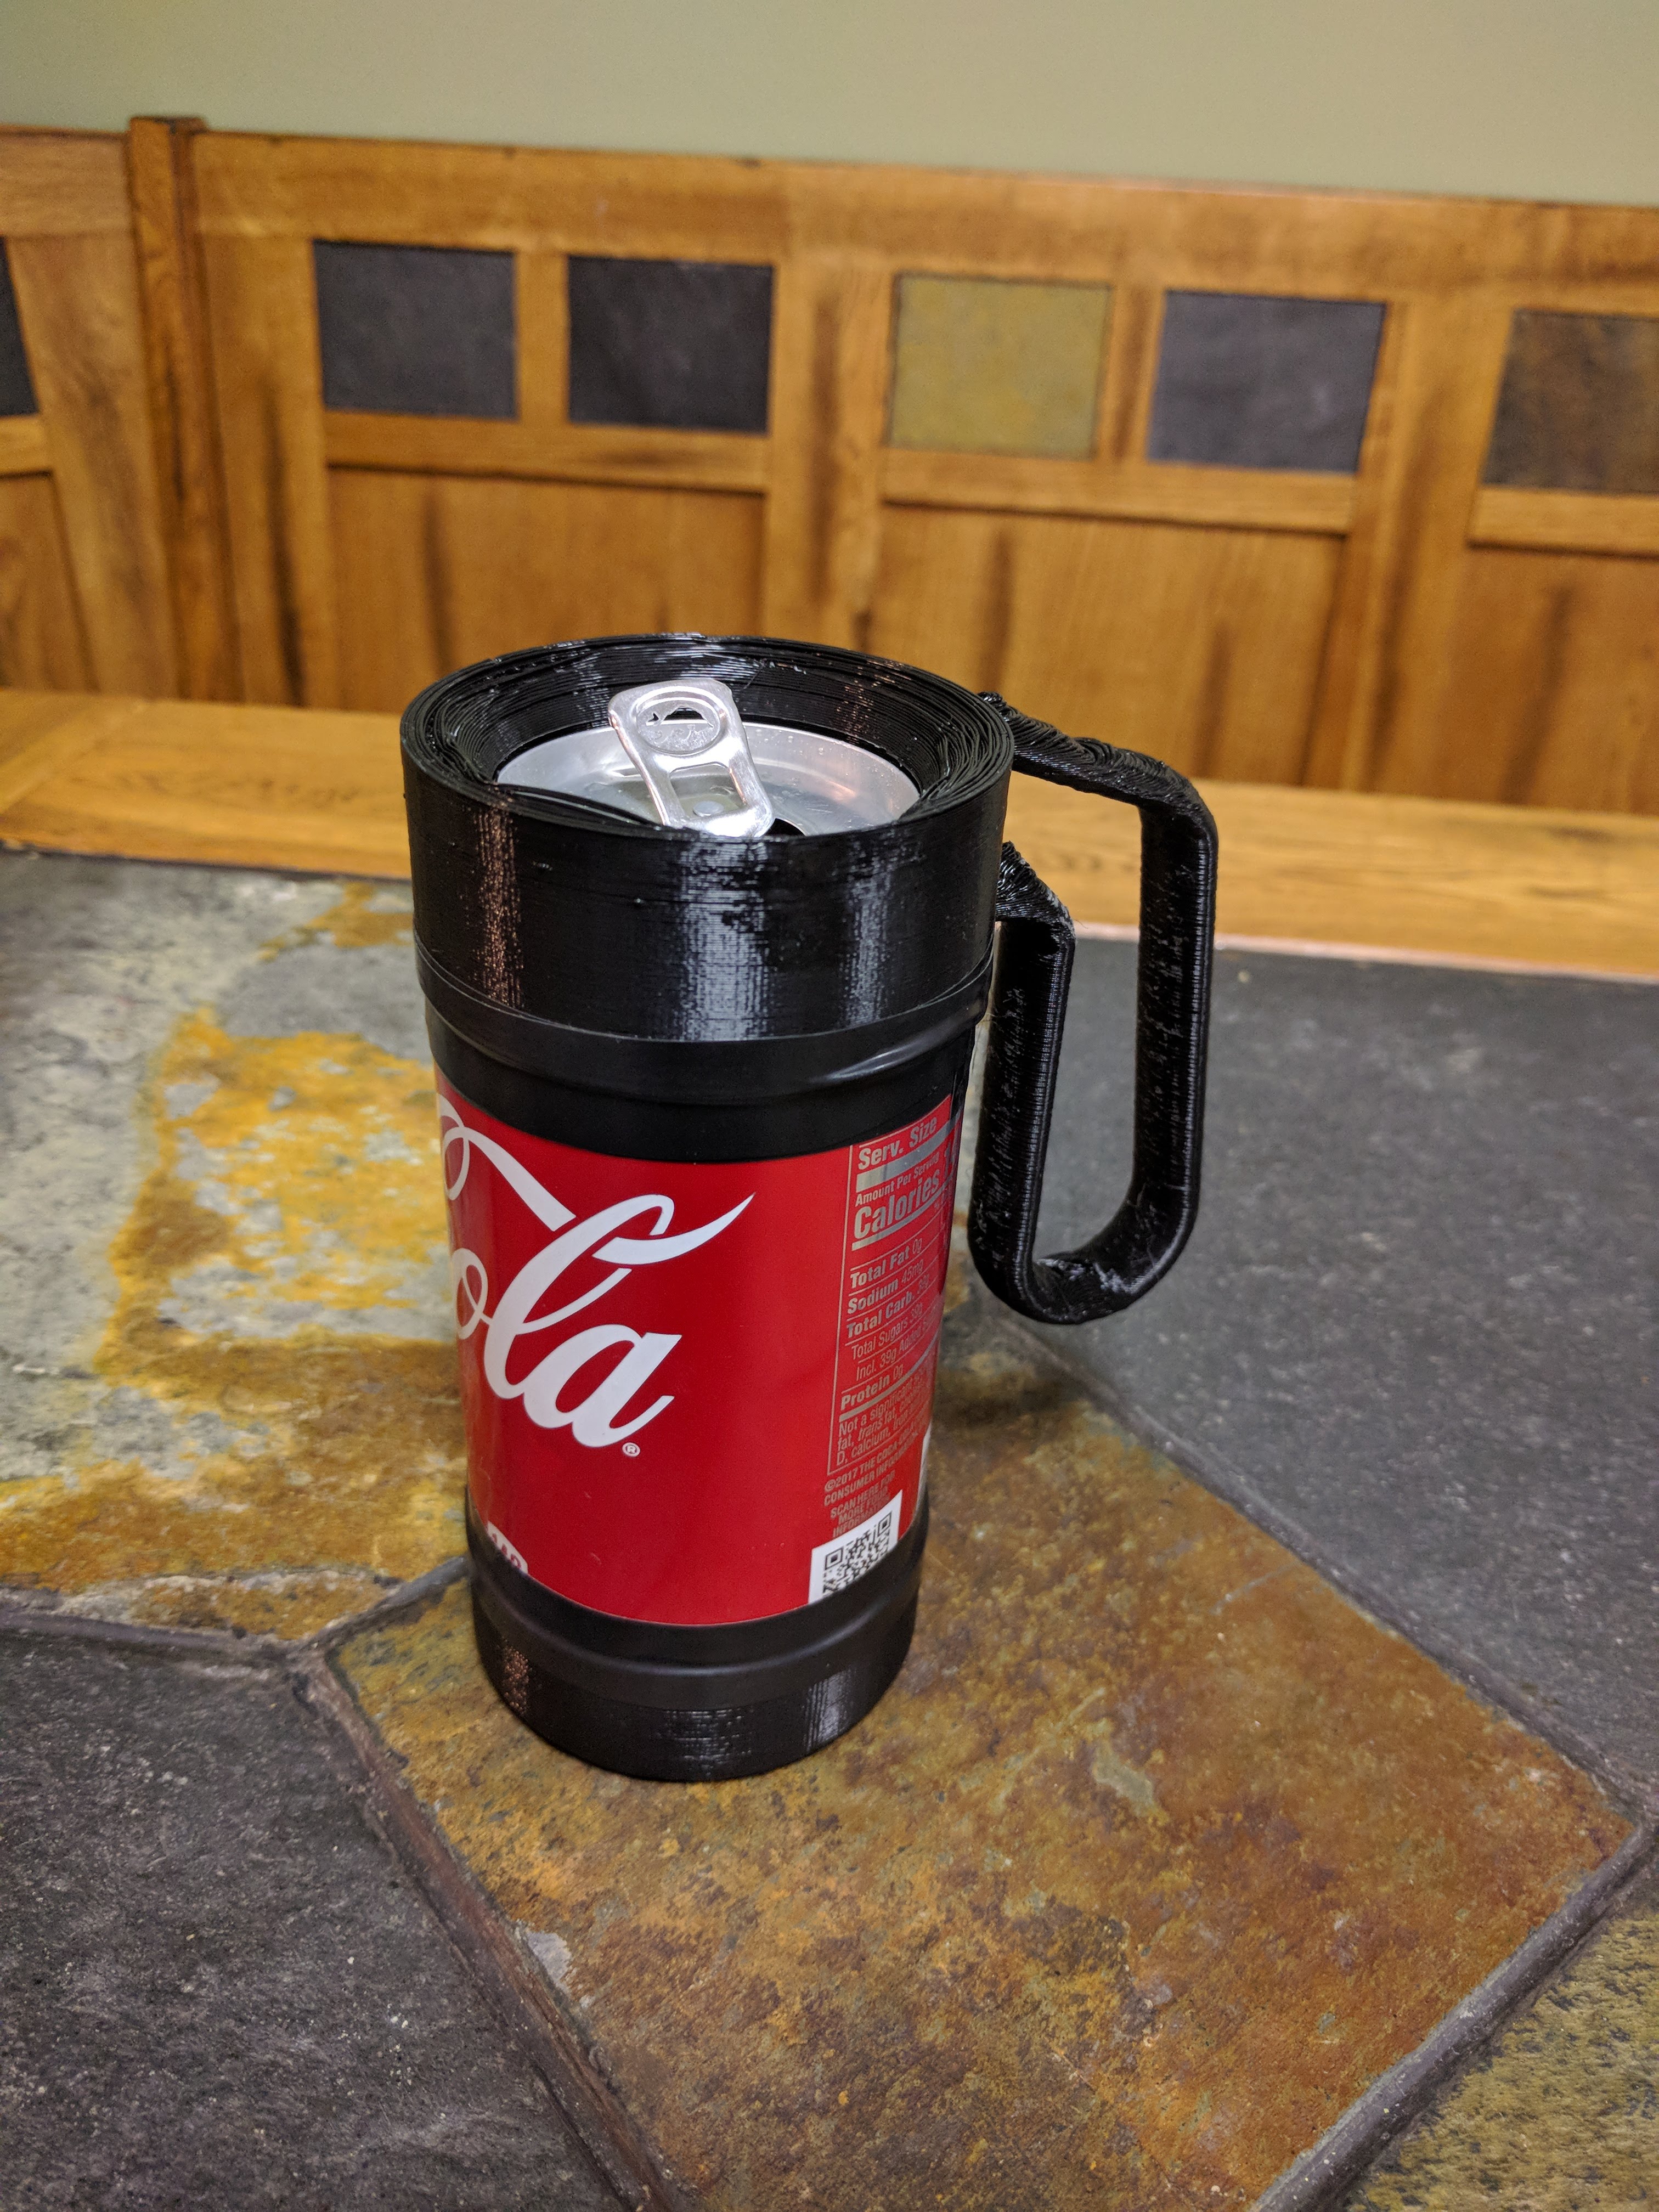
This is my entry for the Esso Upcycling Challenge and what goes better with Esso than a traveling mug! It only makes sense that this mug has two walls to insulate the drinker from hot or cold temperatures while using the natural 250mL top to prevent spills while on the move. The process is straightforward, taking just a few supplies and about 15 minutes to assemble. First, gather the printed cup_base and cup_top along with 2-3 250mL cans, a pair of scissors, and some tape. Next, insert an intact can into the cup_base, then slide the cup top over the can before screwing the cup_top and cup_base together securely. After that, remove the tops and bottoms of the remaining cans and cut a vertical cut down the seam of each can. Cut the top and bottom portions off where the can bends inwards to make a flat rectangle that fits perfectly into place. Now, work the rectangle into the outer groove of the cup_base with the seam of the can aligned with the handle. Carefully slide the can into the outer groove of the cup_top until the sharp edges of the can are completely covered on both ends by plastic. Finally, tape the vertical seam to cover any sharp edges and wrap tape around the upper and lower seams, overlapping the plastic and the can to secure the can in place for a snug fit.
With this file you will be able to print Double Walled Travel Mug with your 3D printer. Click on the button and save the file on your computer to work, edit or customize your design. You can also find more 3D designs for printers on Double Walled Travel Mug.