Dogbert
thingiverse
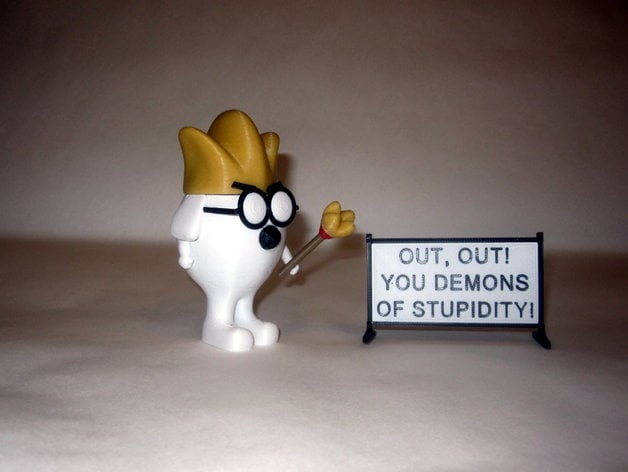
Human: This is Dogbert, the megalomaniac from the Dilbert comic strip by Scott Adams. He dreams of conquering the world and enslaving all humanity. No supports are needed if you have the right filament colors; painting is also not required. The completed model stands 99mm tall after assembly, proportional to my previous models of Dilbert, Wally, and Pointy Haired Boss. Print Settings: Printer: FlashForge Creator X Rafts: Doesn't Matter Supports: No Resolution: .2mm Infill: 10% Notes: See notes below for helpful printing and assembly instructions. Building the model: Colors (no multiple printed pieces): Black: glasses glasses_arm_left glasses_arm_right nose eyebrow_left eyebrow_right stand_12 text_frame_12 White: body arm_left arm_right ear_left ear_right eyes text_12 (see below for optional two-color printing instructions with a single extruder) Gold: crown wand_crown Red: wand_cap Brown: wand_stick Printing and assembly tips: Printing Tips: 1. No supports are required. 2. I used a brim on a few pieces; use your discretion based on your own preference: arm_left has a small base and steep part angle, wand_stick has a small base and is tall. 3. The eyes piece has an included 'brim' which is part of the design; do not clean it off. 4. For printing words with white background and black lettering, see my full instructions included with quotes from the Dilbert series: http://www.thingiverse.com/thing:1727898 Assembly tips: The diagram below will help in assembling the model and is quite straightforward. The model is meant to be glued together. Be sure to insert/glue arms into body before ears. I suggest gluing wand_stick to arm_left before gluing arm to body; I happened to do this last and it was a bit tricky getting the completed wand to stay in right position to dry. For some people, small parts can be hard to put together and glue. Personally, I glued glasses_arms into notches in body in front of ears with tacky glue first. While glasses_arms glue was still tacky, I placed glasses (with eyes already inserted and glued) into notch on body above nose and glued them into glasses_arms. It all turned out quite simple to glue into place. Overall Dogbert assembly: Closeup of some smaller pieces Assembly of Dogbert's quote
With this file you will be able to print Dogbert with your 3D printer. Click on the button and save the file on your computer to work, edit or customize your design. You can also find more 3D designs for printers on Dogbert.