DIY upcycled coffee table
prusaprinters
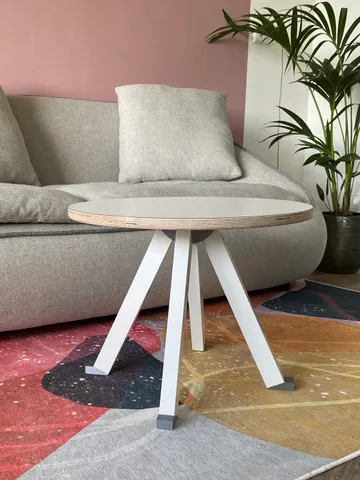
IdeaWe recently moved to a new place and are still in the process of decorating. During our search we stumbled on a great deal for an IKEA desk. Unfortunately, we didn't need the legs in our setup but it still felt wasteful to throw it away. I therefore decided to try and use the legs for a coffee table in the living room since I liked the shape of the legs and the fact that they were prethreaded and came with mounting plates/screws. DesignThe table is designed using Fusion 360 and uses IKEA Godvin legs. The design is made so it can be printed without support material (the part that needs a little bit of bridging is invisible in the end). In the current setup it is 50cm wide and 40cm (394mm) heigh. Requirements50CM table top (I use 19mm multiply with HPL top and bottom layer)1x 3D printed leg brace/table mount1x 3D printed spacer ring4x 3D printed feet4x IKEA Godvin legs cut to 380mm (they unfortunately don't seem available at IKEA Netherlands anymore, but many people offer them practically for free on second hand websites. Adils alternative coming soon) 1x M8 nut1x M8x25 bolt(Wood screws to mount the mounting plate to the table top. You can use the ones that came with the legs depending on the thickness of your table top)3D printingAll of the parts can be printed without support material on a printer with a bed size of 14x14 or larger. I used a Prusa Mini to print the parts using PLA at 0.2mm layer height and 30% infill. The total print time is around 17 hours and the assembly used approximately 300 grams of filament. The table feels very sturdy, but for longevity it may be better to print with PETG. Assembly1. Disassemble Godvin legs2. Cut the legs at 38CM using a simple iron saw (do not cut off the part with thread)3. Attach 3D printed feet to legs (might require some force)4. Insert M8x20 bolts & washers in base 5. Screw legs to base6. Insert Godvin mounting plate in spacer ring 7. Insert M8 nut the back of the moutning plate8. Align mountingplate & spacer in the center of your tabletop 9. Screw mountingplate to table top10. Use M8 center bolt to attach the legs & base to the tabletopResultI would love to see makes (with different legs/colors/feet/materials). Happy making!
With this file you will be able to print DIY upcycled coffee table with your 3D printer. Click on the button and save the file on your computer to work, edit or customize your design. You can also find more 3D designs for printers on DIY upcycled coffee table.