DIY Spherometer
thingiverse
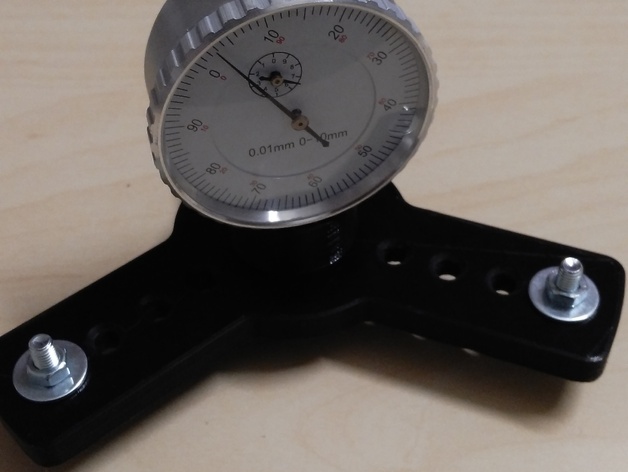
So... you are crazy enough to build your own telescope mirror or other optics? Well, you'll definitely need a spherometer! This design has 2 configurations, based on the central hole - 8mm and 8.3mm. When I print a hole, my printer has an accuracy of about 0.3mm so in my case, 8.3mm is actually close to 8.1mm. The body of the dial indicator is 8mm so it fits like a glove. If you don't know your printer accuracy - use the 8mm version and drill it after the print. You'll also need the following parts: Dial indicator (0.01mm accuracy) with 0-10mm travel. If you can find one for less money - buy it! I bought mine on eBay for about 10-12$. Three M5x20 DIN912 bolts with three to six nuts and six washers. One M3x12 DIN912 bolt with a nut for the nut trap. Stainless steel bearing balls - preferably 1/4 inch (6.35mm) version. You can use whatever you want but keep in mind that it's essential that you know the exact diameter! If you have old bearings - you'll need a micrometer to measure the diameter of the balls. I bought mine on eBay for less than 3$. Put the M5 bolts, nuts and washers as shown in the pictures. Epoxy the balls on top of the heads of the bolts and try not to put any glue on the working surface of the balls!!! Put a M3 nut in the nut trap and screw the M3x12 bolt into the central hole. Put the dial indicator and screw the small bolt until tight (Don't be crazy here - just a gentle twist). Keep in mind that this is pretty precise measuring tool! If you need your dial indicator to sit higher - use more nuts and put the head of the bolts lower. Be careful and level everything! If you make everything correctly - you'll have a nice tool for measuring the sagita of the mirror that you're grinding! The biggest diameter (far most position of the M5 bolts) is 125mm diameter (or almost 5 inches). If you're measuring smaller diameters - put the bolts in other holes. How to calculate and use this tool: Part 1 - https://www.youtube.com/watch?v=htBx5SRFeMI. Part 2 - https://www.youtube.com/watch?v=fLiodHOESYM. Happy measuring! P.S. Sorry about the STL files. Some of them are not correctly aligned so use the proper ones! The system don't want to give me the choice to remove the old files. Print Settings Printer Brand: RepRap Printer: Prusa i3 (Homemade) Rafts: No Supports: No Resolution: 0.3mm Infill: 50% Notes: Total print time: About 5 hours. IMPORTANT!!! Leave the print on the heatbed without touching it for the whole time that your heatbed needs to cool to room temperature! You don't want to bend one of the arms of the spherometer's body! This will be bad!
With this file you will be able to print DIY Spherometer with your 3D printer. Click on the button and save the file on your computer to work, edit or customize your design. You can also find more 3D designs for printers on DIY Spherometer.
