DIY Smart Garage Door Remote
thingiverse
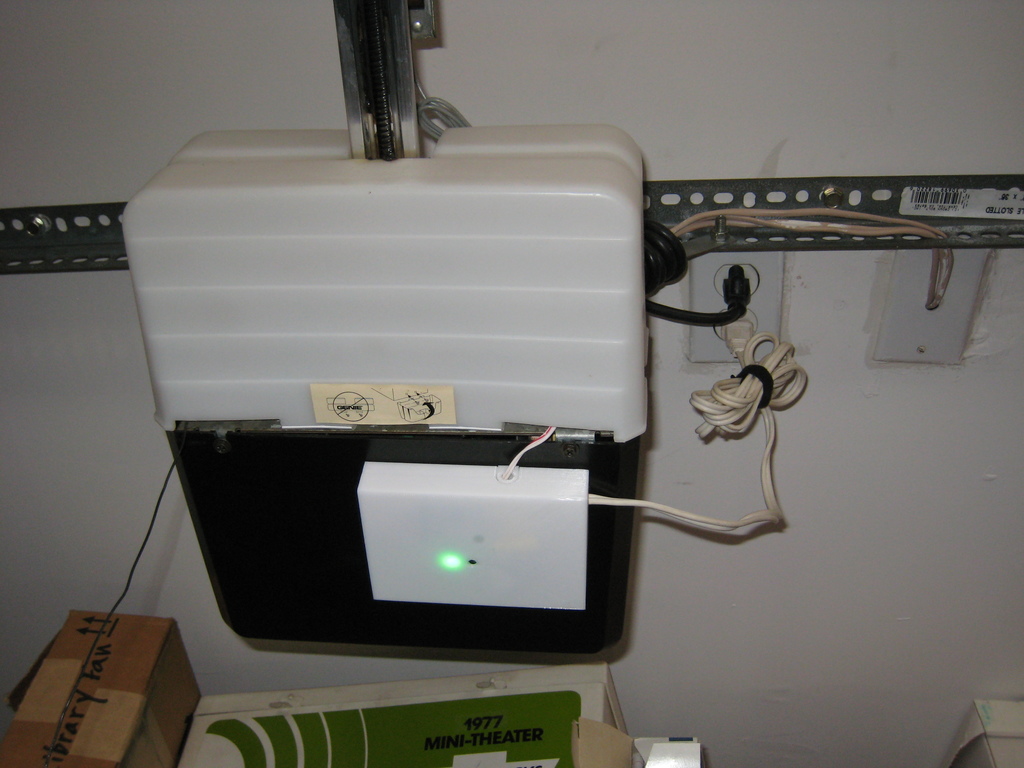
This is an incredibly handy DIY garage door remote controller that will revolutionize your home security. With an Android or Apple smartphone that's eWeLink compatible - which it probably is - you can open and close your garage door from anywhere in the world. The eWeLink app also works seamlessly with Amazon Alexa & Google Home, making it a breeze to control your garage doors remotely. My personal favorite way to operate my garage doors is using an Alexa-connected device or the Alexa app widget on my phone. After installation, you'll still be able to use your regular garage door remote and wall button as usual. **Skill Level:** This project requires some advanced-beginner to intermediate electronics knowledge, especially with relays and mains high voltage experience. You should be comfortable working with these components before tackling this DIY project. The first image shows my Genie garage door opener motor with the DIY remote case attached using double-sided tape. To get started, you'll need a Sonoff Basic that has been updated to support "Inching" mode. If your firmware isn't up-to-date, update your eWeLink phone app and upload the latest Sonoff Basic firmware to your switch, setting it to Inching mode in the process. Inching mode allows you to set the Sonoff Basic so that it only turns "ON" for a specified period of time before turning off. To mimic pushing the button in your garage to open or close the door, change this setting to 0.5 seconds. You can find videos on YouTube explaining how to upgrade your firmware; just search for "How to Firmware Upgrade Sonoff WiFi Smart Switch" and ignore any Tasmota videos. Inching mode automatically turns the Sonoff switch on, pauses for the set time, and then turns it off. As a result, the smart speaker voice command to open and close the door is the same: "Garage Door On." This command mimics pushing the wall switch in your garage to open or close the door. Before starting this project, make sure to test your garage door opener by temporarily shorting the first two wall switch wires. These wires are usually connected to the line and neutral of the power supply. If you're not familiar with working with mains voltage, it's recommended that you consult a professional electrician. The first image shows my Genie garage door opener motor with the DIY remote case attached using double-sided tape. To get started, you'll need a Sonoff Basic that has been updated to support "Inching" mode. If your firmware isn't up-to-date, update your eWeLink phone app and upload the latest Sonoff Basic firmware to your switch, setting it to Inching mode in the process. The AC110V Relay LY2NJ is an essential component for this project, costing around $2 on eBay. You'll also need a 110v power cord with a 2-prong polarized plug, wire, spade connectors, double-sided tape, and two screws (optional). **Final Comment:** I created this device because I have a security camera facing my garage doors. It's easy to see whether they're open or closed via Tiny Cam Pro on my Android phone. One day, while a half-hour away from home, I saw that I had left the double door open, giving anyone complete access to the rest of my home. From that day on, I set out to come up with a low-cost, easy-to-implement solution to this predicament. Because this device is so helpful and easy to make, I'm sharing it with you. Likes, images, and makes are greatly appreciated. Thank you for your feedback! **Update 12/08/2019:** I added text to the base indicating "L" for line voltage and "N" for neutral when inserting the mains voltage wires into the Sonoff. **Update 12/12/2019:** I modified the cover so that the hole for the Sonoff reset button has an internal self-centering cone. This stops the button from getting hung up inside the case during assembly. **Update 01/18/20:** I added a 6mm hole to the base near the relay connectors, allowing users to run hidden wires behind the drywall to a wall-mounted garage door button.
With this file you will be able to print DIY Smart Garage Door Remote with your 3D printer. Click on the button and save the file on your computer to work, edit or customize your design. You can also find more 3D designs for printers on DIY Smart Garage Door Remote.
