DIY Robot Line Tracking / Following Sensor
thingiverse
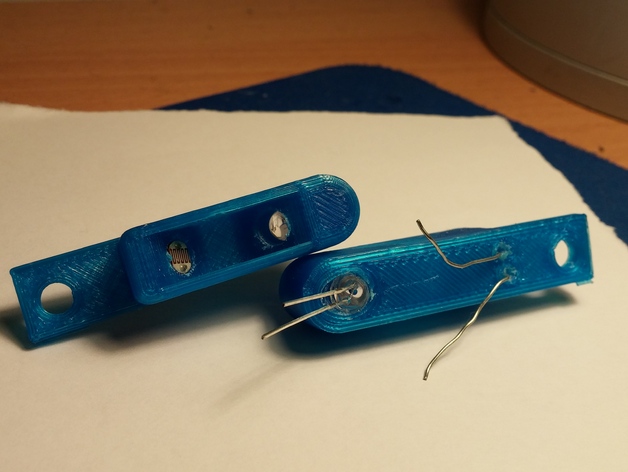
Create a precise line tracking sensor for your upcoming robotic project by carefully placing a photoresistor and led into their corresponding holes, then connecting them to an analog pin on your Arduino or preferred microcontroller. This clever design originated as part of my robotics class robot. You can access the Cadd files here; feel free to request a custom version if needed! Be mindful that hole size might require adjustments based on your 3D printer's accuracy calibration. UPDATE: I'm thrilled to share that this sensor performed exceptionally well on my final robot, delivering a remarkably consistent linear response. To elevate its sophistication, we employed an op-amp Wheatstone bridge type circuit, as illustrated in the images attached. Don't forget to refer to the accompanying wiring diagram for clear guidance. Huge thanks to Bradd Libby for inspiring this design – his original post is accessible at https://braddlibby.wordpress.com/2012/12/23/arduino-light-sensor/arduino-light-sensor-circuit-diagram/.
With this file you will be able to print DIY Robot Line Tracking / Following Sensor with your 3D printer. Click on the button and save the file on your computer to work, edit or customize your design. You can also find more 3D designs for printers on DIY Robot Line Tracking / Following Sensor.