DIY Retro Handheld Gaming Console (V2 Added with HDMI and External MicroSD)
prusaprinters
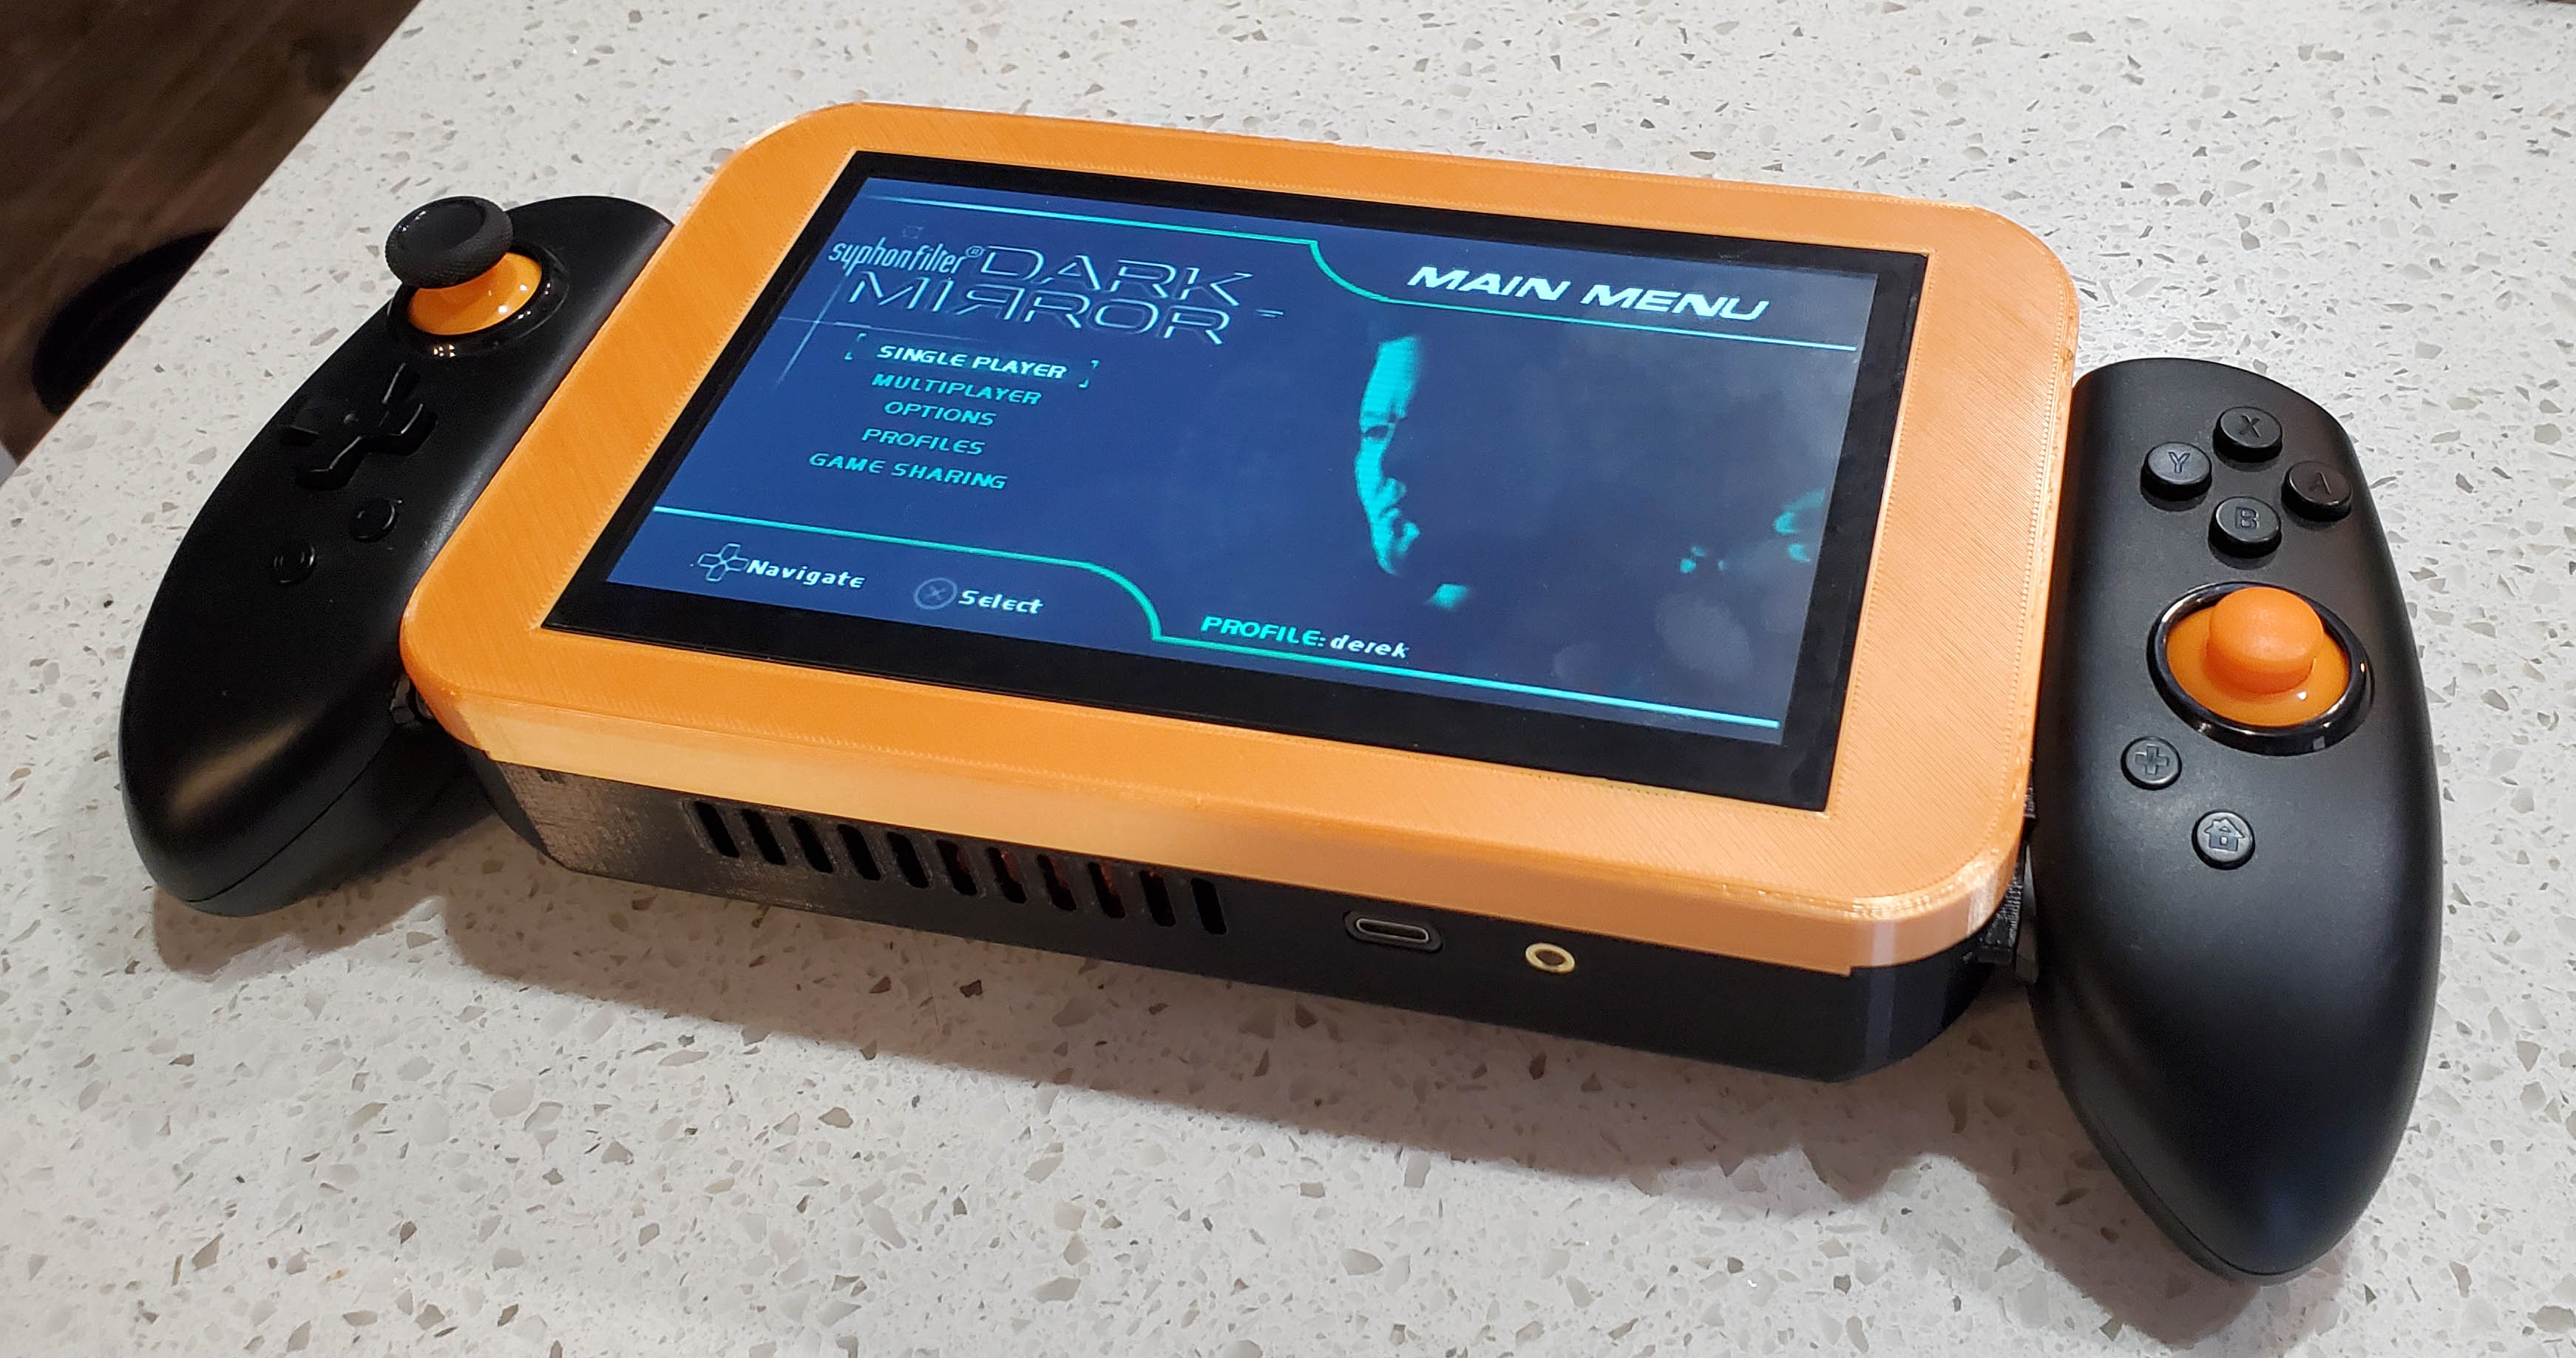
<p>See the attached Video for complete assembly instructions.</p><figure class="media"><oembed url="https://youtu.be/cJXsgqihvRM"></oembed></figure><p>Due to several requests, I'm working on moving the power cord to the top of the unit, adding a microSD extension slot, and an external facing HDMI for the second HDMI slot.</p><p>It is recommended to have at least a basic knowledge of electronics and a bit of soldering experience to try this project. I tried to keep it as basic as possible, but because of some of my own preferences it did have to include a bit. By taking on this project you assume all liability for any risk or harm that may come to yourself, the parts you're using, or their warranties as a result.</p><p>All parts should be able to be printed without supports. The two controller adapters have little built in supports on the outside corners that will need removed after printing. The only spot that may end up needing support is the bridge below where the USB and Audio extension are seated. This should print fine for most people, but if supports are needed it may be there. Hopefully you know the bridging capabilities of your printer.</p><p>Once printing is complete any screw holes will need poked out as they have a single layer closing them in. This layer acts as a support without actually needing supports all the way down to the build plate. The instead of having a support to remove, they just need a hole poked in them.</p><p>Complete Parts list:<br/>Raspberry Pi 4 (Pi 3 is compatible, but PS1, N64, and PSP games won’t play smoothly) – https://www.amazon.com/Raspberry-Model-2019-Quad-Bluetooth/dp/B07TC2BK1X/ref=sr_1_3?dchild=1&keywords=pi+4+4GB&qid=1616461969&s=electronics&sr=1-3<br/>Pi Active Cooling - https://www.amazon.com/gp/product/B07TZFRVQJ/ref=ox_sc_saved_title_6?smid=A1N6DLY3NQK2VM&psc=1<br/>Raspberry Pi Touchscreen with speakers - https://www.amazon.com/gp/product/B07VNX4ZWY/ref=ox_sc_saved_title_5?smid=A36L9W2P32TR7B&psc=1<br/>Pisugar2 Pro Portable 5000 mAh - https://www.amazon.com/gp/product/B08D8PPCKN/ref=ox_sc_saved_title_1?smid=A3801D113D15XA&psc=1<br/>Kinvoca Switch Controller - https://www.amazon.com/gp/product/B083W85BBQ/ref=ox_sc_saved_title_4?smid=A21XT69IYXNZ87&psc=1<br/>Seadream 6 inch 4-Pole audio extension - https://www.amazon.com/gp/product/B016GXSKA6/ref=ox_sc_saved_title_3?smid=A196X59N8WD0QT&psc=1<br/>USB C Extension Cable - <a href="https://www.amazon.com/gp/product/B07YP4SGZT/ref=ox_sc_saved_title_2?smid=ATXIDHHW6V9XV&psc=1">https://www.amazon.com/gp/product/B07YP4SGZT/ref=ox_sc_saved_title_2?smid=ATXIDHHW6V9XV&psc=1</a></p><p>Screws: 5 x m3 * 6mm and at least 4 x m3 * 16mm (7 to fill all the holes)</p><p>Needed for Version 2:<br/>Micro SD Extension (331 Ohm resistor inside must be removed to work correctly with the Pi 4): https://www.amazon.com/gp/product/B07WWVBK8V/ref=ppx_yo_dt_b_asin_title_o01_s00?ie=UTF8&psc=1</p><p>UGREEN Micro HDMI to HDMI Cable Male to Female: https://www.amazon.com/gp/product/B00B2HORKE/ref=ppx_yo_dt_b_asin_title_o00_s00?ie=UTF8&psc=1</p><p>Although not required, you might consider getting an adapter like this to test your controller before cutting it up: https://www.amazon.com/dp/B073XKK9MZ/ref=cm_sw_r_cp_apa_glc_fabc_R32QZP28KHSE63HJX67Z</p><figure class="media"><oembed url="https://youtu.be/gBDj_a8NLdo"></oembed></figure>
With this file you will be able to print DIY Retro Handheld Gaming Console (V2 Added with HDMI and External MicroSD) with your 3D printer. Click on the button and save the file on your computer to work, edit or customize your design. You can also find more 3D designs for printers on DIY Retro Handheld Gaming Console (V2 Added with HDMI and External MicroSD).