DIY RC Street Racing Car: One Week Classroom Project
thingiverse
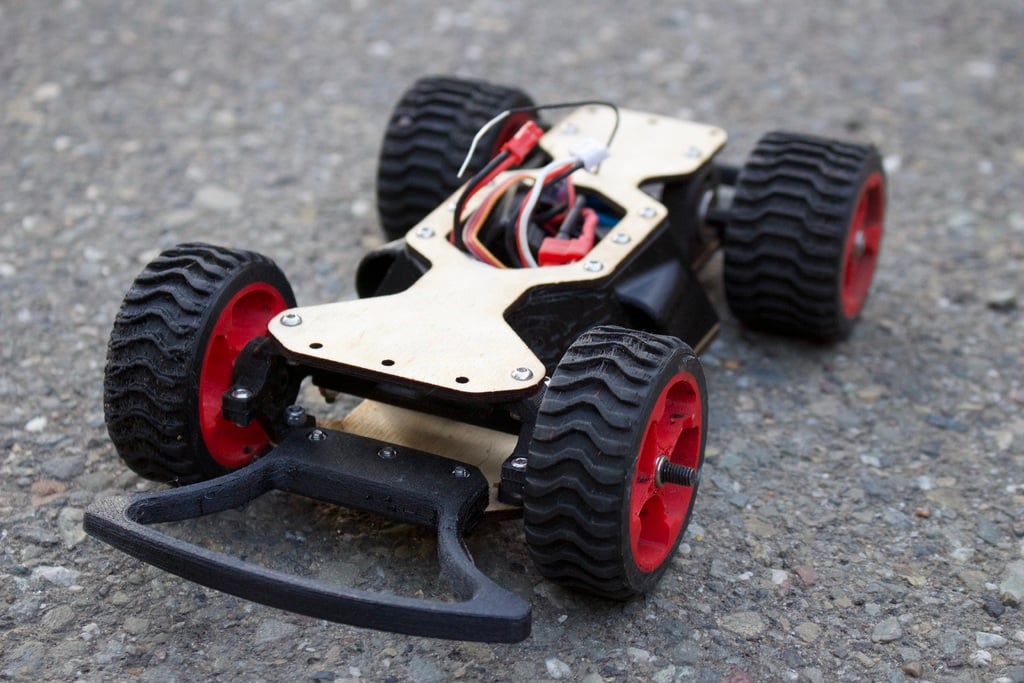
The provided text appears to be a comprehensive guide for printing and assembling a 1:10 scale RC car chassis using 3D printing technology. The guide includes step-by-step instructions for printing various components, such as wheels, axles, bearings, motor mounts, ESC mounts, bumpers, and the base plate. It also mentions optional components like side guard air intakes and steering rack. To provide a clear and concise summary of the text, I will outline the main points: 1. **Printed Components:** * Wheels with TPU treads for optimal traction * Axle mounts to hold front bearings in place * 5mm flange spacers to keep rear axle drive gear straight * 15mm spacer to space left wheel from the body * Servo mount to hold a 9g metal gear servo * Steering rack for turning wheels * ESC mounts to secure electronics * Side guard air intakes to direct airflow and keep wires clean * Motor mount for a 2430 motor * Front and rear bumpers for protection during crashes * Rear drive gear for connecting to the rear axle 2. **Assembly:** * Install wheels with M5 nuts on axles * Connect steering rack to servo arm using thin wire or a stiff paper clip * Mount ESCs with included mounts * Attach side guard air intakes to bottom and top plates * Install motor mount and rear drive gear * Assemble base plate and upper plate with M3 bolts 3. **Tips and Recommendations:** * Print wheels, axles, and other load-bearing components in strong materials like PLA or TPU * Use 100% infill for high-strength parts * Apply red loctite to rear right wheel bolts for added security * Try printing the default 79-tooth rear drive gear first, and adjust as needed
With this file you will be able to print DIY RC Street Racing Car: One Week Classroom Project with your 3D printer. Click on the button and save the file on your computer to work, edit or customize your design. You can also find more 3D designs for printers on DIY RC Street Racing Car: One Week Classroom Project.