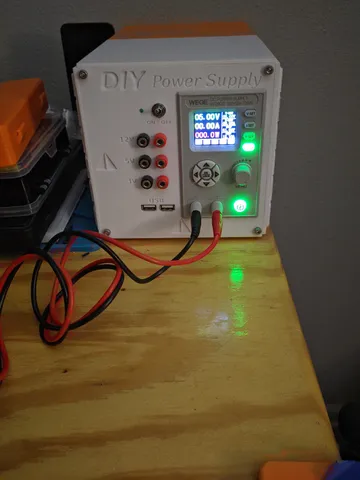
DIY Power Supply
prusaprinters
This is that old right of passage for many electronics learners, This is a DIY power supply, that takes a regular ATX power supply from a computer and with a makeshift wiring harness we have a multi-point variable power supply for circuit projects.The Hex Nut caps only go on the left and right side panels, Both Front left and front right only need the caps on the front top and bottom tabs (super glued them together) then on the back left and right sides you need to add all four hex nuts and caps, i created a hex nut hole that is in each of the left and right side panels.assembly notes:I found it easier to get the bottoms and left and right side panel on one side then the other side and then put the tops on, last will be the the back panel then the front panel.Superglued any pieces that didnt stay easy, also added an LED to the power switch but i did the wiring wrong on that part and so does not work (nor show in pictures) so as a random FYI, your powersupply does not want to see any resistance on the power-on switch wire.I really had to tie down and bind all the excess cables from the power supply so be warned about space, as well a modular power supply would be ideal.I also added a fuse blown LED to the back, you will need to wire the LEDs (and resistor if needed) in series with the fuse so that if it does blow the LED will light up and you can easily see which one is blown.
With this file you will be able to print DIY Power Supply with your 3D printer. Click on the button and save the file on your computer to work, edit or customize your design. You can also find more 3D designs for printers on DIY Power Supply.
