DIY In-Wall Sonoff Light Switch
thingiverse
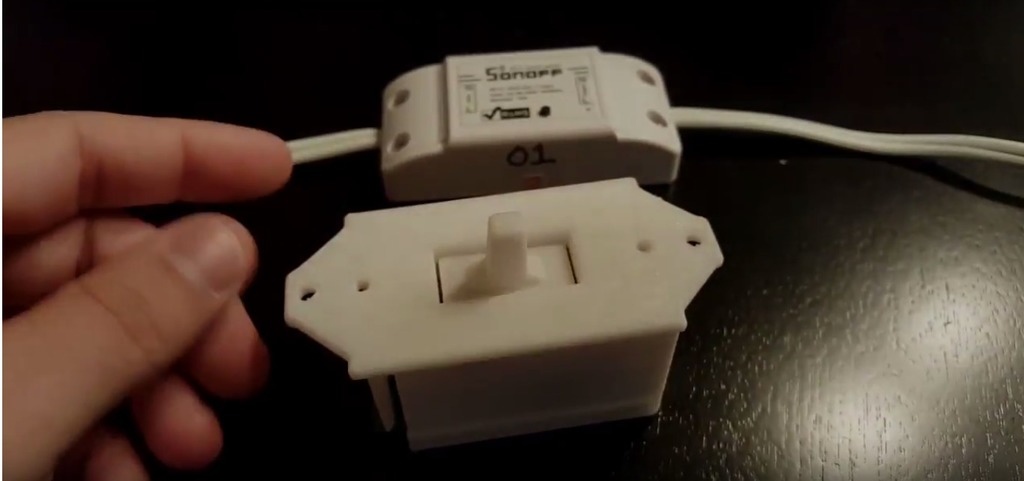
This is an outdated version, please refer to Version 2 of the In-Wall Sonoff Light Switch. The new version eliminates the necessity for an additional PCB and button. You can find it here: https://www.thingiverse.com/thing:2632463 Following printing, insert the Actuator through the back of the Mount Plate and carefully force the tabs of the Actuator into the holes on the Mount Plate. Once installed, the Actuator may feel stiff and hard to move, but working it back and forth a few times will soon make it operate smoothly. You also need to create the PCB that holds the pull-up resistors and buttons which the actuator presses. I used perf-board and salvaged buttons and resistors to make it. The PCB should be shaped as in the image above because the Sonoff's button and LED are rather tall, ensuring the whole switch enclosure fits inside the wall with existing wires tucked behind. Below is my video describing my Sonoff In-Wall Light Switch, where I also demonstrate its installation in the wall by replacing an existing light switch. One thing to note is that the Sonoff will not be able to replace a 3-way light switch; this is explained more in the video. I debated uploading this to a different site and charging $1 to download it, but ultimately decided against it as I am a big fan of open source and have greatly benefited from it. Instead of paying for the .stl files, I would appreciate it if you could subscribe to my new YouTube channel and share the video. https://www.youtube.com/watch?v=XgzF7lwwa0A&t=49s
With this file you will be able to print DIY In-Wall Sonoff Light Switch with your 3D printer. Click on the button and save the file on your computer to work, edit or customize your design. You can also find more 3D designs for printers on DIY In-Wall Sonoff Light Switch.