DIY Home Server Case
thingiverse
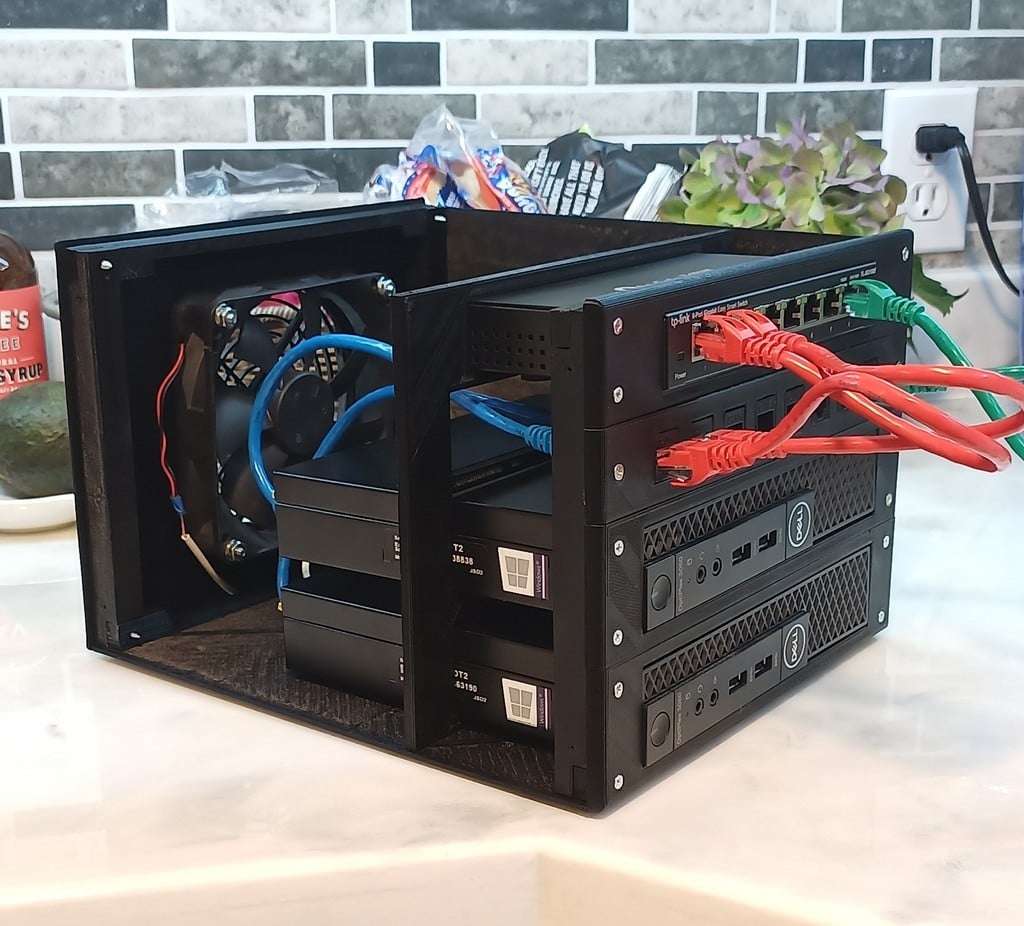
I run two Dell Optiplex 3060 mini micro PC's for my Home Lab.I wanted something compact to consolidate desk space and at the same time help to cool the PC's by creating a case for everything, including a low noise 120mm cooling fan that is 12v running on 5v.This is a tested prototype with about 3 months of use with no problems or need to edit. I don't have a lot of free time but after many requests, I've decided it's time to share with the world. I apologize but I cannot offer edits for your specific hardware.You will need a 3D Printer with at least a 350x350mm print bed to build this puppy. I modified my Ender 3 (just for this print) to become 400x400mm so I had no problem printing this. (or get an EnderExtender) Maybe you can split the STLs with a program that can be printed on a factory Ender 3, maybe you can't, I don't know.There are clearly a lot of pieces to print so I tried to name them as best I could to help identify proper placement.I used a standard 120mm Fan you might find out of an old PC, cut an old USB cable and attached it to the fan (do a web search on how). I used a spare USB port on one of the PCs so it is 5v powered. The fan is key to keeping these PCs cool.The Keystone hole size on the faceplate is 14.5mm x 17.8mm. I had to trim each hole to ensure a perfect fit, be careful here, razors are very sharp. I used iGreely Keystone Couplers from Amazon. Secure with hot glue on the back side if you'd like, mine were press fit.I used a TP-Link TL-SG108E Switch at the top. All your wires and cables should exit from the "mousehole" in the rear corner.To print, I used 20% infill in PLA or PLA+. I printed the front faceplates @ 100% I suppose you don't have to, but I did.For assembly, I used #4 Wood screws with Countersunk Heads. Home Depot sells them in 12 packs. I used a 5/64" Drill Bit to pre-drill every hole.I used 1/2" screws for the front face plates and side covers, and 3/4" screws for the remainder of the parts. It's important that you pre-drill every hole, I can't stress this enough, otherwise your print will crack! I even used a Countersink drill bit to make all the screw heads perfectly flush with the surface. Don't overtighten. If you build one, let's see it! Be sure to post a photo if you do!Most of all, have Fun and Enjoy!
With this file you will be able to print DIY Home Server Case with your 3D printer. Click on the button and save the file on your computer to work, edit or customize your design. You can also find more 3D designs for printers on DIY Home Server Case.
