DIY FPV Monitor with M6 mount - RX5808, 18650, USB Charging
thingiverse
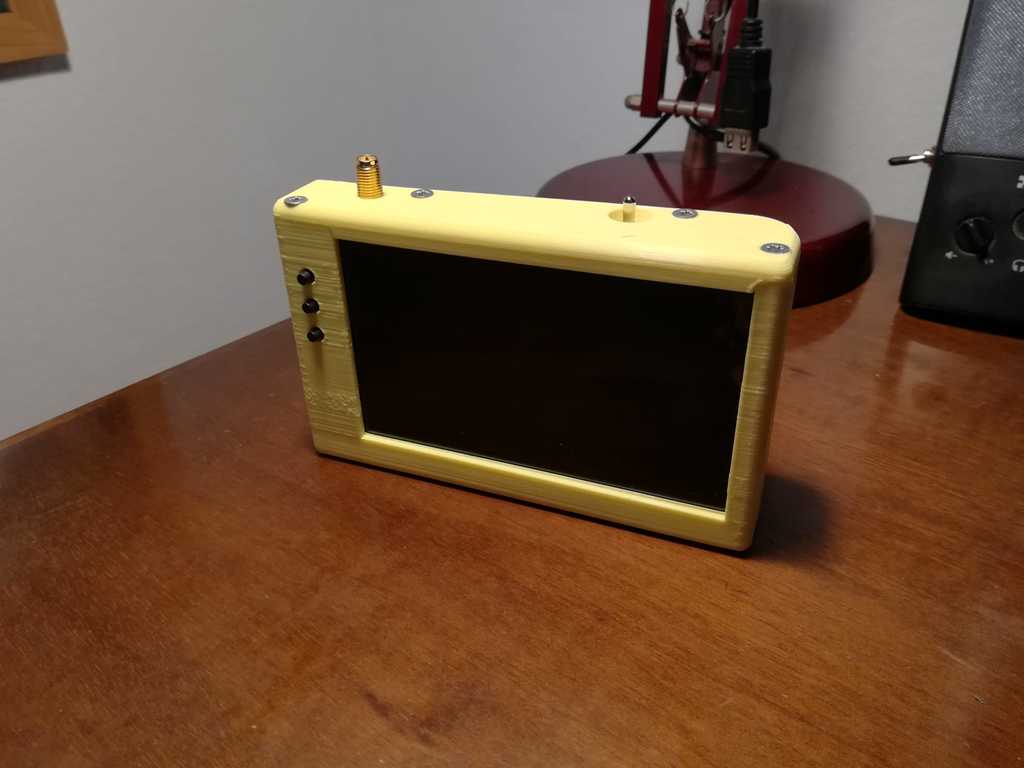
This is the excellent and highly useful add1ct3dd monitor design with the addition of the M6 attachment on the back for mounting it on any TX M6 phone-compatible support. This is the original one (without M6 attachment): https://www.thingiverse.com/thing:3645387 To assemble it, you need to take: 1 x M6 nut. 4 x M3 screws (approximately 6-8mm long). In my build, I used a lever switch. The following are the other components required for assembling all the electronics: Screen: https://www.banggood.com/custlink/KKKKPdpNTO TP4056 USB Charger: https://www.banggood.com/custlink/33DmPyJsu7 18650 Battery: https://www.banggood.com/custlink/Dv33FRJ2Dp Switch (for Banggood print): https://www.banggood.com/custlink/GDDDFErbw0 OR this better (in my opinion) switch: https://www.banggood.com/custlink/mD3DVYrb7q SMA Adapter (if you don't want to use the RP-SMA connector that comes with it): https://www.banggood.com/custlink/GmvvPhCUGF 4 x M3 screws (approximately 6-8mm long), some wire, and some hot glue. I won't provide a wiring diagram because you should know how to properly wire this device and I don't want to be held liable for any potential issues due to its internal battery. However, the wiring is relatively straightforward.
With this file you will be able to print DIY FPV Monitor with M6 mount - RX5808, 18650, USB Charging with your 3D printer. Click on the button and save the file on your computer to work, edit or customize your design. You can also find more 3D designs for printers on DIY FPV Monitor with M6 mount - RX5808, 18650, USB Charging.