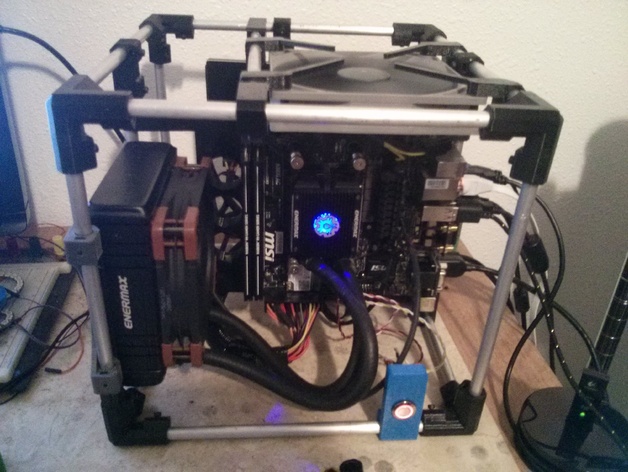
DIY Desktop PC case. Mini ITX OVERKILL
thingiverse
I've been using my old laptop for ages, but when it came time to upgrade at the turn of the year, I realized it was totally out of spec, so I decided to build a low-cost desktop from scratch. Since I'm also an enthusiastic tinkerer, I wanted to design the case using printed parts instead of just buying one off the shelf. I finally settled on a hybrid approach that combines both printed brackets and aluminum round tubes. At this point, everything is up and running in its new home with a bit more cable management still needed here and there, but it's all good so far. I'm pleased with how it looks overall although it does turn out to be slightly too big for what would be considered a mini ITX build. I won't let that get me down though - as soon as possible, I'll be upgrading to a Micro ATX board and adding additional graphics processing capabilities. One thing to keep in mind when following this project is that I had made my measurements at 110% of their original size initially due to some initial skepticism about my printer's accuracy - it turned out my Y stepper was malfunctioning. I scaled the corner brackets and crossbar brackets up from there within the slicer, meaning not all components are as perfectly snug together as they should be. Each bracket uses standard-sized 8mm M3 nuts and bolts except for the motherboard mounts, which make use of larger 20mm M3 fasteners. If you're interested in building something similar, please do let me know and I'll send over more information to get your build off to a flying start.
With this file you will be able to print DIY Desktop PC case. Mini ITX OVERKILL with your 3D printer. Click on the button and save the file on your computer to work, edit or customize your design. You can also find more 3D designs for printers on DIY Desktop PC case. Mini ITX OVERKILL.
