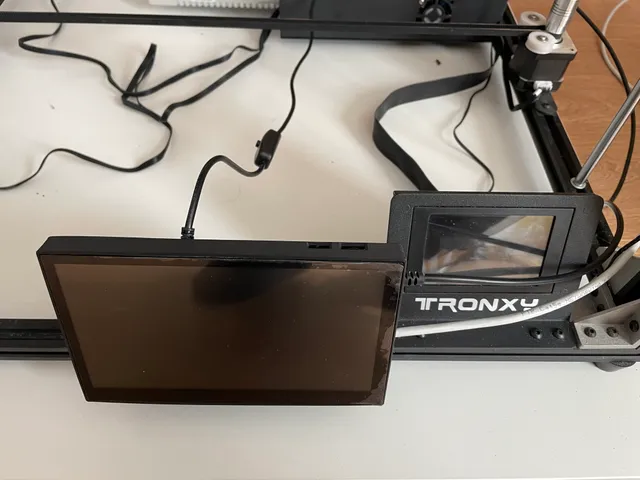
Display case for BTT Pi TFT70 and RPi4
prusaprinters
Very simple case for the BTT Pi TFT70 V2.0. The Raspberry Pi attaches at the back of the display, as per original design and everything is enclosed. An 3007 fan sucks air via the vents on the side of the display and pushes it out from the back of the Raspberry Pi cooling first the display and then the Pi. Or you could reverse the flow by mounting the fan in reverse. A very simple mount is provided for 2040 frame extrusion, also usable on 2020 extrusion, to mount the display facing upwards – like the original display on the Trendy X5SA400-PRO for which it was originally designed. Other mounts can be made to suit needs.As I do not like protruding bolt heads, this design is made for countersink screws. Required hardware:4x M2.5 4mm countersink screw to secure the display to the back4x M2.5 4mm countersink screw for the Raspberry PiUses the original M2.5 standoffs that came with the BTT Pi TFT70, which are 17mm long4x M3 12mm countersink screw for attaching the fanTo add the stand you need to replace two of the M2.5 4mm screws with M2.5 8mm screws and also use two or four M4 8mm screws with M4 T-nuts to attach to the extrusion.Printing:All parts are designed to be printed without supports, laying on their wide side. The case can be made of any material, I used ABS. The only place where it uses infill is in the mount. I used 0.4mm nozzle, 4 perimeters and 4 top-bottom layers, 30% cubic infill.Assembling:Be careful when you insert the display in the back, as it has delicate ribbon cables and also some protruding connector on the back. As its purpose is not documented I did not provide for connecting cable to it. While inserting mine it broke a bit in the corner while I was experimenting with dimensions – so if your printer is not very precise, prepare to file these holes a bit.There is no provision for accessing the Raspberry Pi SD card while attached to the display, so it would be good idea to prepare and install it at this point.Screw the four supplied standoffs to assemble the Raspberry Pi to the back of the display. Here you too might need to file the opening a very tiny bit – but do not be too aggressive as tolerances are relatively tight. Then install the ribbon cable supplied with the display to both the display and the Raspberry Pi. You might also attach thereon cable to the display first, before attaching the bank – as is more convenient to you.Finally, slide the Raspberry Pi back cover and secure with the four M2.5 4mm screws.Depending on the mount you would use, unscrew the relevant screws and replace with longer versions, as required. I found it easier to screw the mount to the extrusion as a final step, but in your case it might be different due to space constraints.In general, you want the Raspberry Pi ports to be easily accessible which means there should be space to either right and top (with controls on top) or left and bottom (with controls on bottom) of the display. You can use the small switch on the display to change its orientation.Bugs:After making this case, I found an bug in the BTT Pi TFT70 V2.0 design in that if you mount the Raspberry Pi directly to the mount standoffs on the back, its PCB touches components on the display PCB which might be a problem (eventually breaking something if you over tight, it also presses n the SD- card slot). Likely this is the reason for including standoffs with the display which move the Pi far from the display. This issue can be resolved by adding 1mm washers under the Raspberry Pi, but then the supplied M2.5 standoffs won't fit as they are of the “short” variety. I plan on resolving this in a future iteration of this case, which will also add more mount options and proper front bezel.
With this file you will be able to print Display case for BTT Pi TFT70 and RPi4 with your 3D printer. Click on the button and save the file on your computer to work, edit or customize your design. You can also find more 3D designs for printers on Display case for BTT Pi TFT70 and RPi4.
