Display Case
prusaprinters
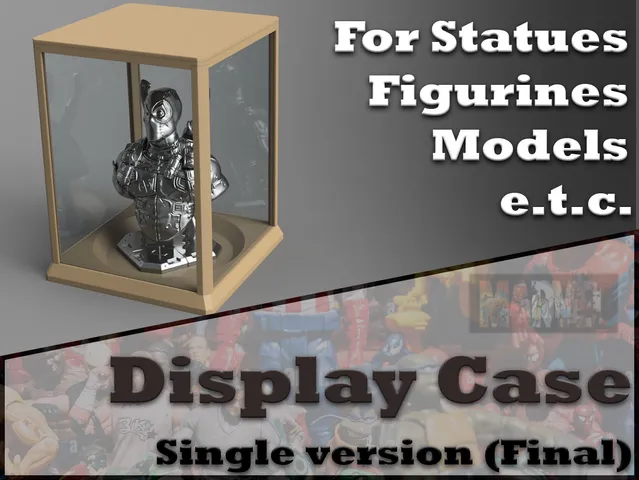
BIG UPDATE ON 09.03.2024After Some testing I have redesigned all parts and description as well. Now this model is changed from Beta1 to Final Version. Changes are made to make it much sturdier and with much easier access to Display figure/model inside. And as for description I have done assembly instructions as well now. So here we go:Just got tired to clean dust from my little collection of Figurines. So I decided to Make some Display case for them. This is my first try. Just a single case for single figure. In plans I have an idea to make kind of a stackable in both directions, wide and up. No supports needed. All postprocessing You will have to do is to remove mouse ears from all parts and use some superglue for bottom part and corner columns. just glue them in to the Bottom Base and You can put some glue to the corner railings to bound acrylic glass to the corners. Don't glue top lid to the main case so You can take it off when needed.Inside dimensions of the case are 7x5in (177.8x127mm) with FLAT Bottom Base and7.39x5in (187.8x127mm) with HOLLOWED Bottom Base As for a glass for this project I have used these Acrylic Sheets from UK Amazon:https://www.amazon.co.uk/gp/product/B0BVZK4FKS/ref=ppx_yo_dt_b_asin_title_o00_s00?ie=UTF8&psc=15x7inch and 1mm thick !!!So for This Display Case model get these or same size ones. Here are presented 2 types of top LID. Solid One. Straight forward, just put it on using and that's it.One with glass (acrylic) window. This one is a bit more tricky. It is splitted in two parts. Here You will have to cut one sheet 2 inches down so it will be 5x5inch (or get ones at this size). Put it in dedicated place and then glue both parts together as it it shown in instructions below: ASSEMBLY INSTRUCTIONSPrepare desired Bottom Base (Flat or Hollowed one) and 4 Corner Columns Pour some Superglue (or one you use to bound your printed materials) to the Corner slots on Bottom Base and on Corner Bottom end Push all the Corner Columns one by one into the slots until they completely snaps in Take 4 Transparent Glass Panels and slide them down using slots in Corner Columns Take a Top Support Bracket and secure top side of Corners and Glass By using some Glue and slots and pins on the Corner Columns and Top Support Bracket Just put on a TOP LID (Solid or Windowed one) And You are done! Additional instruction how to assemble a Windowed Top LID.Cut Your Transparent panel to size of 5x5in to fit a slot in Top Clear Top Part of the LID.Place Transparent panel into a Slot Pour a Glue all over the perimeter of Top Clear Top or Top Clear Bottom part of the LID Put both parts together and use some clamps or weight to keep them firmly together for better boundand You're donep.s.On cover picture for the representative purposes I did use a Deadpool Bust model By EastmanHere is a link to the model. Very Cool model by the way :)https://www.printables.com/model/36689-deadpool-bust-remastered-supportless-edition-stl That's all I think. Enjoy :)You can Buy me a coffee if You feel good doing so :) (And very big Thank You For interest in my work)https://www.buymeacoffee.com/warlogh
With this file you will be able to print Display Case with your 3D printer. Click on the button and save the file on your computer to work, edit or customize your design. You can also find more 3D designs for printers on Display Case.