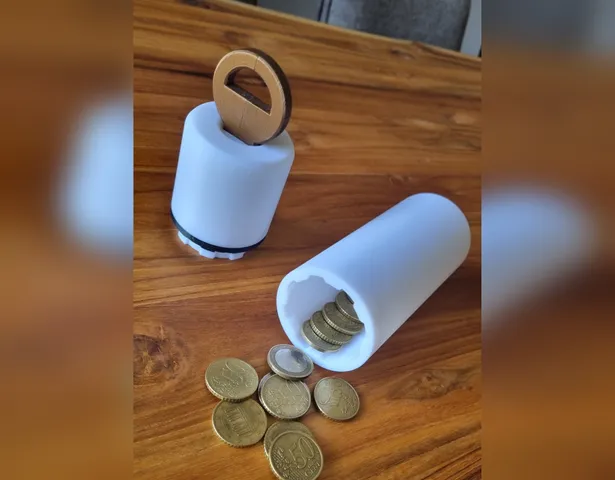
Disc Tumbler Lock Storage Container
prusaprinters
Disc Tumbler Lock Storage Container Update 11.07.2022: Updated tolerances of the inner workigsUpdate 03.07.2022: Updated tolerances of the pin I always love to understand how different every-day mechanisms work. What better way to fully understand a disc detainer (or tumbler) lock, than designing and building one myself?This turned out so nicely that i wanted to share it with you and give you the opportunity to print one for yourself. I always keep this box on my desk in the office to keep my change for the candy vending-machine somewhat safe :) You need:14x M3 “ruthex” threaded insert (others may fit aswell)14x M3 x 8mm countersunk screws1x 7x40 mm steel pin (optional, can be printed of pla) You print:1x upper body1x lower body1x ring1x interlock1x cylinder2x of each disc (90°, 112.5°, 135° and 157.5°)7x spacer2x half key or 1x full key You do:Print 2 pieces of the half key and glue them together. Trust me, thats the only way the key comes out somewhat nice on a FDM machine.Put threaded inserts into the upper body and the cylinder. You don't need to use all 14 inserts. Every other one is plenty enough.Use sandpaper to sand the top and bottom surface of every disc and spacer! Stack the discs and spacers into the cylinder. Make sure that the numbers on the discs are visible from the top. Also the little tap on the discs has to touch the right wall of the cutout in the cylinder (see pictures!)The notch in the spacers has to align with the long slit in the cylinder! (pictures! :))The order of the discs must the following or the key will not work!:90 - 157.5 - 112.5 - 135 - 112.5 - 157.5 - 135 - 90Check if the last disc is flush with the cylinder. If the stack of discs and spacers is “to tall”, go back to sanding a little bit of of each one. Take your time here, because this will make the mechanism work very satisfyingly!Once everything fits, put the steel pin (or printed pin) into the slit in the cylinder and hold it in place. Slide the upper body part over the whole assembly, so that the long notch on the inside matches with the steel/printed pin. (pictures! :))Turn the whole thing upside down. Screw on the ring to hold the cylinder in place inside the upper body part.Screw the interlock onto the bottom of the cylinder. Here it is very important, that the notches on the circumference of the interlock are perfectly offset from the notches in the ring. There must always be a notch in one part, where the other part has none! If not, unscrew the interlock again, turn it 120° and try again. It will fit at some point!Turn everything around and you should be done! Have fun printing and don't hesitate to ask, if you have any questions!Cheers!
With this file you will be able to print Disc Tumbler Lock Storage Container with your 3D printer. Click on the button and save the file on your computer to work, edit or customize your design. You can also find more 3D designs for printers on Disc Tumbler Lock Storage Container.
