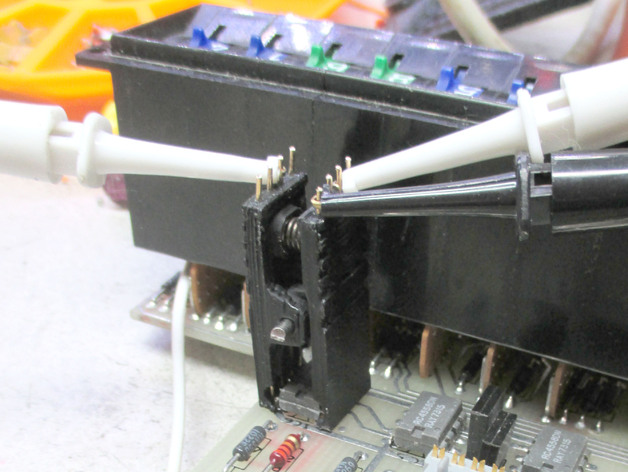
DIP chip clip
thingiverse
Those clips that attach to DIP chips are really convenient for debugging and logic analyzing, but they're way too pricey for hobbyists who need to buy different sizes. Make your own - it's easier than you think! Here's what I came up with: take all the usual sizes for DIP chips and design them yourself! Don't worry if you can't use SCAD; just stick to basic designs. Revision June 22, 2016: clean up those top dividers and get rid of any leftover clutter. Print Settings * Rafts: Doesn't matter - go with it! * Supports: No way - don't even think about it! * Resolution: Print at the highest level possible! Use a tiny nozzle (0.4mm or less) and ultra-thin layers (0.15mm or less). You'll get much better results this way. Don't print with flexible plastic, as it won't hold up well - ABS or PLA are great options. Use no supports; just let it sit and dry for a bit. Add a brim or raft if you notice any warping. After printing, follow these steps: 1. Get some 2mm rods or finish nails and push one through the hinge area to join two clip halves together. You may need to drill it out if there's no fit. 2. Next up, install springs (you might need more than one) in the circular areas inside each clip. Don't close them all the way so that they still open wide enough for test leads. 3. Now get your gold-plated brass head pins (21 gauge is great). They're essential for these clips! Trim their ends so they stick out from top to bottom. 4. Take those long metal rods (about 2") and carefully push them through each pin so they stay in place - don't worry, they won't warp. 5. Now trim the pins' tops off; you can even glue them if you like. Voila! That's it. Your handy chip clips are ready to use - clip on your leads and get debugging ASAP!
With this file you will be able to print DIP chip clip with your 3D printer. Click on the button and save the file on your computer to work, edit or customize your design. You can also find more 3D designs for printers on DIP chip clip.
