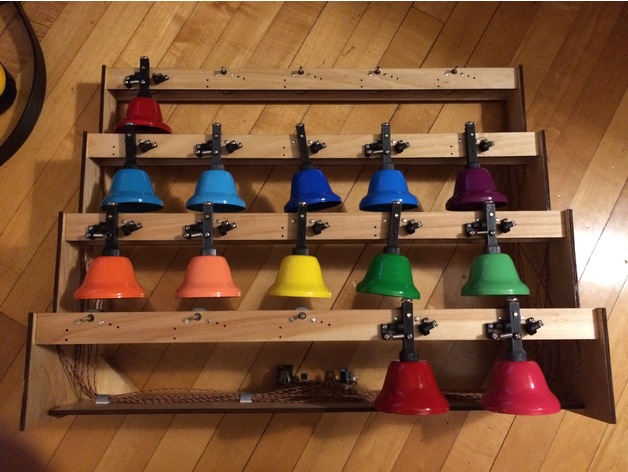
Dingbot, the Mechanical Bell Choir
thingiverse
I Designed a MIDI-controlled Bell Choir That Anyone Can Build Using Affordable Hardware. To Learn More About This Project and Watch Step-by-Step Video Tutorials, Visit Https://www.shamlian.net/projects/bellchoir/. Almost All of the Parts Required for This Project Are Standard #4 Brass Rod, M3 Screws Probably Working Too. I Chose Keystone 720 as My Stops, But Any Standard 1/4-inch Rubber Bumper Would Also Work Great. For the Clapper's Hinge, I Went with Keystone 351, But Any Similar Component Should Fit Fine. One Exception Is the Set Screw for the Motor, Which is a Common 1/4-20 X 1/4-inch Machine Screw, and the Two Screws Holding Each Motor in Place Are M2.6 x 8-mm Screws. Print Settings Rafts Not Necessary Supports Also Irrelevant Post-Printing Once You've Successfully Printed Out All of Your Bell Choir Components, Follow These Final Steps: Inspect Your Print for Any Errors or Warping. If Necessary, Clean Up and Re-Level the Base. Mount Each Component Accurately, Ensuring a Tight Fit Between Parts. Adjust and Fine-Tune Your Hinge Mechanism for Smooth Functionality. Finally, Connect the Motors and Test Out Your Brand New Bell Choir, Tuning as Needed to Produce Clear and Vibrant Sound.
With this file you will be able to print Dingbot, the Mechanical Bell Choir with your 3D printer. Click on the button and save the file on your computer to work, edit or customize your design. You can also find more 3D designs for printers on Dingbot, the Mechanical Bell Choir.
