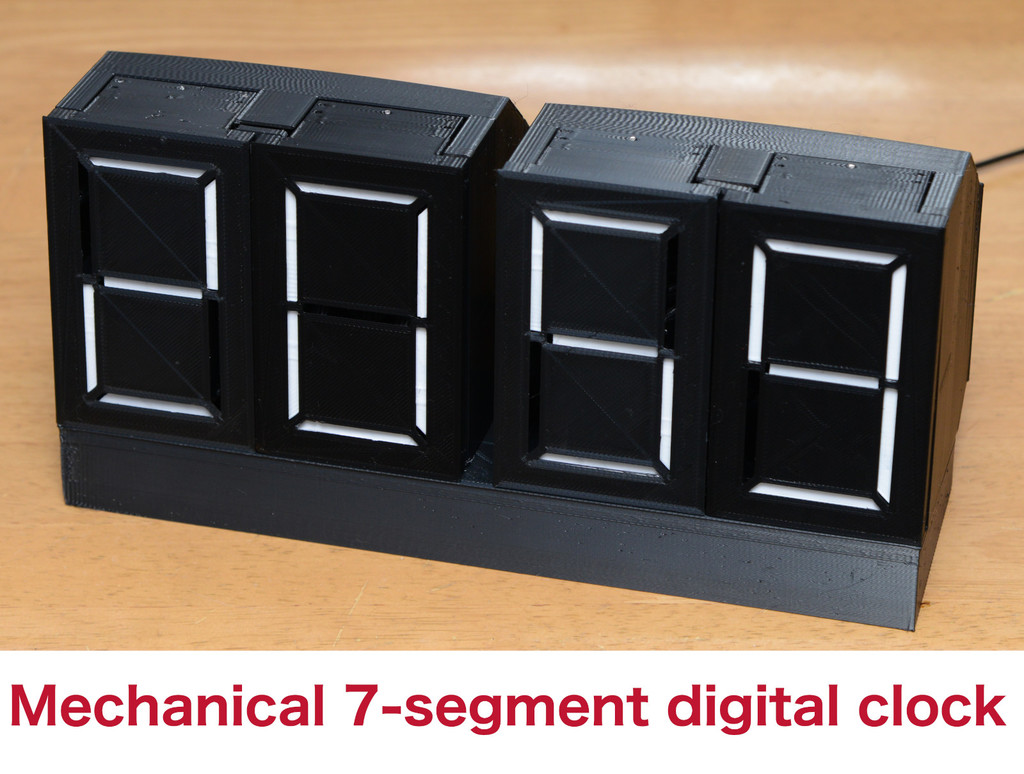
Digital clock with mechanical 7-segment display units
prusaprinters
<h3>Digital clock with mechanical 7-segment display units</h3><ul><li>This clock uses four mechanical 7-segment display units, at <a href="https://www.thingiverse.com/thing:5066794">https://www.thingiverse.com/thing:5066794</a></li><li>Here I provide the base to arrange four units, rear cover and clock codes</li></ul><h3>Video</h3><figure class="media"><oembed url="https://youtu.be/ZwclWyj2Rok"></oembed></figure><h3>How to make</h3><h5>You need</h5><ul><li>Four mechanical 7-segment display units, already published at <a href="https://www.thingiverse.com/thing:5066794">https://www.thingiverse.com/thing:5066794</a></li><li>2mm tapping screws</li><li>micro:bit</li><li>Ks0360 Keyestudio Sensor Shield V2, <a href="https://wiki.keyestudio.com/Ks0360_Keyestudio_Sensor_Shield_V2_for_BBC_micro:bit">https://wiki.keyestudio.com/Ks0360_Keyestudio_Sensor_Shield_V2_for_BBC_micro:bit</a></li></ul><p>(other micro controllers can be used if it can handle 4 servos)</p><h5>How to make</h5><ul><li>Assemble 4 display units. Follow the instructions at <a href="https://www.thingiverse.com/thing:5066794">https://www.thingiverse.com/thing:5066794</a></li><li>Attach display units to the base, using 2mm tapping screws</li><li>Fix the top of the neighboring display units using retainer.stl and screws</li><li>Attach Ks0360 board to the bottom of the base</li><li>Insert micro:bit to Ks0360 board</li><li>Set rear covers (print two instances)</li></ul><p><img src="https://cdn.thingiverse.com/assets/8e/2b/e8/76/6d/man.jpg"></p><p><img src="https://cdn.thingiverse.com/assets/58/35/2f/9a/80/bottom.jpg"></p><p><img src="https://cdn.thingiverse.com/assets/d8/1a/5f/7c/4b/4.jpeg"></p><h3>Adjustments of the position of the servos</h3><p>### offset adjustment</p><ul><li>visit the site at <a href="https://makecode.microbit.org/">https://makecode.microbit.org/</a> and upload check-offset2.hex</li><li>fill the "offmap" table with zeros</li><li>download the editted .hex file from the micro:bit site and flash it to the micro:bit board</li><li>Find the best offset values. A/B button increases / decreases the offset value. Press A and B buttons simultaneously to increase the number to be shown (0-9).</li><li>Write down the found offset values to the source code and check again.</li></ul><h3>using clock code</h3><ul><li>upload clock.hex to micro:bit site</li><li>Copy the offmap table from check-offset2.hex to clock.hex</li><li>download the .hex file and flash it to the micro:bit</li></ul><p>Category: Gadgets</p>
With this file you will be able to print Digital clock with mechanical 7-segment display units with your 3D printer. Click on the button and save the file on your computer to work, edit or customize your design. You can also find more 3D designs for printers on Digital clock with mechanical 7-segment display units.
