Digital clock based on Arduino
thingiverse
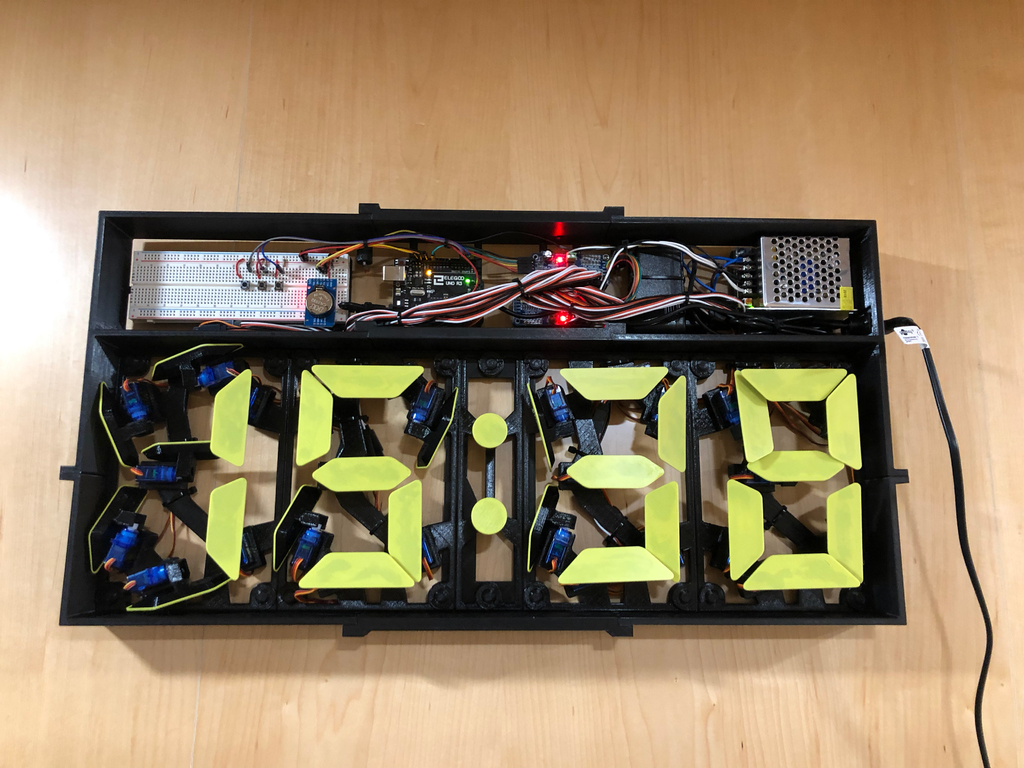
I uploaded a video showcasing the clock's startup sequence and time-setting process: https://www.youtube.com/watch?v=rmQThXoI2bg This project is truly impressive. Utilizing the otvinta 3D design, which can be found at www.otvinta.com, I aimed to create this clock using Arduino instead of Raspberry Pi. To accommodate all the electronics, I redesigned the 3D model from scratch and wrote the code from zero. This was a thrilling experience. The clock features three buttons that allow users to set the time. The first button enters hour-setting mode, followed by minute-setting mode, and finally returns to clock mode. The second and third buttons decrease or increase hours or minutes accordingly. To power this project, I employed an Arduino board, two PCA9685 servo controllers, and an RTC3231 real-time clock. Additionally, I utilized two separate power sources: one for the Arduino and electronics, and another for the servos. Within the provided files lies my Arduino code, which I have attempted to write in a clear and well-documented manner. Your feedback on this code is greatly appreciated. One potential issue I've encountered is that the servo positions are not always precise, resulting in segments sometimes failing to reach their intended final position. Unfortunately, due to my limited knowledge of electronics, I'm unable to resolve this problem.
With this file you will be able to print Digital clock based on Arduino with your 3D printer. Click on the button and save the file on your computer to work, edit or customize your design. You can also find more 3D designs for printers on Digital clock based on Arduino.