Dice Mixer (Tärningsblandare)
prusaprinters
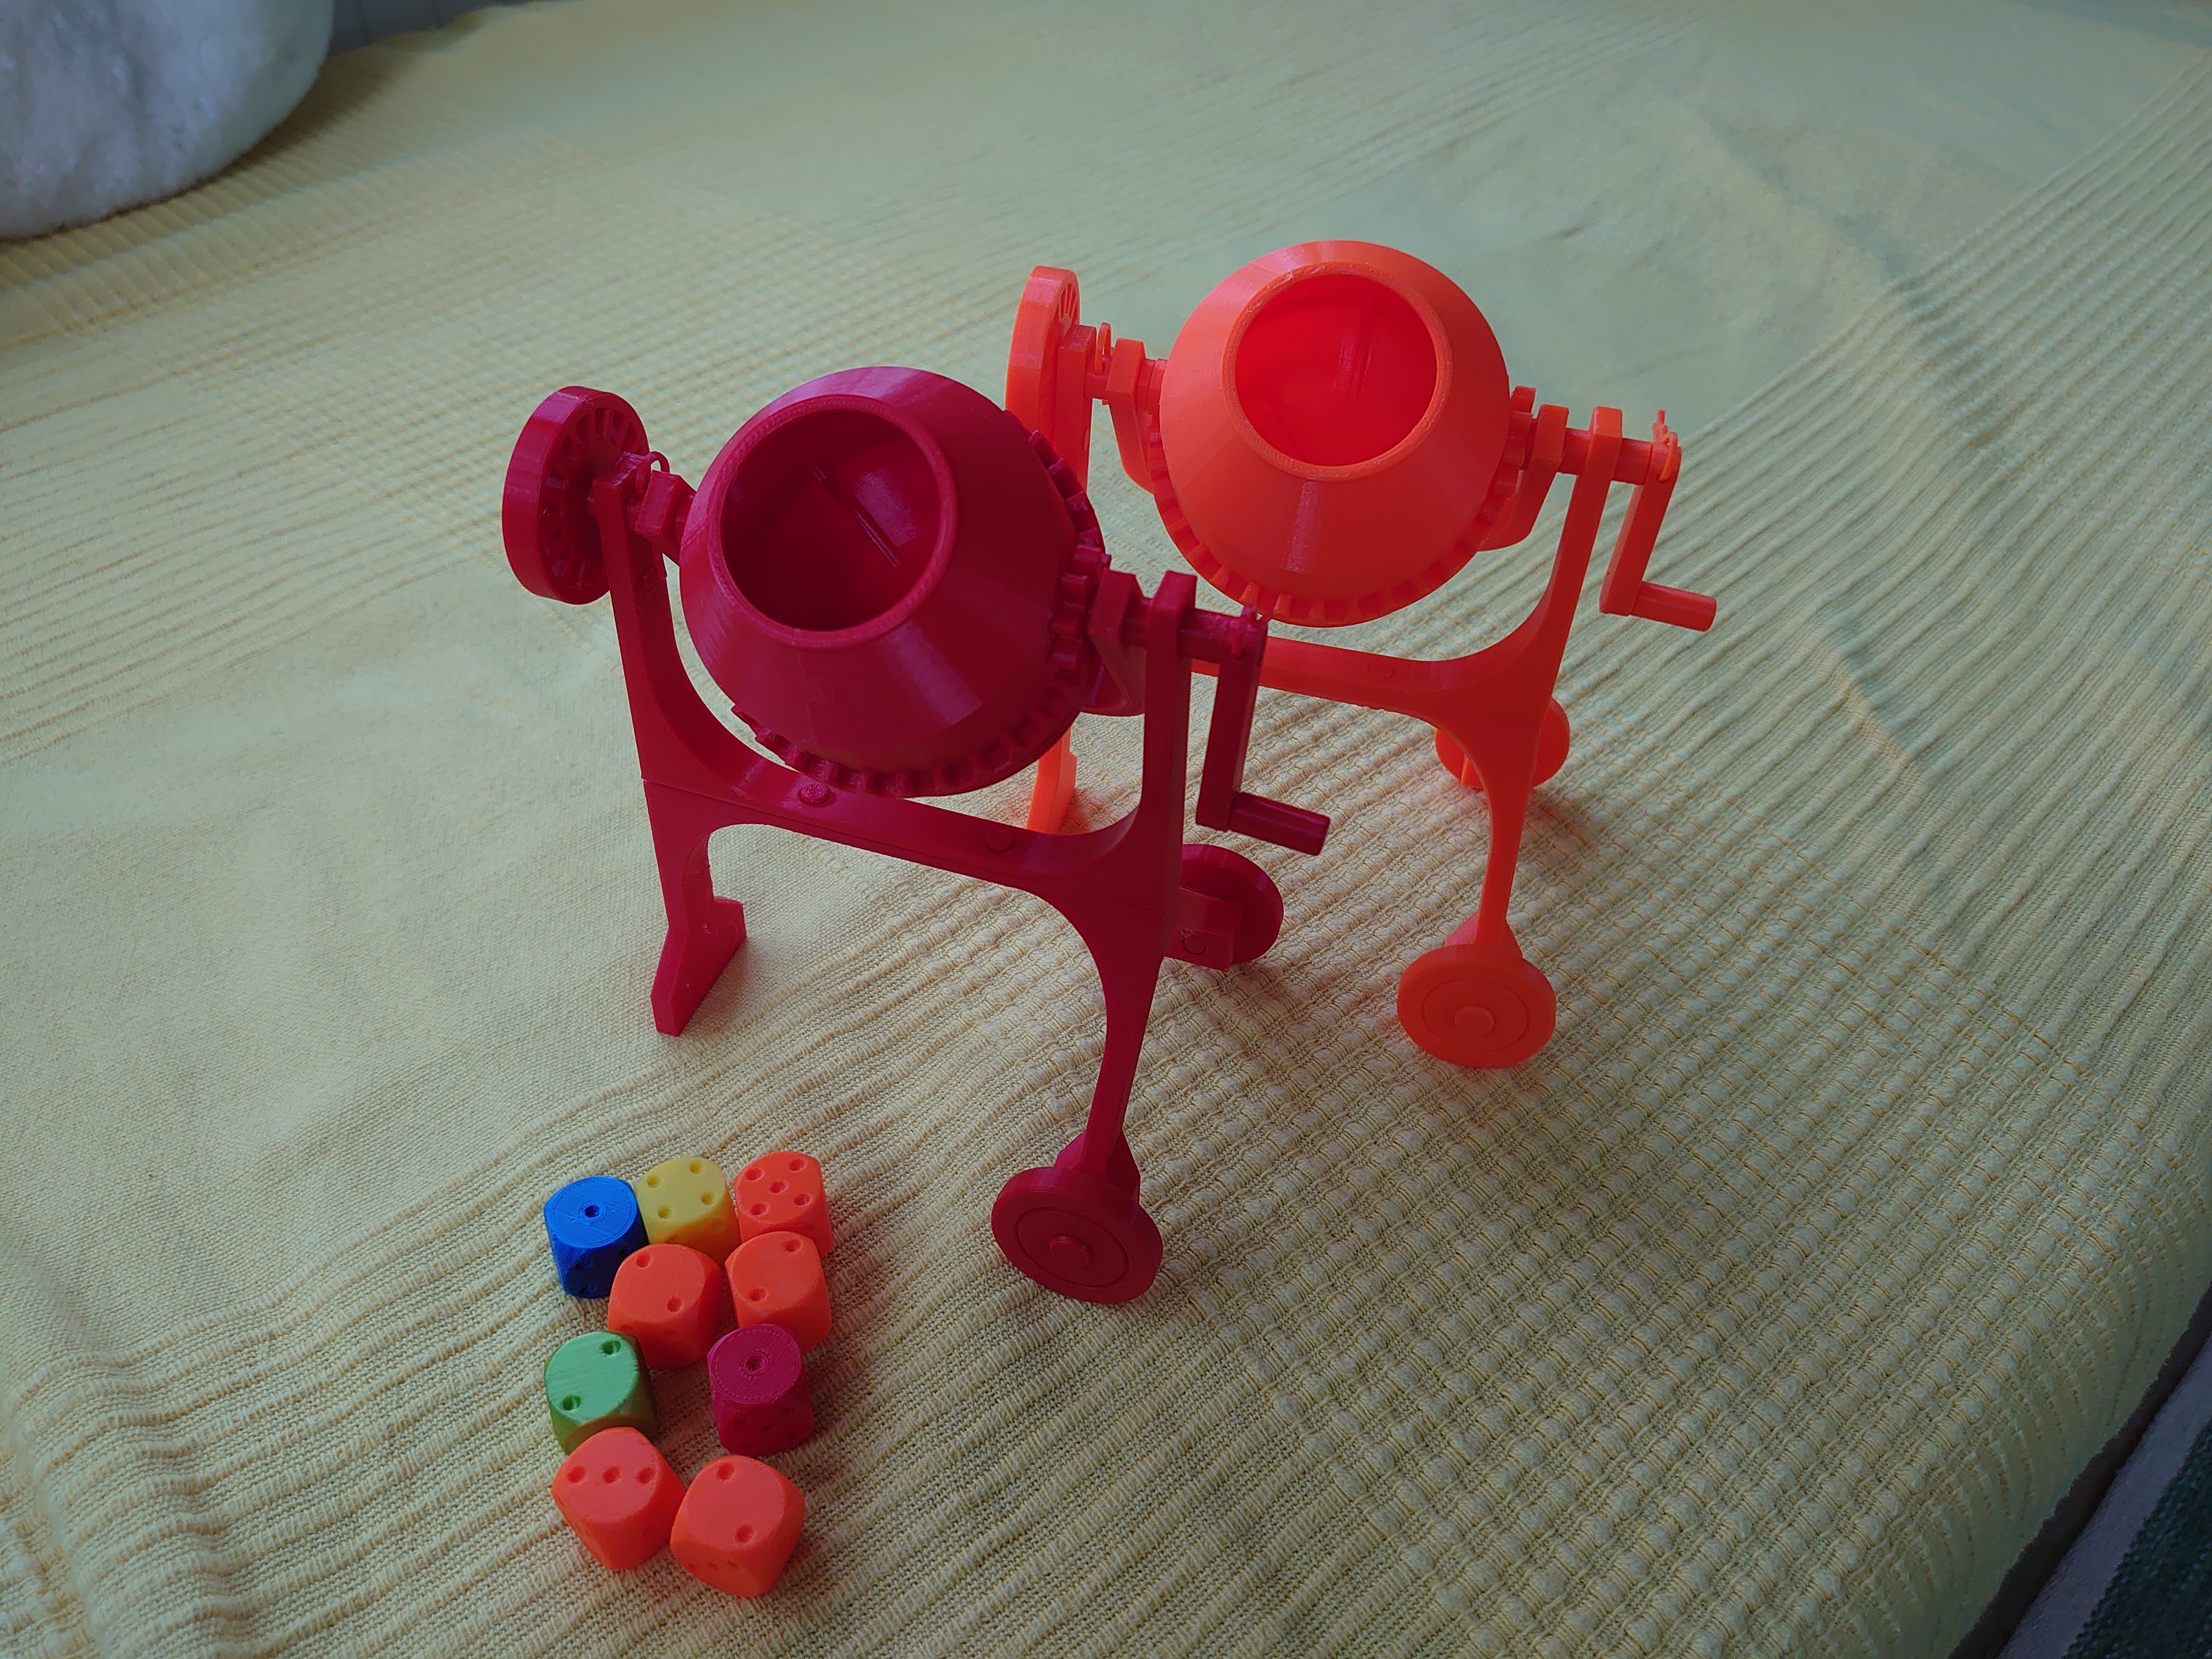
<p>First, English is not my native language!</p><p>Some parts fits very tight together and <strong>should be</strong> very tight. Some parts can be difficult to assemble. Some force may be required. If a part breaks, fret not, because you got a 3d printer.</p><p>Printed with Prusament PLA Orange and Prusament Lipstick Red (I have not tried PETG)</p><p>The orange one was printed on MK3S and the red one on the MINI.</p><p>Also, for the orange one I printed all small parts separately but for the red one I printed all the small parts in one print.</p><p>I had some issues with the red small parts. It might be better to print the parts separately.</p><p>Also, some holes are made sideways instead of bottom to top, but this is a minor issue.</p><p>I have not used any glue, but you could glue the lower and upper stand together.</p><p>Also you could use a drop of glue for the upper sticks in the tipper stand though I haven't.</p><p>(To print dice, take a look at https://www.prusaprinters.org/prints/71570-die-tarning)</p><p>Now, this is a toy, you have to hold when you crank.</p><p>The container can be difficult to attach to the tipper stand. You have to bend a bit but with some patience it should work.</p><p>And Yes I have used (too) many hours (of my vacation) in this project, though I haven't counted, but have had much fun :-)</p><p>If you have any issues with the parts please let me know.</p><h3><strong>Assembly</strong></h3><h3><strong>#1</strong></h3><figure class="image"><img src="https://media.prusaprinters.org/media/prints/74647/rich_content/b1bae633-4dd7-4680-a373-4ec3a6dc2548/standlower.png#%7B%22uuid%22%3A%22995c4a43-3a72-43c3-8469-746804fe276c%22%2C%22w%22%3A1051%2C%22h%22%3A547%7D"></figure><h3>#2</h3><figure class="image"><img src="https://media.prusaprinters.org/media/prints/74647/rich_content/06f71459-bcd5-479f-9f88-5a09d1e607f7/standupper.png#%7B%22uuid%22%3A%229090361b-a06d-49e5-a5c0-d31f3485ca6a%22%2C%22w%22%3A815%2C%22h%22%3A546%7D"></figure><p>#2 the plugs can be somewhat hard to fit into place, use a tool to press. May be glued together with #1</p><p> </p><h3>#3</h3><figure class="image"><img src="https://media.prusaprinters.org/media/prints/74647/rich_content/1a3b4afd-8c7b-45e7-99bd-4c0e93d9e600/tipperstanda.png#%7B%22uuid%22%3A%22e0e20830-6c08-4580-b9de-89b52291ea65%22%2C%22w%22%3A797%2C%22h%22%3A542%7D"></figure><p>#3 TipperStandStickLeft may be glued, though I haven't</p><h3>#4</h3><figure class="image"><img src="https://media.prusaprinters.org/media/prints/74647/rich_content/ad6a38f8-aff8-49c3-85b2-0f1b89330d4b/tipperstandb.png#%7B%22uuid%22%3A%22025022dd-cbe5-4873-8094-1a3490a40a22%22%2C%22w%22%3A751%2C%22h%22%3A559%7D"></figure><p>#4 TipperStandStickCrank may be glued, though I haven't</p><h3>#5</h3><figure class="image"><img src="https://media.prusaprinters.org/media/prints/74647/rich_content/081227e8-27ff-41ce-9abe-311bbf952b70/barrel.png#%7B%22uuid%22%3A%22c19cdf78-bda8-4ae4-a934-2ca71fd597bc%22%2C%22w%22%3A954%2C%22h%22%3A546%7D"></figure><p>#5 It may be easier to attach the barrel after step 7. Anyway, you have to bend and twist to get it into place.</p><h3>#6</h3><figure class="image"><img src="https://media.prusaprinters.org/media/prints/74647/rich_content/d14868b4-09a3-4394-8965-d6b20f209780/tippergear.png#%7B%22uuid%22%3A%223b365341-1eb1-42a2-a9f7-21b25631e154%22%2C%22w%22%3A988%2C%22h%22%3A578%7D"></figure><p>#6 can be difficult the TipperGear into “TipperStandStickLeft” (no problem with the orange but some problems with the red)</p><h3>#7</h3><figure class="image"><img src="https://media.prusaprinters.org/media/prints/74647/rich_content/6f4aa209-1bd1-4458-8e01-63d609eec0e6/crank.png#%7B%22uuid%22%3A%228c66a4c7-295e-4158-87f5-046426c41caf%22%2C%22w%22%3A1091%2C%22h%22%3A624%7D"></figure><p>#7 the crank stick and handle are printed as one and the handle rotates within the stick.</p><h3>#8</h3><figure class="image"><img src="https://media.prusaprinters.org/media/prints/74647/rich_content/96646537-fbee-46f7-9693-79c644f35428/complete.png#%7B%22uuid%22%3A%2212445533-6d9b-444f-a311-9c4c16459242%22%2C%22w%22%3A925%2C%22h%22%3A604%7D"></figure><p>#8 <strong>Hurray, you're done. </strong>Now you should “train” it to get it to work smoothly.</p><h3>Lock/unlock</h3><figure class="image"><img src="https://media.prusaprinters.org/media/prints/74647/rich_content/db293b91-4d46-4aab-ad4a-52fd3fda7b23/completeb.png#%7B%22uuid%22%3A%22d790bf7e-8f65-4ba6-8951-851a5c76d3c7%22%2C%22w%22%3A921%2C%22h%22%3A581%7D"></figure><h3>Start rolling (or tumble) the dice! </h3><p>---</p><p>BTW. The next project is to add a stepper motor instead of the crank. :-)</p>
With this file you will be able to print Dice Mixer (Tärningsblandare) with your 3D printer. Click on the button and save the file on your computer to work, edit or customize your design. You can also find more 3D designs for printers on Dice Mixer (Tärningsblandare).