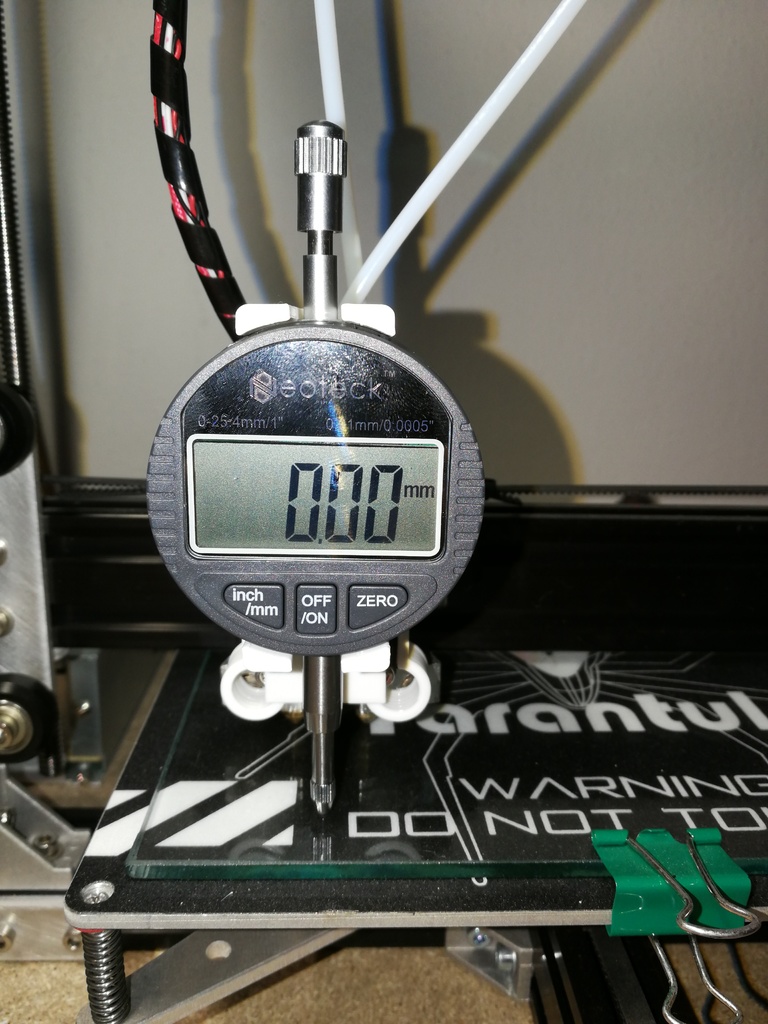
Dial gauge clamp for Tevo Tarantula
prusaprinters
<p>This is a clamp designed to level your bed with the help of a dial gauge.</p> <p>With this clamp you can attach the gauge to your hot-end (single and dual nozzle) and make sure your bed is level by a precision of 0,01mm.</p> <p>The clamp is simply pushed onto the stock hot-end fan.</p> <h3>Update</h3> <p>I have designed a new clamp to support the Steinle 3105 analog dial gauge. You now find two stls for the different dial gauges</p> <ul> <li>Neateck Clamp [1]</li> <li>Steinle 3105 Clamp [2]</li> </ul> <p>See parts list for the links</p> <h3>Print Settings</h3> <p><strong>Printer Brand:</strong></p> <p>TEVO</p> <p class="detail-setting printer"><strong>Printer: </strong> <div><p>Tarantula</p></div> <p><strong>Rafts:</strong></p> <p>Doesn't Matter</p> <p class="detail-setting supports"><strong>Supports: </strong> <div><p>Yes</p></div> <p><strong>Resolution:</strong></p> <p>0,2</p> <p class="detail-setting infill"><strong>Infill: </strong> <div><p>30</p></div> <p><strong>Notes:</strong></p> <p>The raft isn't needed by this design but removing all supports is much easier since they stick to the raft and can be pealed of easily.</p> <p>TIP: To make sure the clamp is even on the fan, screw in additional two screws (should be spares in the box) into the fan. So the clamp has an even surface to be pushed against.</p> <h3>Partlist</h3> <p>[1] Neateck digital dial gauge <a href="https://www.amazon.de/gp/product/B01H035DRO/ref=oh_aui_search_detailpage?ie=UTF8&psc=1&tag=thingiverse09-20">Amazon DE</a> Amazon US</p> <p>[2] Steinle 3105 analog gauge <a href="https://www.amazon.de/gp/product/B01M0ACNST/ref=ppx_yo_dt_b_asin_title_o00_s00?ie=UTF8&psc=1&tag=thingiverse09-20">Amazon DE with magnetic stand</a> <a href="https://www.amazon.de/STEINLE-Messuhr-3105-0-10-Ablesung/dp/B01HIHA3RW/ref=sr_1_1?ie=UTF8&qid=1550917942&sr=8-1&keywords=steinle+3105&tag=thingiverse09-20">Amazon DE</a></p> <p>Sorry I couldn't finde the gauge on amazon US...</p> <h3>Instructions</h3> <ol> <li>Mount the gauge on the clamp</li> <li>Mount the clamp to your hot-end, by simply pushing it over the fan</li> <li>Home your Z-Axis</li> <li>Now use a pice of paper to caliber one corner of your bed</li> <li>When leveled, turn on the gauge and, if necessary reset it to 0.00</li> <li>Move your print head the the other corners and trim the bed till the gauge shows 0.00 again</li> <li>Repeat step 6 till no adjustments are needed any more.</li> </ol> <p>TIP: I use <a href="http://www.pronterface.com/">Pronterface</a> to move the head and the gauge to the same position each time I level the printer.</p> <p>I have created a <a href="https://gist.github.com/ChristophvdF/d6843a5acce27c4b1daf8d7bbb671498">gist</a> containing all the macros for pronterface to calibrate the print. Since the files are sorted alphabetically in the gist please follow this instructions in which order to use the macros</p> <blockquote> <p>WARNING</p> <p>Please make sure you home your printer first before you use any of the mentioned macros. The PaperCalibration.gcode contains the home gcode (G28) before it sets all axies to 0. You just have to home the printer once (not after each macro)</p> </blockquote> <ol> <li>PaperCalibration.gcode</li> <li>ZMontage.gcode (Mount the bracket and gauge on the hot-end)</li> <li>FrontLeftCorner.gcode</li> <li>FrontRightCorner.gcode</li> <li>BackRightCorner.gcode</li> <li>BackLeftCorner.gcode</li> </ol> </p></p></p> Category: 3D Printer Accessories
With this file you will be able to print Dial gauge clamp for Tevo Tarantula with your 3D printer. Click on the button and save the file on your computer to work, edit or customize your design. You can also find more 3D designs for printers on Dial gauge clamp for Tevo Tarantula.
