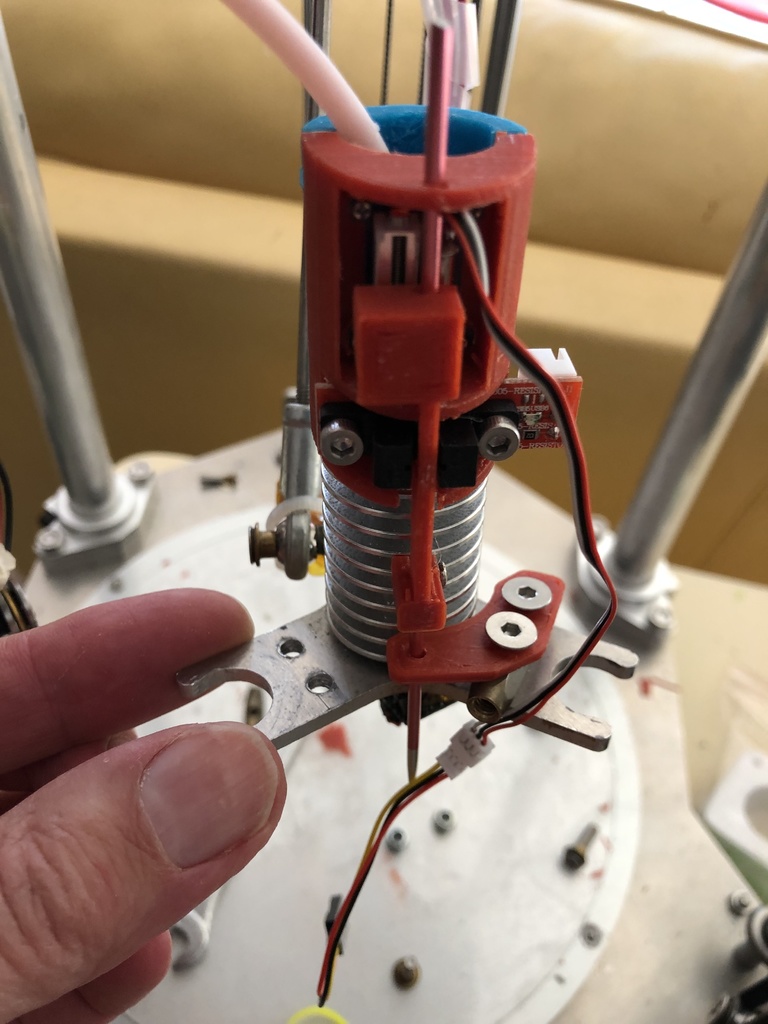
DHP linear servo Z-Probe
thingiverse
This is a Z-Probe that I designed for my 3KU printer, but can be used with a wide range of printers by adjusting the lower guide. You will need to print the STL files; note that the body is actually two parts with a skirt that you cut off after printing to minimize warping during printing. To assemble this Z-Probe, you will require: 1 x 2mm aluminum knitting needle (cut to length) 2 x M3x30mm screws with nuts to mount the optical end-stop and hold the halves together 2 x M20 (optional) to hold the upper part of the halves together 1 x M2x8mm self-tapping screw to close the lower arm firmly around the needle 1 x optical endstop 4 x M1x5 self-tapping screws to mount the linear micro servo 1 x micro linear servo (left) - these come as "left" and "right" units; get the left one, here is an example: https://www.aliexpress.com/item/3-7-5V-RC-Servo-Plastic-Nylon-Gear-Digital-Linear-Servo-For-RC-Ultra-micro-Aircraft/32972306205.html I have picked a seller at random; I have no affiliation with this seller. This Z-Probe is the only probe that I have successfully used since I got a PEI build sheet on my 3KU. My configuration uses Smoothie, and here are the settings: ## Z-probe # See http://smoothieware.org/zprobe # Switch module for servo control switch.servo.enable true # switch.servo.input_on_command M280 # M280 S7.5 would be midway switch.servo.input_off_command M281 # same as M280 S0 0% duty cycle, effectively off switch.servo.output_pin 1.23 # must be a PWM capable pin switch.servo.output_type hwpwm # H/W pwm output settable with S parameter in the input_on_comand #switch.servo.pwm_period_ms 20 # set period to 20ms (50Hz) default is 50Hz zprobe.enable true # Set to true to enable a z-probe zprobe.probe_pin 1.28^ # Pin probe is attached to, if NC remove the ! zprobe.slow_feedrate 5 # Mm/sec probe feed rate #zprobe.debounce_ms 1 # Set if noisy zprobe.fast_feedrate 50 # Move feedrate mm/sec zprobe.probe_height 5 # How much above bed to start probe #gamma_min_endstop nc # Normally 1.28. Change to nc to prevent conflict, custom_menu.dhp_probe_out.enable true # custom_menu.dhp_probe_out.name DHP_Probe_Out # custom_menu.dhp_probe_out.command M280S11 # custom_menu.dhp_probe_In.enable true # custom_menu.dhp_probe_In.name DHP_Probe_In # custom_menu.dhp_probe_In.command M280S3 # custom_menu.dhp_probe_bed.enable true # custom_menu.dhp_probe_bed.name DHP_Probe_Bed # custom_menu.dhp_probe_bed.command M280S12.0|G32|M280S3.0|G1X0Y0Z10 # # Delta grid leveling strategy leveling-strategy.delta-grid.enable true # Enable grid levelling leveling-strategy.delta-grid.radius 80 # Grid radius in millimeters leveling-strategy.delta-grid.size 11 # Grid size, must be an odd number leveling-strategy.delta-grid.do_home true # Whether to home before calibration leveling-strategy.delta-grid.save true # Whether to automatically save the grid leveling-strategy.delta-grid.initial_height 10 # Height at which to start probing leveling-strategy.delta-grid.probe_offsets -13,7,2.2 # Z-Probe Offset To deploy the probe, you go: M280S11 to retract the probe go: M280S3 or as Have a LCD attached, I go to the custom menu page and select: dhp_probe_out or dhp_probe_in or to run the levelling strategy: dhp_probe_bed with a M500 at the end to save the config override file on the internal SD Card. I dumped Marlin a while ago so I am not sure how to specify the equivalent in Marlin. Here is a video of it working https://youtu.be/ga1Hua26YZo
With this file you will be able to print DHP linear servo Z-Probe with your 3D printer. Click on the button and save the file on your computer to work, edit or customize your design. You can also find more 3D designs for printers on DHP linear servo Z-Probe.
