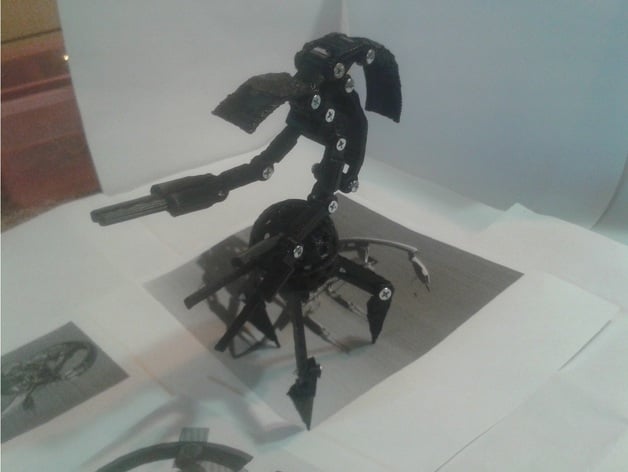
DESTROYER DROID - Star Wars - Meccano Parts
thingiverse
This is one of my favorite robot architectures. It's not perfect, as you'll see below. I've been eager to build this one for a while now, and here it finally is! Building Notes: The frame is based on the 3-JOINT BRACE Part, which connects the BACKBONE Part to the BELLY Part to the SHOULDER Part. The 2-JOINT BRACE Part links the HEAD Part to the BACKBONE Part. The TORSO JNT Part joins the BELLY to the Top DOME Part. Upper and Lower DOME Parts are connected by 2-HOLE STRIP Parts (internally). Legs have a choice of Long or Short UPPER LEG Parts. Arms are dual ARM Parts chained from the SHOULDER to Dual ARM GUN Parts. I recommend using #4 or #6 Screws, or M2 or M3 Bolts and Nuts. Note: A cat isn't included in this project. This architecture is based on Meccano Parts - see links below. However, its walking capability is limited by the three-legged design, which is unstable due to a broad center of balance. It would easily topple over trying to walk... Four legs would be much better! I have the correctly built architecture on one of my 100 robots on the shelves. Check out the fourth image for a new friend visitor! Have fun building! Obviously, erector parts (including #6 Screws or 3mmx10mm bolts and nuts) are needed to build this model with these printed parts. You may want to refer to: Meccano Base Parts Plates Struts Angles Millenium Falcon Star Wars Meccano Expansion for more parts. Print Settings: Printer Brand: RepRap Printer: Mendel Rafts: Yes Supports: Yes Resolution: 0.2mm - 0.8mm Nozzle Tips Notes: I printed these on a Mendel RepRap with 1.75mm fiber. I used a 0.8mm Nozzle Tip with a 0.5mm Layer Height setting. You can use any tip from 0.2mm to 0.8mm and it should print fine. It took between 3-10 minutes per part to print. The Backbone and Belly Ring parts need to be rotated 90-degrees to have a ball-round surface on the table when printing properly. Rafts are suggested for these. Some parts may be a little thin and fragile, so be careful when removing. Post-Printing: Some parts may have burrs that need filing to finish. If the bolts seem loose, a glue gun may help. How I Designed This: I used TinkerCad.
With this file you will be able to print DESTROYER DROID - Star Wars - Meccano Parts with your 3D printer. Click on the button and save the file on your computer to work, edit or customize your design. You can also find more 3D designs for printers on DESTROYER DROID - Star Wars - Meccano Parts.
