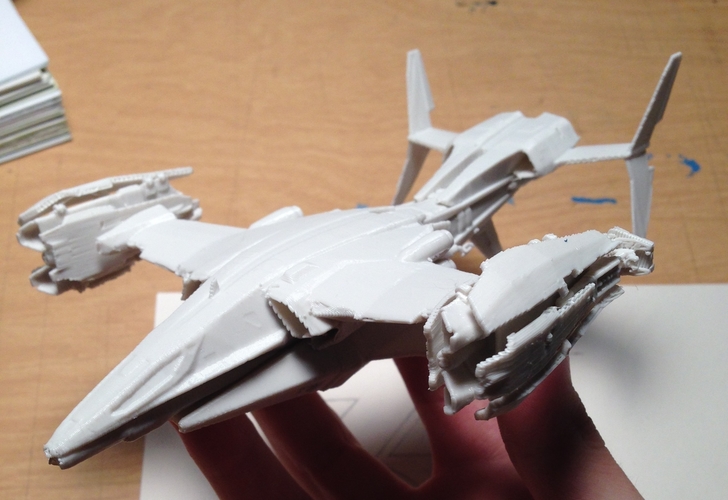
Destiny - Hawk VTOL ("Alpha Umi" Player Jumpship)
pinshape
The "Hawk" jumpship and player aircraft from Destiny, specifically version two, were a thrilling challenge to bring to life in 3D form. A huge shoutout goes to lowlidev for providing their site's downloadable 3D game assets, which proved invaluable for this project. This print was not only fun but also tricky, making it less suitable for beginners who are just starting out with printing models. Important Note: If you're planning to attempt this model, be sure to read the entire wall of text below, as it contains crucial notes on printing and assembly that will help you avoid common pitfalls. The "Hawk" jumpship comes in several pieces, including the forward half of the ship, which is split into two parts - the top and bottom - contained within the file labeled "fore." The tail section, meanwhile, is stored in a separate file labeled "aft." These parts snap together seamlessly without requiring glue, but there's a subtle trick to getting them aligned correctly. To assemble the forward half of the ship, you'll need to hold the tail section against the upper fore part and then slot the lower fore part over it, sliding its tab into the corresponding slot on the bottom of the upper fore piece. This might require some gentle persuasion, but once done, it will stay together securely. You may need to sand down some of the contact points to ensure a smooth fit, as the tolerances can be a bit tight. The engines come in two versions - one with all pieces oriented vertically and another with them oriented horizontally. Orientation is crucial, both aesthetically and for the success of the print. I initially intended to print them vertically, but my printer had other plans, so I ended up printing them horizontally instead. You can choose which version to print, but keep in mind that the horizontal one may be more reliable. The engines fit together nicely, but due to their small size, they might not stay assembled without glue. The good news is that they're designed to be repositionable, allowing you to point them either up or forward. For displaying purposes, it's ideal to have them pointing up, but if you can manage to print the vertical version, it should look even better. When attaching the engines to their respective wings, make sure to install the cowling plate with a hole first, followed by the main engine body. If you need to remove them later, be prepared to do so separately rather than trying to pull them off as one unit. Be extremely cautious when removing supports and handling the finished model, as some parts are fragile and prone to breaking. Specifically, the tail fins, vestigial leg landing gear on the tail piece, tabs on the engine cowling, and the landing gear that attaches to the engine require extra care. Depending on your printer's resolution, some details might not print correctly, which is unfortunate but unavoidable. I attempted to create a solid and airtight model, but the printers at my service can be finicky, making it challenging to adjust the design for optimal results across multiple printers. You may need to sand down contact points or use a craft knife to increase the tolerances on parts like the attachment point between the engine and the wing. Lastly, make sure to set the scale correctly when printing this model - I believe it's set to millimeters, but feel free to adjust it so that it's around 10cm long in total. If you don't, the finished product might be too small to work with. Despite the challenges, I'm thrilled with the results and hope you'll enjoy this model as much as I do. The "Hawk" jumpship is one of my favorite vehicle designs from the game, and it's a testament to Isaac Hannaford's incredible concept art skills.
With this file you will be able to print Destiny - Hawk VTOL ("Alpha Umi" Player Jumpship) with your 3D printer. Click on the button and save the file on your computer to work, edit or customize your design. You can also find more 3D designs for printers on Destiny - Hawk VTOL ("Alpha Umi" Player Jumpship).
