Destiny ghost
thingiverse
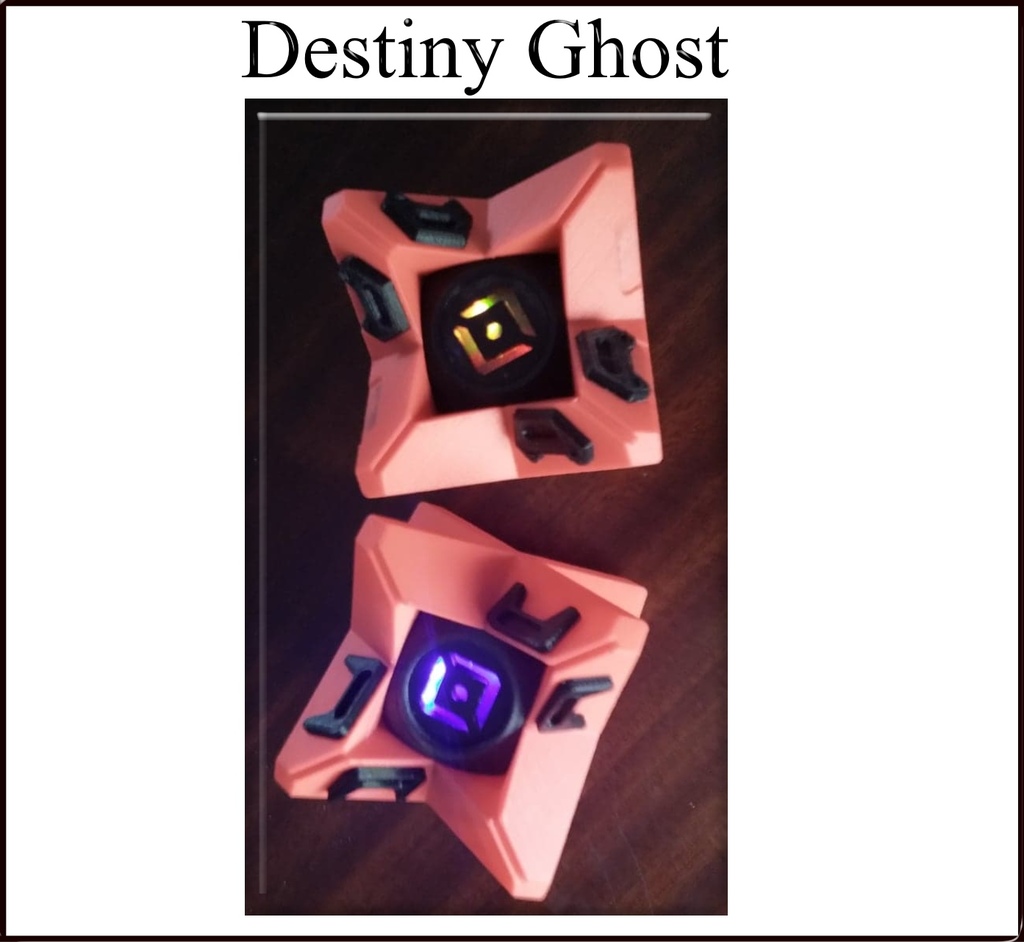
Destiny Ghost for 3D Printing - Customize Your New Friend! Add some sparkle to your creation by adding LED lights that can be lit up if desired. You can even paint your new buddy in any color you like, giving it a personal touch. To keep the little guy together, consider using 6mm magnets that attract each other all around the shells. Simply epoxy them in place for a secure hold. Alternatively, you can glue the ghost together if you prefer. Smooth out the middle ball by sanding it so it moves freely within the shell. This will allow for a more realistic and dynamic design. Protect your creation's front eye with a thin layer of cellophane, which can be easily secured with a clip from inside the ball. You can also use a sweet wrapper as a makeshift cover - get creative! Place the jet attachments wherever you like on the ghost, giving it a unique personality that's all its own. To bring your creation to life, you'll need a coin cell holder, LEDs, and a toggle switch. Don't worry if you're not an expert - just grab a small soldering iron and some solder, and you'll be lighting up your destiny ghost in no time!
With this file you will be able to print Destiny ghost with your 3D printer. Click on the button and save the file on your computer to work, edit or customize your design. You can also find more 3D designs for printers on Destiny ghost .