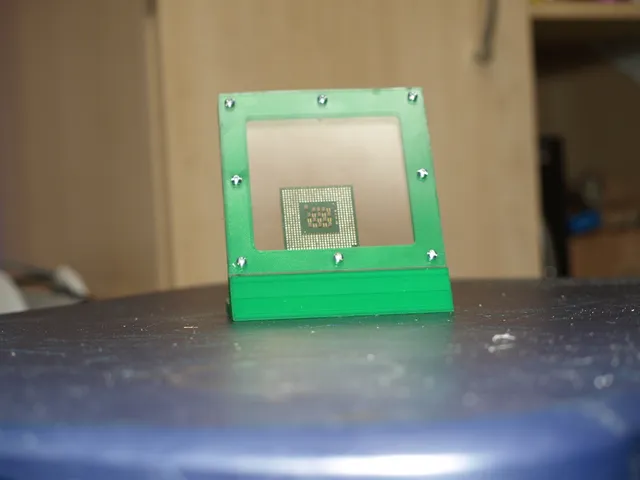
Desktop Display Case
prusaprinters
A case to display to sit on a desk or bookcase. Design features a two pice 3D printed setup and utilizes two pieces of Acrylic or Plexiglass/Lexan to provide a see through display mount. Since the plastic windows are held in place by Nuts & Bolts/Machine Screws, assembly and disassembly is easy and repeatable. Items inside the case can be held in place by glue to the back piece of plastic or via pressure from a the plastic windows on the object. Alternatively the objects can remain loose and move around when shaken. Current design provides a 3 inch square working space that accommodates items .215 inches thick (loose fit) or slightly more (pressure fit). Instructions Step 1: Measure and Modify Begin by measuring the object(s) you want to place in the display case. The current design files give a 3 inch square space (with rounded corners) that is .215 inches thick. Adjust these figures to your own desire. Key is the thickness of the mount itself. If you want to have your object(s) stay in place by friction than the mount would need to be slightly thinner than the object itself. Alternatively if you want things to be loose than you want to ensure the thickness is big enough to prevent things from sticking. When modifying keep in mind any empty space you want. Also note the base width should match the width of the mount, adjust accordingly. The base does not include the three screw holes that would be necessary to attach it to the mount. If your comfortable that these will print well add them now (make sure to measure correctly). Otherwise you will need to drill these by hand later. The original 123d Design file is included for your moding use. For more information 123d Design or to download the software visit: http://www.123dapp.com/design. Step 2: Supplies and Printing Print the two parts on a 3D Printer. If you modify the files for your own use, make sure to create new STL files with your modifications. This is easier from the 123d Design Desktop app then the web interface. In addition to the 3d Printed parts you will need: Plexiglass or Acrylic. You will need enough to cut two windows the size of the mount. For the included STL files this is 4 Inches square. A .080 Thickness worked well with the included STL files, providing a relatively flush line with the base. Machine Screws/Bolts and nuts. For the included STL files #4 Machine Screws fit well (though a bit tight in the drilled holes). Keep in mind length (which would be the thickness of the mount, plus the thickness of the plastic times two, plus room to screw on the nuts with extra to spare). For the included files, I used 5 #4-40 X 3/4 inch machine screws for the top five holes. For the three holes that will be on the bottom #4-40 X 1 Inch machine screws worked well. These bottom screws have to also go through holes in the based (drilled later). Step 3: Cut the Windows Next you will need to cut the windows and drill the corresponding holes so the screws /bolts can go trough the windows. For instructions on working with acrylic visit: http://www.plaskolite.com/Fabrication/Acrylic/Cutting-And-Machining. For the holes a 1/8 (.125) diameter worked was used and works well with the #4 Machine Screws used. To line up the holes I used the already printed mount as a template which I held in place with clamps. This worked ok at best (I still managed to get mis-aligned holes). Drill presses are recommended. While at it the base was designed without the holes necessary to attach to the base. This was done to avoid any overhang and to ensure I get the alignment right. If you did not add the holes in the design before printing you will need to drill these out now. Step 4: Assemble Put the pieces together and screw/bolt tight. It should go Plexiglass/Acrylic, Mount & Object(s), Plexiglass/Acrylic, and base. Refer to the pictures for visuals. Category: Office
With this file you will be able to print Desktop Display Case with your 3D printer. Click on the button and save the file on your computer to work, edit or customize your design. You can also find more 3D designs for printers on Desktop Display Case.
