Desiccant drier cage for use with filament driers
prusaprinters
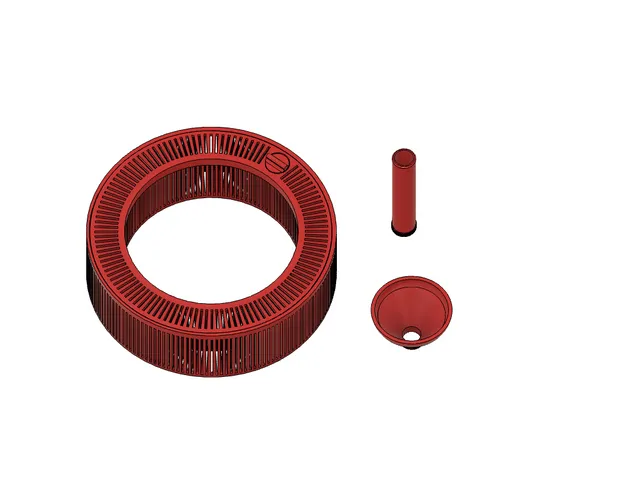
This is a re-engineering of a desiccant drier I saw on another site. I created this model in Fusion 360The original model screwed at the centre, allowing the edges to flex and leak desiccant. I added threads to the outside cover edge for a secure sealAdded inner lip to the cover to secure the inside perimeter Created a fill and drain portCreated a funnel and spout that can be screwed into the port for hands and mess free transfersI am not convinced this is a worthwhile endeavour, microwaves are much faster. Let me know what you think.Makes sure you print in ABS for heat resistance. PETG ones can and have meltedUse a .28 layer height for the main body and expect a 10 hour print on a Bambu X1CC in regular modeAll other parts need to be printed at 2.0 for threads to work.Heat soak your printer with bed set to 100 degrees for at least an hour if printing on a Bambu X1CCIt may be tough to screw the top cover in so just push it in and it will ‘clip’ in. Then you ran rotate the cover to tighten
With this file you will be able to print Desiccant drier cage for use with filament driers with your 3D printer. Click on the button and save the file on your computer to work, edit or customize your design. You can also find more 3D designs for printers on Desiccant drier cage for use with filament driers.