Delta dimensional calibration tool
thingiverse
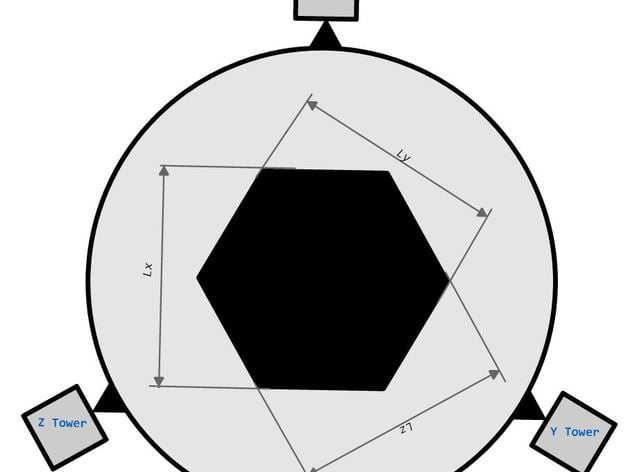
After spending countless hours trying to fine-tune my delta printer, I decided to develop a more precise method for approximating the diagonal correction, assuming my z height is calibrated. This approach involves utilizing the unique Horizontal Radius of your printer. INSTRUCTIONS (Highly recommended to read the attached PDF). First, set any correction on your X,Y or Z Diagonal rod to 0 and use your actual diagonal rod length. Ensure you use the same diagonal rod value for each tower so the Excel spreadsheet can calculate specific corrections accurately. Next, print the calibration piece in the center of the printing plate, just like the one shown in the image. To avoid thermal dilation during printing, use maximum cooling, a moderate resolution, not too slow or too fast - 40 mm/s for perimeters should be acceptable. Then, measure the distance between faces on each tower direction and enter those measurements into the spreadsheet document located in "Thing Files". The default distance is set to 75 mm; if you scale the piece, you'll need to edit that parameter within the Excel document. Instructions for using the Excel document can be found within the Excel document itself. A detailed explanation of this method can be found in the attached PDF. It's a good idea to remove any wall dilation from your measurements. Tips: * On slic3r, set perimeter extrusion to 90% (e.g., example) under advanced settings for more accurate prints. * Use brim; it may enhance precision. * Leave the hexagon on the printing bed; measure it without removing it.
With this file you will be able to print Delta dimensional calibration tool with your 3D printer. Click on the button and save the file on your computer to work, edit or customize your design. You can also find more 3D designs for printers on Delta dimensional calibration tool.
