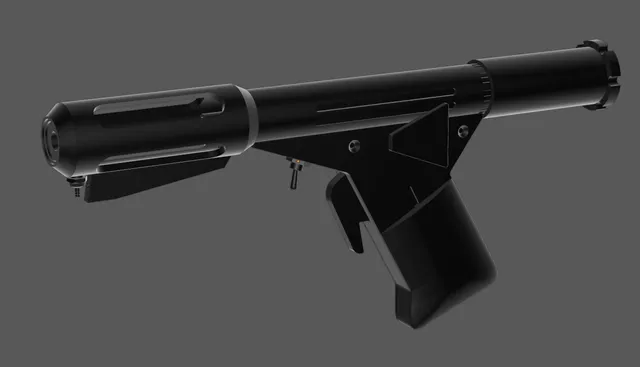
Deep Sleep Gun
prusaprinters
My version of the Deep Sleep Gun from the classic movie Logans Run. Used by the Sandmen to give runners the deep sleep.Requires some hardware and a bit of glue.2mm diameter pins (I use cut up bicycle spokes) Several of the following lengths16mm (x2) (grip panels)12.5mm (x1) (trigger)10mm (x1) (belt clip)M3 Countersunk ScrewsM3x6 (x5) Side panels/Belt ClipM3x14 (x1) Front GripM3x20 (x1) Rear GripM3 Square nuts x55mm diameter x20mm long spring for trigger (can be found in clicky pens Optional parts - I'd recommend these as the printed ones have thin posts and are a bit delicateSPST miniature microswitch if using a real one (something like https://www.rapidonline.com/sci-ta101a1-miniature-toggle-switch-spst-on-off-75-0125 )N3 or N4 glow plug if using a real one Dry fit the parts together first before gluing anything.The muzzle glues into the front of the barrel. The gas tube is glued into the front of the Main body. The the barrel is then glued to the main body, using the 4 locating lugs. I just used a superglue gel.Use the 16mm pins to align the grip panels with the Grip and a bit more glue to hold them in place.Now take your spring and fit it into the front of the grip in the trigger slot. There is a hole for the rear of the spring to fit into. The fit the trigger and compress the spring slightly and then use the 12mm pin to hold the trigger. The pin acts as a hinge and you should get a smooth sprung loaded trigger action.Use a M3 square nut and M3x6 screw in the belt clip as well as the 10mm pin to fasten it to the Left panel. The screw head should fit flush with the panel (or slightly below). You can use a bit of glue if you want to hold the pin in place. The pin is to prevent the belt clip from rotating.Slide 4 more of the M3 square nuts down into the slots in the top of the grip. Make sure they go all the way in. Ignore the thin membranes of plastic that covers the holes. You can screw right through those easily. Use the other 4 M3x6 screws to secure the Left and Right panels to the grip. The side panels will secure the trigger pin in place.If you are using a real toggle switch then you can fit that into the hole at this point. If not you can glue the printed one into place. Grip assembly is now complete.The grip lines up with a slot in the main body. The M3x14 screw goes in the front and the M3x20 goes in the rear to hold the grip to the main body. Then the Gas Supply simply screws into the back. I used 0.15 layer heights on the threads using a height range modifier. 0.2 is a little coarse and will probably require some clean up. 0.1 will make them smoother. The threads are a M12 nominal so real M12 hardware can be used to chase through the threads and clean them up.Finally glue the Glow plug into place (either real or printed). I have also included a Prusa Slicer (v2.5) project file setup for the MK3 that has print orientation and the supports painted for the parts that require supports.
With this file you will be able to print Deep Sleep Gun with your 3D printer. Click on the button and save the file on your computer to work, edit or customize your design. You can also find more 3D designs for printers on Deep Sleep Gun.