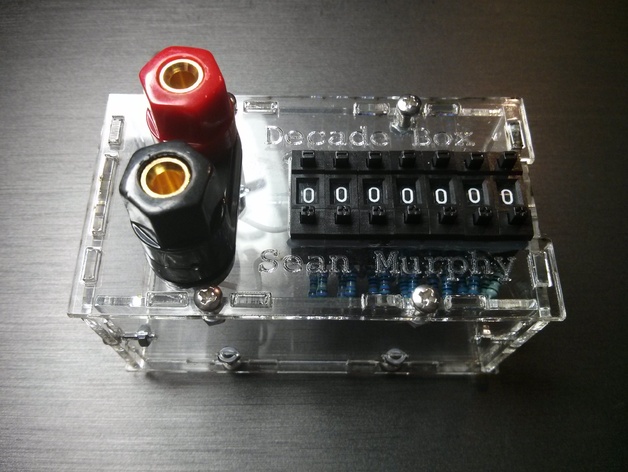
Decade Resistor Box
thingiverse
Human: Affordable decade variable resistor kit offers precision in a compact laser-cut enclosure made from readily available and moderately priced components. Total cost for all parts is estimated at just under $40 plus the cost of acrylic for the enclosure; however, considering wastage and component leftovers, the real cost should be around $15. Important warning: this project was designed with my personal requirements in mind, so expect some flaws or areas that may require adjustments down the line. In addition, soldering on the circuit is quite tight, making it a challenging process for anyone not experienced in working with electronics. Regarding resistor tolerances, I opted for 1% resistors to achieve a more precise resistance setting compared to the common 5% resistors found elsewhere. The switches add some variance and resistance to the system but don't significantly affect overall accuracy since any adjustment you make will be within 1% of the actual value. The kit uses dual banana plug jacks, which add about 2-3 ohms of resistance; however, this shouldn't have a substantial impact on your measurements. As with all projects of this nature, once you tune the circuit with this box, remove it and measure the resistance instead of relying solely on the readout. If you're looking for a decade resistor without investing in time-consuming DIY, Sparkfun offers a kit at $30 that goes up to 1M with 10ohm increments; I prefer my design for several reasons. *Yes, the resistor range tops out at 9,999,999 ohms.* --- \n\n Instructions: Parts: - 2mm acrylic (~100x220mm) - M2.5 by 8mm machine screws x12 - M2.5 hex nuts x12 - 10-digit decimal switches x7 - Dual banana plug jack x1 - 9 pieces of 1% resistors, with 1 and 10 being available in three quantities each, the others only one piece per size. Assembly: Order your parts using the provided sources as a guide; however, if you're not able to get the same sizes from other suppliers, they probably won't fit my design. 1- Solder the resistors on top of the decimal switch using these soldering techniques. 2- Connect all seven resistor blobs to form one solid connection. 3- Cut the box from 2mm acrylic or another material of your choice (consider the T-slots in this context). 4- Install the banana plug jack to the top panel by placing a small amount of hot glue on the underside.
With this file you will be able to print Decade Resistor Box with your 3D printer. Click on the button and save the file on your computer to work, edit or customize your design. You can also find more 3D designs for printers on Decade Resistor Box.
