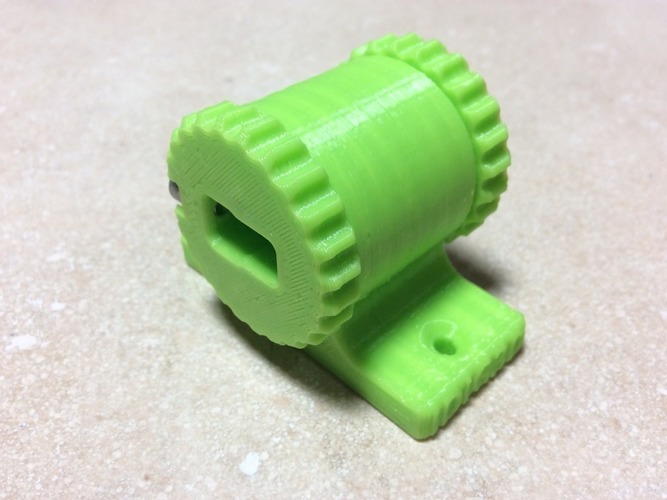
Deans Connector Soldering Stand
pinshape
After showing a buddy my solder fingers, he requested something to hold a Deans connector for soldering purposes. So I came up with this idea and over-engineered it, but it was a fun little challenge. The thumbwheels rotate and click in at 90 degrees. You can insert a mating connector and tighten the set screw to secure it so it can hold the connector and function as a bit of a heatsink. Screw holes are provided for mounting to a bench or snapping into a magnet. Printed best with something more flexible than standard PLA—high-temp PLA, ABS, PETG, or ASA. Requirements include: 4 M3x10 screws for dial assembly 2 M3x6 screws for set screws to hold mated connectors 12mmx3mm magnet for base https://youtu.be/tqZjS9RRJLIPrinter: i300Pro Rafts: No Supports: No Resolution: 0.2mm Infill: 10% Notes: 3 perimeters. Use something less brittle than standard PLA. Start two M3x10 screws into the 4-pointed catch. Stack on top of the clicker and screw in. Stack on top of the dial and tighten screws, but not all the way. The clicker should be ever so slightly loose. Repeat for the other side. Hold the assembled dial in your hand, rotate 45 degrees, and align it with the base. Get started and apply force. A rubber mallet may help here. It should be a tight fit. The clicker point should snap into place. Rotate both ways to smooth it out a bit. A bit of teflon powder would help here. Snap in the other side. Line up the 12mm (OD) x 3mm magnet in the hole at the bottom of the base over a hard surface. Push down to seat it. It should not be loose. If so, glue it. Used my favorite design tool, Onshape, to create this.
With this file you will be able to print Deans Connector Soldering Stand with your 3D printer. Click on the button and save the file on your computer to work, edit or customize your design. You can also find more 3D designs for printers on Deans Connector Soldering Stand.
