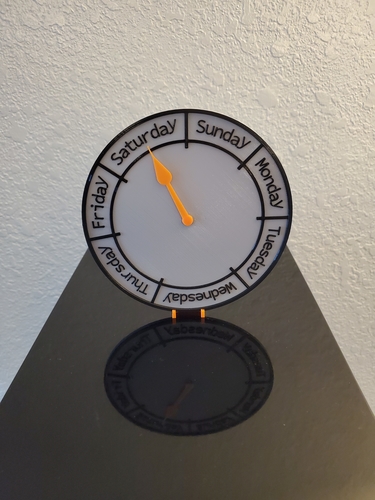
Day Clock
pinshape
For those long quarantine weeks where the days blend together. This clock uses a servo so the clock hand always points at the center of the day, it does not "sweep" through the day smoothly like a normal clock would; at midnight, the hand moves to the next day. Thanks to the gearing, this works with a normal 180 degree servo. Code is included, just update to your WiFi information! Print Settings Printer brand: Creality Printer: Ender 3 Rafts: No Supports: No Resolution: .2 Infill: 20% Filament_brand: Hatchbox Filament_color: Variety Filament_material: PLA Notes: Print the clock hand at 100% infill, everything else can be at 20%. I used a brim for the clock face to prevent warping and changed the filament between layer 15/16. Edit: Added separate files for the clock face, rings, and letters so it can be printed on an SLA printer and glued together. Post-Printing Trim brim from clock face, including from notch at bottom Push the servo into the slot until it hits the bottom Screw servo gear onto servo horn Attach servo horn to servo Place box on top of servo and coil cable inside, connect to Wemos D1 Put clock hand through clock face into clock gear, align to Saturday Place clock in base; I used a dab of glue to prevent it from moving at all Run Day_Verification to calibrate middle of day values Update values in Clock.ino and upload
With this file you will be able to print Day Clock with your 3D printer. Click on the button and save the file on your computer to work, edit or customize your design. You can also find more 3D designs for printers on Day Clock.
