Dare-to-Cross-that-Needle Z-axis Motor Visualizer
prusaprinters
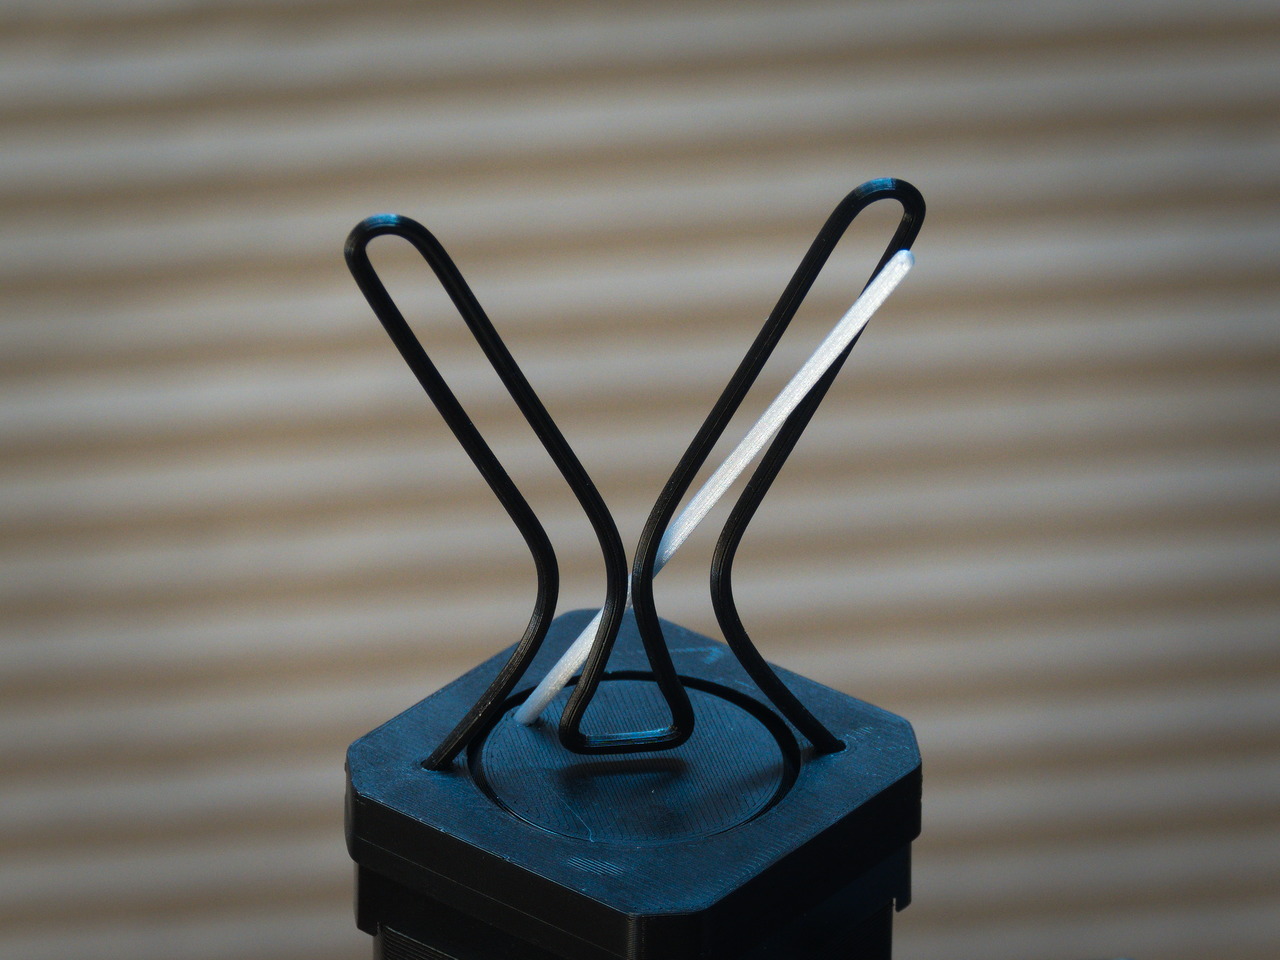
<p>The video below shows the Z-axis motor visualizer in action:</p><figure class="media"><oembed url="https://youtu.be/7j5xoFmFr4A"></oembed></figure><p>The rotating part of the visualizer has a glued on 8x3mm neodymium magnet to attach it to the Z-axis of the printer. The square block holding the cross wires in place fits on top of the Z-stepper motor. It has two slots for 8x3 neodymium magnets at the bottom. You can insert magnets that are attracted to the screws in the stepper motor to better fix it to the motor, but this is optional.</p><h3>Printing Instructions</h3><p>Everything is printed in PLA. No supports are needed. I made everything quite tight on purpose to minimize wiggling of the components. So, you need a good printer to make this.</p><p><strong>Needle and Wire Cross</strong></p><p>The needle and wire cross both use the 0.10mm DETAIL profile to get the cleanest rounding possible. </p><p><strong>Needle Base</strong></p><p>The circular base in which the needle has to be inserted uses the 0.2mm QUALITY profile.</p><p>Note that my Prusa/MINI+ has a wide opening around the Z-axis in the stepper motor. Therefore I have added a circular ring around the slot to insert the 8x3mm neodymium magnet to keep the base centered. On some pictures of other Z-axis motor visualizers, I noticed that the wide opening is missing. So you may have to adapt the bottom part of the base to fit your situation. The needle base is supposed to hover 1mm above the stepper motor. You may need to change the height of the magnet slot to fit your printer.</p><p><strong>Cross Base</strong></p><p>The square stationary base that hold the cross wires also uses the 0.2mm QUALITY profile.</p><p><strong>Assembly Instructions</strong></p><p>Glue a neodymium magnet (8mm diameter x 3 mm height) in the slot at the bottom of the circular base. But first check that this would make the disc hover 1mm above the motor top. If not, you will need to make some adjustments to the slot that fits the magnet.</p><p>Insert the needle in the hole of the base at an angle. Note that the rounded edge of the needle should point up.</p><p>Insert the cross wire into the two holes of the square base. Push it down as far as possible. File is down a little if the fit is too tight. Make sure that all wires are in one vertical plane.</p><p>First attach the needle base to the Z-axis using the magnet. Then move the square base over it. If everything is set up correctly, the needle should not scratch the cross.</p><p> </p>
With this file you will be able to print Dare-to-Cross-that-Needle Z-axis Motor Visualizer with your 3D printer. Click on the button and save the file on your computer to work, edit or customize your design. You can also find more 3D designs for printers on Dare-to-Cross-that-Needle Z-axis Motor Visualizer.