Da Vinci 1.1 Cartridge Touch screen programmer
pinshape
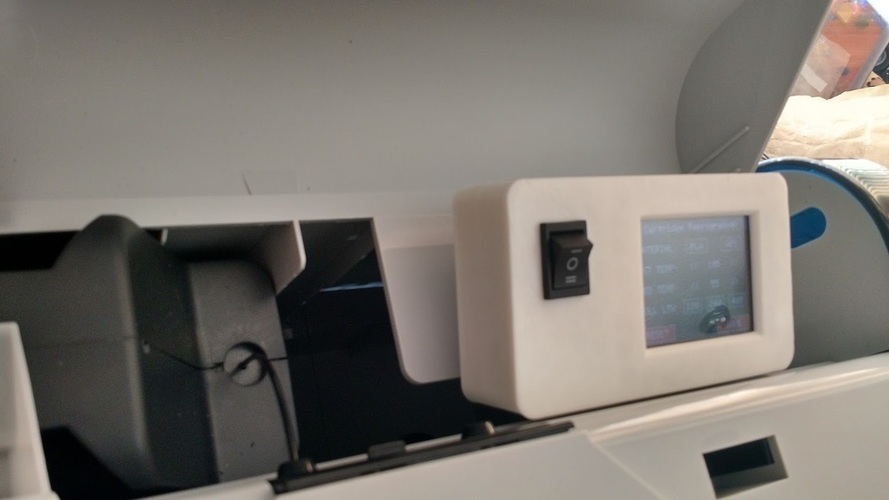
I further developed existing online code to enable effortless programming of the EEPROM from a cartridge via a touchscreen interface. The touchscreen shield, sourced from eBay and featuring the SPFD5408 chip, was integrated into the system. I've included the necessary Arduino code and libraries. To replicate this project, you will need: * An Arduino Uno * A 2.4-inch touchscreen shield with an SPFD5408 chip * A spare EEPROM chip from a cartridge * A DPDT switch identical to the one pictured * Wire and a soldering iron for connecting components Here's how I implemented it: I removed the back panel and routed the 5V power supply cables (positive and negative) to the area where the programmer would be installed. The negative cable was wired through the DPDT switch, ensuring that the Arduino is only powered when the EEPROM is connected. Next, I carefully soldered three wires to the point where the EEPROM cartridge is read (positive, signal, and negative). The positive and negative connections were made directly to the spare EEPROM chip, housed alongside the touchscreen. The signal wire was attached to the DPDT switch. Pin 4 on the Arduino was then connected to the DPDT switch, and the center position of the switch was soldered to the EEPROM. This setup allows the DPDT switch to toggle between connected, off, and Arduino modes.
With this file you will be able to print Da Vinci 1.1 Cartridge Touch screen programmer with your 3D printer. Click on the button and save the file on your computer to work, edit or customize your design. You can also find more 3D designs for printers on Da Vinci 1.1 Cartridge Touch screen programmer.