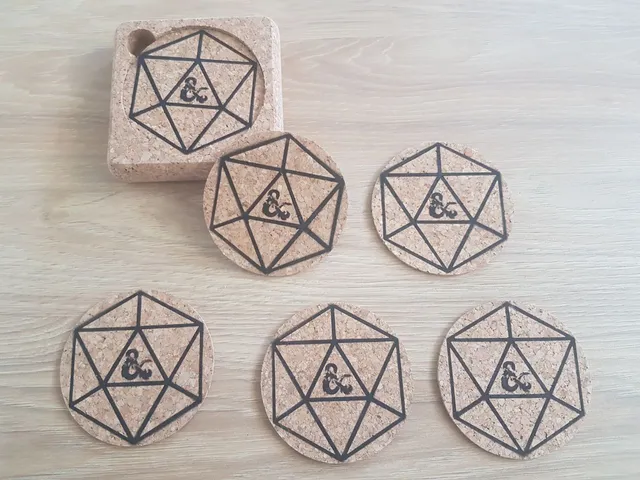
D&D spray-paint pattern for coasters
prusaprinters
I made this set in order to spray-paint my plain corkwood coasters (which I think I got from IKEA) with a D&D-inspired design. Drawing inspiration from various stylized d20 designs (like the Critical Role logo) I drew a geometric hexagonal pattern and used it as a basis for a mask. Then I added supports to join the floating pieces together without having to add breaks in the pattern.The model was made for coasters nearly 9cm in diameter (mine were 89.5 ± 0.3mm). It can be scaled to fit different coaster sizes, but I would advise against scaling it down too much as the supports are fragile enough as is, and the logo in the center already requires at least a 0.25mm nozzle to print with sufficient detail.Printing recommendations: Unless you've modified the model to remove the intricate logo or scaled it up significantly, I do not recommend going larger than a 0.25mm nozzle for the mask. The frame can be printed at 0.4mm if you can be bothered to switch the nozzle, and the two pieces should still snap in just fine. Layer height is mostly inconsequential, so you can use larger values to increase print speed. Use 100% infill (or an appropriately set solid infill threshold area) when printing the mask to avoid having holes in the supports.My painting procedure: You'll need:a piece of cardboard large enough to fit one coaster and enough extra space to hold with one hand without risk of painting over your fingersa glove you don't mind getting paint ondouble-sided sticky tapea can of spray-paint in your color of choice (or even multiple different colors if you fancy)a face mask, a large open area and whatever else is mandated for use of your chosen spray-paintFirst, carefully join the two printed pieces together (it only works in one orientation so don't try to force it). They should snap together mostly snugly, with possibly minor adjustments needed along the edges. Also cut a piece of double-sided tape smaller than the size of your coasters and stick it to one end of your piece of cardboard. Now carefully insert a clean coaster into the assembly with one hand while holding the assembly in the palm of your other (gloved) hand. Make sure the coaster is as flush as possible with the mask, but don't force it too much or risk breaking it. Then attach the whole thing firmly to the piece of tape on the cardboard, hold the cardboard up in the air and spray it evenly with the spray-can. Don't be too bothered with getting every little bit completely colored, it looks better when you remove the (now fully painted) mask, and the more you spray the more you risk making globules of paint or having paint sneak under the mask and making a blurry edge. When done painting, remove the assembly so only the coaster remains stuck to the cardboard. Then carefully remove the coaster, leave it aside to dry, and continue with the next coaster.If you're painting a large batch, quite a lot of paint will be deposited on the mask, making the whole assembly sticky. If you fiddle with it too much while inserting your coasters, you might end up clogging up the channels of the mask with residue paint. In that case simply use a toothpick to clean it up a bit. Disclaimer: I do not own the original D&D logo used to make the design. Do not use this model (or any derivative with the logo included) for commercial purposes.
With this file you will be able to print D&D spray-paint pattern for coasters with your 3D printer. Click on the button and save the file on your computer to work, edit or customize your design. You can also find more 3D designs for printers on D&D spray-paint pattern for coasters.
