Cylindrical Lithophane Lamp
prusaprinters
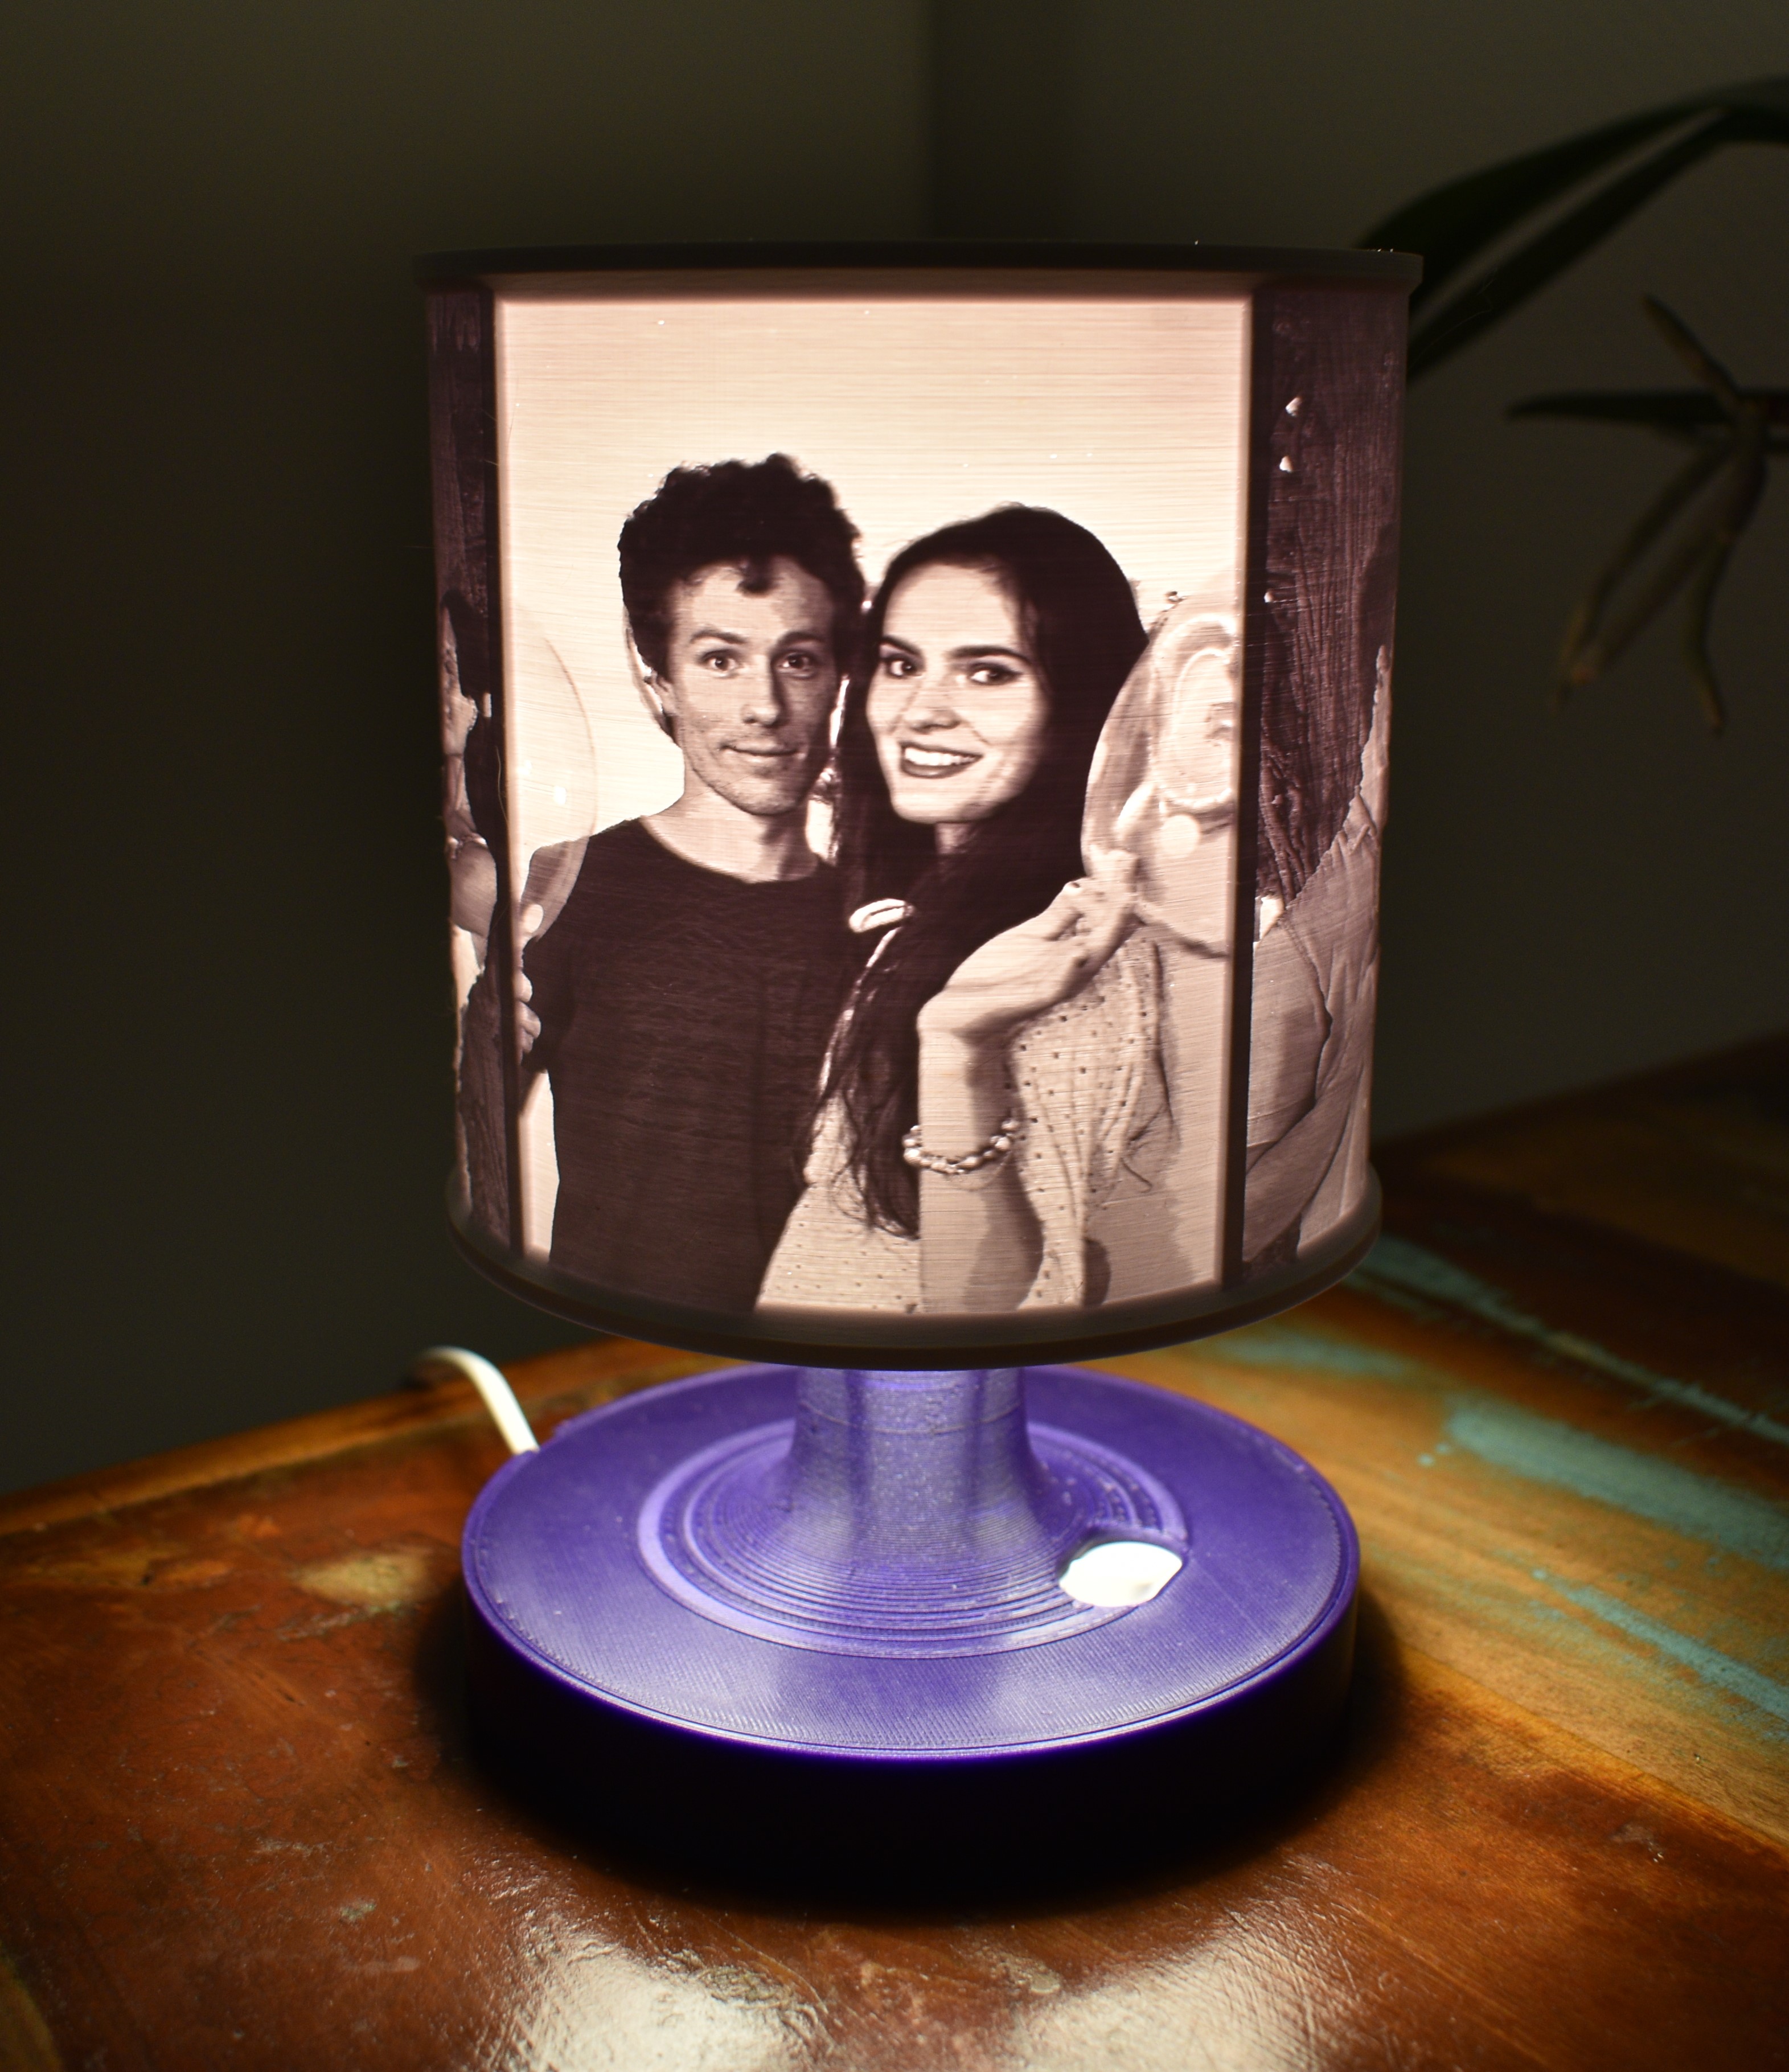
<h4><strong>Lithophane</strong></h4><p>The tool I used: <a href="https://tool.itslitho.com/">https://tool.itslitho.com/</a></p><p>Stich desired photos together and import into lithophane tool with the following settings (I used 4 pictures of ratio ¾ side by side):</p><p><i>Shape options:</i></p><ul><li>Shape: Cylinder</li><li>Diameter: 120 mm</li><li>Min Thick: your minimum extrusion width (0.45 mm)</li></ul><p><i>Quality options:</i></p><ul><li>mm per pixel: for maximum quality, push it as low as it will go without exceeding the file size limit.</li></ul><p>After exporting the lithophane STL, it must be combined witht he “spokes” STL. This can be done in any STL editor like Blender, Meshmixer, or directly in Prusa Slicer.</p><p> </p><h4><strong>Light and wiring</strong></h4><p>Bill of materials:</p><p><i>E14 LED light bulb</i> (example: <a href="https://www.amazon.de/-/en/AmazonBasics-Light-Teardrop-Shape-Replaces/dp/B06Y3BWTGZ)">https://www.amazon.de/-/en/AmazonBasics-Light-Teardrop-Shape-Replaces/dp/B06Y3BWTGZ)</a></p><ul><li>Any shape of bulb fits.</li><li>DO NOT use incandescent bulbs.</li></ul><p> </p><p><i>E14 light bulb standard socket </i>(example: <a href="https://www.amazon.de/-/en/LEDmich-Including-Approx-Diameter-Installation/dp/B07DT3VJWY/ref=sr_1_37?keywords=E14+Fassung&qid=1661998130&sr=8-37)">https://www.amazon.de/-/en/LEDmich-Including-Approx-Diameter-Installation/dp/B07DT3VJWY/ref=sr_1_37?keywords=E14+Fassung&qid=1661998130&sr=8-37)</a></p><ul><li>Socket must have outer threading. They usually come with a screwable nut, however, this is not necessary as the part screw_ring.stl can be used instead.</li></ul><p><i>Power cable for lamps, with switch</i> (example: <a href="https://www.amazon.de/gp/product/B014WL12Y0/ref=ppx_yo_dt_b_asin_title_o00_s00?ie=UTF8&psc=1)">https://www.amazon.de/gp/product/B014WL12Y0/ref=ppx_yo_dt_b_asin_title_o00_s00?ie=UTF8&psc=1)</a></p><ul><li>Find a cable with the switch as close to the exposed wire end as possible</li><li>I used the cable in the example, the lamp is modeled after its dimensions. Depending on your model, the lamp might need modifying. Feel free to reach out for help in the comments.</li></ul><p> </p><h4>Print settings</h4><p>Lamp shade was printed at .15mm layer height, as the best compromise between quality and print time (24h print). The other parts were printed at .3mm.</p><p> </p><h4>Assembly</h4><p>See attached diagram for assembly.</p><ol><li>Pull cable through leg_top, then attach it to the socket by pushing the copper-clad wire tips in the small holes of the socket. </li><li>Screw socket into leg_top.</li><li>Attach switch to leg_bottom (I used poster putty, can be glued), and place the plug-facing cable in the slot.</li><li>Loop the extra cable around inside leg_bottom.</li><li>Align switch to hole, then snap leg_top and leg_bottom together (I had to glue them because the snapping features were too small in the first version. This was corrected in the current version.)</li></ol><p> </p><h4><strong>Extra</strong></h4><p>The CAD files are publicly available on Onshape: <a href="https://cad.onshape.com/documents/44581abeb9373fb7e9faba43/w/2eb1bdf719be8a9693b42d46/e/52a915cd7064c4bfd836a564?renderMode=0&uiState=631018c582b8273a73d43f40">https://cad.onshape.com/documents/44581abeb9373fb7e9faba43/w/2eb1bdf719be8a9693b42d46/e/52a915cd7064c4bfd836a564?renderMode=0&uiState=631018c582b8273a73d43f40</a></p><p>Be aware that the CAD is messy, as I improvised the design while modeling.</p><p> </p><p>Feel free to reach out in the comments for any help/troubleshooting/customization.</p>
With this file you will be able to print Cylindrical Lithophane Lamp with your 3D printer. Click on the button and save the file on your computer to work, edit or customize your design. You can also find more 3D designs for printers on Cylindrical Lithophane Lamp.