Customizable Rupee Lamp Shade
thingiverse
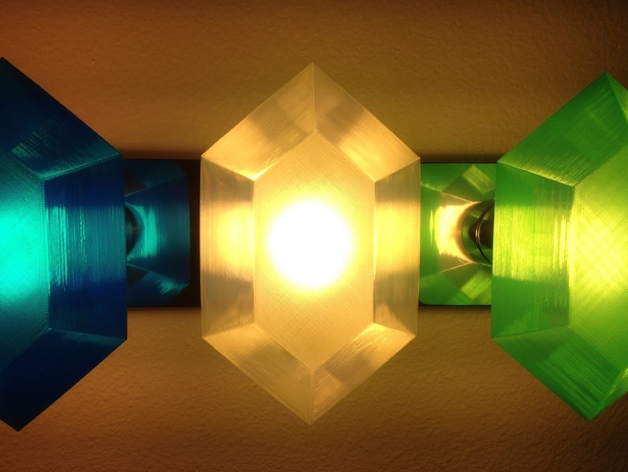
In this tutorial, I will demonstrate how to beautify your bathroom for merely 52 rupees! These rupees are not only attractive by themselves, but also may divert any adventurers who enter your home, potentially leaving your clay pots and valuables untouched. Please read the safety note below before starting. SAFETY NOTE: To ensure safety, I conducted a two-hour worst-case test by hanging one of the stemless rupees directly onto one of the vanity lights while standing nearby with a fire extinguisher at hand. The result was that the PLA rupee had softened and slightly deformed, but showed no signs of discoloration or residue on the bulb. I highly recommend that you conduct a similar test (with a fire extinguisher handy) to ensure everything is safe in case of a mounting failure. GALLERY NOTE: Despite the room appearing dimly lit in the pictures, it is actually quite bright in reality. As for color balance and shadow weirdness, I may switch to clear shades in the future. For now, I will stick with the 52-rupee version for its playful appearance. To begin, make sure your nozzle diameter and layer height match your slicer's settings. The model is designed to avoid generating fill paths that would be visible when lit, and the bottom of the shade is 4 layers thick for symmetrical crosshatching. Test print with various colors of PLA to see what works best for you. If you have decorative cylinders around your light socket, measure its internal radius using digital calipers and set "Light Socket Connector Top Diameter" accordingly. The shade should slide in and out of the socket easily but not wiggle. For reference, the translucent PLA colors I used were: - Red: https://ultimachine.com/content/pla-175mm-red-translucent-1kg-spool - Green: https://ultimachine.com/content/pla-175mm-green-translucent-1kg-spool - Blue: http://www.matterhackers.com/store/3d-printer-filament/175mm-pla-filament-blue-1-kg - Clear: http://store.makerbot.com/pla-filament (specific link unavailable due to MakerBot's website structure) To change colors, set your printer's pause-at-z to 57 mm (or the scad file's echoed value). Be cautious as the nozzle tip may start "strumming" the print before the stem halves join together. This effect was stopped in my case without disrupting the print. Removing the rupees from the blue painter's tape platform is easy due to their thin bottom and translucent plastic. Use a slightly sharpened cricut spatula (http://www.amazon.com/Cricut-29-0099-Spatula-Tool/dp/B000NP1ESO/) for gentle removal by applying light pressure while rolling the blade side to side, which usually works it under the print without damaging the tape. Remember to exercise safety precautions and enjoy transforming your bathroom on a budget!
With this file you will be able to print Customizable Rupee Lamp Shade with your 3D printer. Click on the button and save the file on your computer to work, edit or customize your design. You can also find more 3D designs for printers on Customizable Rupee Lamp Shade.