Customizable Mendocino Motor
thingiverse
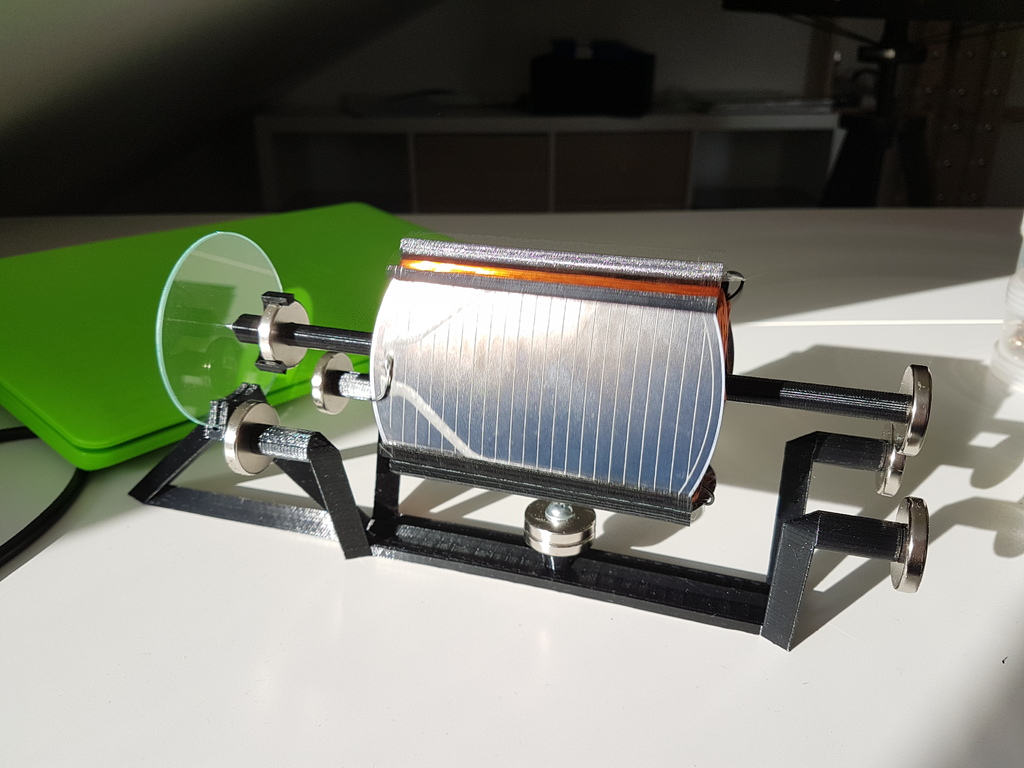
Use the .f3d file! The STLs are only useful if every single dimension matches my original dimensions exactly. This is a fully customizable Mendocino Motor, and you can use Fusion 360 (totally free for hobbyists) to open the .f3d file. Navigate to Modify -> Change Parameters to input your solar cell size, magnet size, glass diameter, and more. You'll need a few things besides your trusty 3D printer: - Four solar cells (I used old 10cm round cells cut into squares with a Dremel) - Seven or eight strong round magnets with holes in them (mine are 25mm * 5mm) - A glass disk (mine is about 67mm) - Copper wire for two coils (I used 100 turns each) around the coil holder - An old ball point pen, rounded nail, or something durable as a bearing against the glass Once you've printed everything, wind those coils, add the solar cells, and connect them. The opposite cells hook up to the same coil but with reversed polarity. Double-check your wiring by placing a compass next to it and turning the coil holder in 90° increments. The compass needle should move consistently when shining light on the top cell, regardless of which one's facing up. Next, screw in those magnets, add the glass, and insert the bearing. Levitate and admire it spinning in the light. You may need to balance it out so it starts smoothly. I glued some plastics until it seemed like it wouldn't turn by itself in the dark.
With this file you will be able to print Customizable Mendocino Motor with your 3D printer. Click on the button and save the file on your computer to work, edit or customize your design. You can also find more 3D designs for printers on Customizable Mendocino Motor.