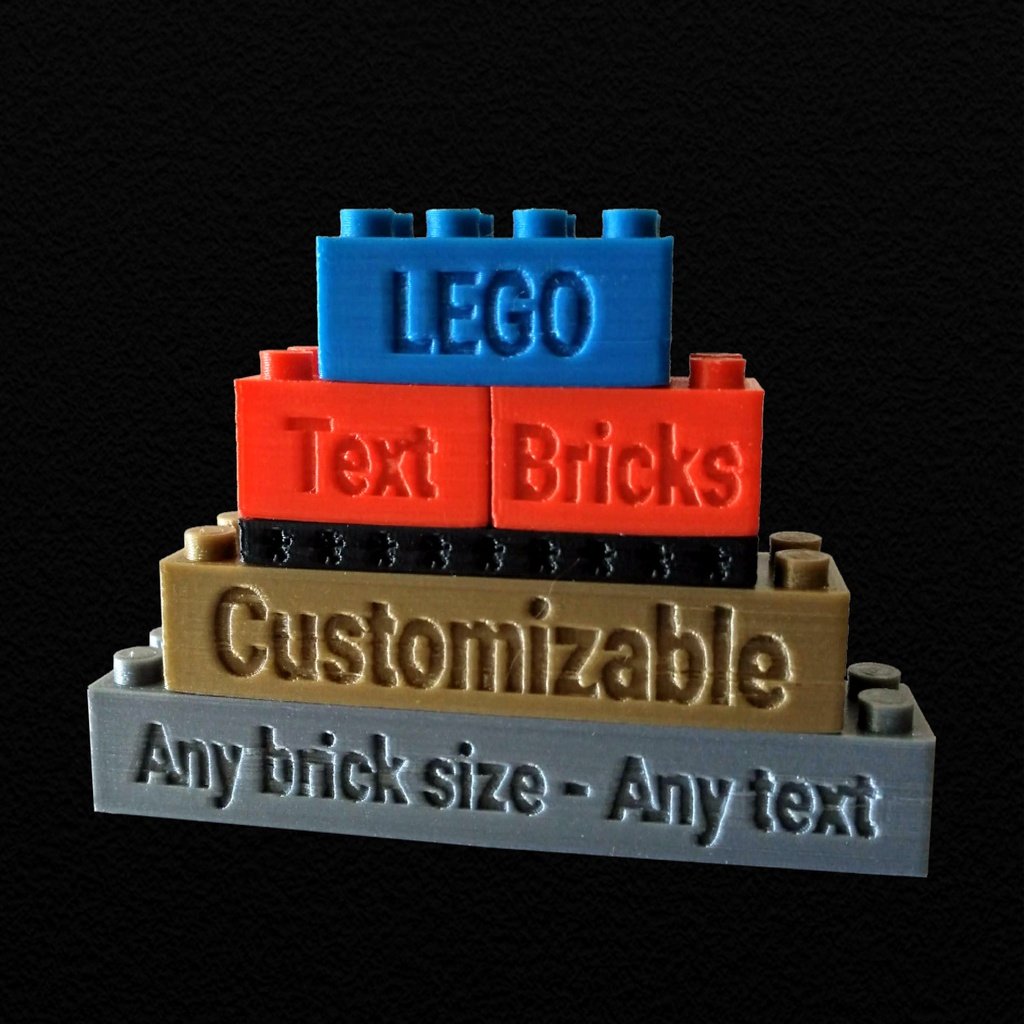
Customizable LEGO compatible Text Bricks
thingiverse
Human: Thingiverse messed up the viewport for all customizers on March 19 making it only 109 pixels in height. Use the following link instead to launch the customizer:[OPEN THE CUSTOMIZER](https://customizer.makerbot.com/things/3867358) This is a customizer for creating LEGO-compatible rectangular bricks with text engraved on all four sides. You can also use it to create bricks without any text. It can make bricks as small as 1x1x1 (plate height) or as large as 48x48x18 (six normal bricks high). All dimensions are accurate, but the customizer has a tolerance parameter so the dimensions can be adjusted for your printer and filament to fit perfectly with one another and real LEGO blocks. Real LEGO blocks have a horizontal play of 0.2 mm to connect them together easily. The tolerance is in addition to the required 0.2 mm play and is subtracted from both sides of all walls so that the default tolerance of 0.05 makes bricks fit perfectly with one another. For example, a 4x2 brick becomes 31.7x15.7 mm and a 6x2 brick becomes 47.7x15.7 mm. The customizer creates LEGO-sized bricks by default, but you can adjust the dimensions to make them larger or smaller as needed. I scaled up the large nameplate brick in the photos to 200% and then printed it. The text depth parameter was also adjusted so that when it was scaled up, the desired depth of 0.8 mm was achieved. Since creating the bricks in the photographs, I have added a parameter to specify the spacing between letters. By default, they will be spaced a little farther apart than on the bricks in the photos. 2019-10-18 Update: I set all LEGO dimensions as adjustable parameters so you can make any adjustments needed for a perfect fit. If you're having trouble with the fit and need more control than the tolerance parameter provides, you can now override any of the LEGO dimensions. ---Printing Recommendations--- If a brick will be connected to other bricks, it's best not to have an elephant's foot. I usually set the initial layer horizontal expansion parameter in Cura to -0.2 mm to prevent elephant's feet, but for the LEGO bricks with a default tolerance of 0.5 mm this must be reduced to -0.14 to print the under-tubes on the first layer. For the best-looking brick, you'll want the top surface of the part of the model to be a single continuous print from one corner to the other instead of going around the areas where the studs will be added in later layers. To accomplish this in Cura, set the Skin Expand Distance to 2.2. ---The Reason for This--- I had been printing #2456 LEGO bricks as my filament samples, but they didn't indicate which filament it was so I couldn't tell them apart. Thus, the idea was born to put text on the side of LEGO bricks.
With this file you will be able to print Customizable LEGO compatible Text Bricks with your 3D printer. Click on the button and save the file on your computer to work, edit or customize your design. You can also find more 3D designs for printers on Customizable LEGO compatible Text Bricks.
